General Tech What did you work on Today?

JeeperG

Well-Known Member
Location
Riverdale
Started on project number 2 at home for those weekends I'm not working on the farm truck and need to stay busy, seeing I've had this turd for 23 years I'm in no hurry to get it done but she needs a lot of TLC, I've done enough tire stuffing and such the original front fenders are cracking and bent in places and the bushwhackers that been on for 20+ years were starting to hang on for dear life so I'm replacing both.

PXL_20220710_222759947.jpg

PXL_20220710_222735367.jpg

Might as well do rear protection and flares all in one too. Haven't got that far yet mocking it all up. They are pretty stout, also the rocker guards I currently have aren't going to work with this stuff so maybe I'll just replace those as well.

PXL_20220709_003039383.jpg

I'm going to keep it with the straight 4 for now, maybe I'll build up and put the 8.8 I got laying here and regear both axles to better handle the freeway driving. 😄 I've got all new exhaust but I'll keep the Borla header on. Need to drop the AX5 and see if I can fix third gear that I blew out. I still have 2 1/2 years before I can vintage tag this thing, the farm truck is higher on my priority list.
 
Last edited:

Pike2350

Registered User
Location
Salt Lake City
So I mentioned I was going to be getting my Rodeo up for sale. Today I pulled it in to try and figure out the CE light. My cheap code reader gave me a 0306. I start tearing I to it and realize I didn't change this plug last time I swapped plugs...because it is a PIA to get to.

Well no wonder there was a code. The coil boot was ripped and after fighting to get the plug out I found it had basically self destructed.

I hope a new plug and new coil pack on this cylinder will get it running right and I can sell it. Sad to see it go...but I just don't use it anymore.
 

Attachments

  • 20220716_124637.jpg
    20220716_124637.jpg
    346.6 KB · Views: 17
Last edited:

Mouse

Trying to wheel
Supporting Member
Location
West Haven, UT
Had a small transmission leak on the scrambler. Turned out to be the TV cable seal. OK, change the cable, go to adjust the TV, and no matter what the trans will only shift at 3000 rpm. It was harsh! I figured during the TV adjustment the internal valve got stuck at full pressure (common issue with 700r4).

So I ordered a Transgo shift kit, corvette servo and a new pan. Once I had everything apart, I found the 2-4 servo rod was seized in one of the pistons (slightly over-sized; should be .500" and was close to .510). I used the drill press and some 600 grit emory to bring it back to size and installed the corvette servo.

Took Friday and installed the rest of the Transgo kit, which includes a new, revised (much better) TV valve as well. Got it together yesterday and the transmission shifts so much better. The kit even fixed a 2-3 flare and some weird 4th gear feel. Everything is better than ever before - I highly recommend the Transgo kit.

20220716_130759.jpg


After stopping at the parts store to drop off the old trans fluid, it would'nt start. Was getting 0 psi out of the electric fuel pump (Hyperfuel Surge tank 40007 with a 340 LPH in-tank pump). I popped the gas cap and got a big whoosh of vapor. Looks like 2 things happening - basically vapor locking.

First, the pump should run whever the Sniper FI is powering it (it was intermittent) - so I need to look for a quality replacement. I am hopeful to find a Aeromotive replacement.

Second, when I plumbed the tank for FI, I eliminated the vapor recovery pieces. Its basically a totally sealed unit - do I need a vent? If so, how do I run it?
 

Hickey

Burn-barrel enthusiast
Supporting Member
After stopping at the parts store to drop off the old trans fluid, it would'nt start. Was getting 0 psi out of the electric fuel pump (Hyperfuel Surge tank 40007 with a 340 LPH in-tank pump). I popped the gas cap and got a big whoosh of vapor. Looks like 2 things happening - basically vapor locking.

First, the pump should run whever the Sniper FI is powering it (it was intermittent) - so I need to look for a quality replacement. I am hopeful to find a Aeromotive replacement.

Second, when I plumbed the tank for FI, I eliminated the vapor recovery pieces. Its basically a totally sealed unit - do I need a vent? If so, how do I run it?
You definitely need a vent of some kind. For many reasons, even if only for expansion on warm days. It shouldn't take much of a vent to equalize pressure. Do you have any unused ports? What's your cap look like. @skippy mentioned drilling and tapping his caps on his buggies for a motorcycle style cap vent/filter.
 

Mouse

Trying to wheel
Supporting Member
Location
West Haven, UT
There are 2 1/4" barbs at the top of the tank that I have a hose looped between. Is there a checkvalve (roll over valve) or something I should use?

A vented cap sounds easiest - is there a thread with @skippy work in it?
 

Hickey

Burn-barrel enthusiast
Supporting Member
There are 2 1/4" barbs at the top of the tank that I have a hose looped between. Is there a checkvalve (roll over valve) or something I should use?

A vented cap sounds easiest - is there a thread with @skippy work in it?
 
  • Like
Reactions: DAA

glockman

I hate Jeep trucks
Location
Pleasant Grove
No pictures but I replaced the alternator on the 4runner today. I normally love working on Toyotas because they are so easy. This was not that. The alternator on the V8 4runners is on the bottom passenger side and requires removing the power steering pump or pulley to remove it. WTH Toyota. Good thing the oem lasted 15 years and 175k miles.
 

jeeper

Currently without Jeep
Location
So Jo, Ut
I’ve been watching my brakes on the front of the Colorado with each tire rotate. The drivers outside pad was wearing much faster than the others. I knew it was close to being gone about 3,000 miles ago, and had already bought replacements. Yesterday it started grinding, so I changed them this morning.
I obviously have a stuck caliper.

255F4F04-08C5-4D37-A74C-CD4C015591E4.jpeg

The passenger side are both identical to the good pad above.

I cleaned the pistons and lubed them up, hopefully it will solve the issue. If not, I guess it’s a warranty issue for the dealer to deal with.

I have never been happy with the brakes from the beginning. So I opted for some upgraded pads and drilled/slotted rotors. I hope this will make them a little more effective.

E73CF56C-BA84-471E-9AC9-FAC4BD7B8BF2.jpeg

The dumbest part of all of this is that I have a more than average amount of garage space, including an a/c in my shop.. but I did this repair in the hot sun in the driveway 🤦🏼‍♂️

782B71DA-ACB7-42A0-AE2A-DEA9B185C614.jpeg
 

Hickey

Burn-barrel enthusiast
Supporting Member
The ultimate Death Wobble test is on I-215 northbound, crossing the canal bridge just north of 1300 south. Specifically in the right lane at the speed limit. If you have any possibility of DW, you will know it here.

4192C59D-1B19-449F-B234-03C6F8ADD3D9.jpeg

Today I found that I still have some.


N-Smooth

Smooth Gang Founding Member
Location
UT
It was always I-80 Westbound to I-15 Southbound that got me. Long, sweeping left-hand turn at speed with some bumps mixed in. DW would be like "SURPRISE MF'ER I'M STILL HERE!!!"
 

zmotorsports

Hardcore Gearhead
Vendor
Location
West Haven, UT
I've been a bit absent lately dealing with some health issues over the past several months but I'm slowly trying to get caught up on personal projects so I can move on to other projects that I've promised out.

One of my personal projects was a chair repair. During our spring trip to the Swell in April, my "Jeeping" chair broke on the last day of the trip.

At first thought I was going to replace it but have had a hard time finding something that I thought was made as well and then the wife suggested I just fix it. Well initially the small cast aluminum pieces that broke were also the hinge/pivot component and I was not quite sure how to go about duplicating them so I discounted the idea of fixing the chair. Then after looking and not finding something I liked, plus I prefer to repair or repurpose things, I opted to give it a try. I have actually been procrastinating on the repair due to not really knowing how to go about it but last night I bit the bullet, devised a plan and executed the plan for the repair.

This will be a large picture dump and cover several posts so bare with me please.


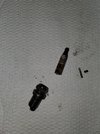
This is my chair that broke. The left hinge or pivot broke completely and the right side was cracked and nearing failure.
chair1.jpg

This is where the cast aluminum pivot blocks reside.
chair2.jpg

Here is my wife's chair showing what it is supposed to look like when folded/collapsed. These are great for taking up little space in the back of the Jeep. They have gotten a lot of use over the past 8 or so years that we've owned them as we use them for lunch stops when off-roading and many times at happy hours during our rallies and gatherings with our RV club.
chair3.jpg

Knowing that hole spacing was critical to not only allow the chair to fold properly but also so I could use the existing holes in the leg's framework I thought it would be best to devise a fixture in which to make the new pivot blocks with. Hole spacing measured out using the DRO on the mill then the proper sized pins were machined on the lathe and pressed into the holes in an aluminum block.
chair4.jpg

An aluminum spacer was machined to hold the small end up at the correct height on the fixture.
chair5.jpg

The OD was turned down slightly on the spacer to allow enough clearance for the small piece of plate that would need to be added later.
chair6.jpg

This is the original cast aluminum pivot block that broke being used for measurements and design.
chair7.jpg

Original cast aluminum pivot placed in the fixture to ensure spacing.
chair8.jpg

I originally thought about making the new pieces out of aluminum but ultimately settled on steel using O1 drill rod for the large (.500") and small (.375") ends. Here are the .500" diameter pieces faced off, .250" diameter hole drilled and chamfered then cut on the bandsaw before facing to length. I cut them on the bandsaw slightly over the .500" required length to allow a little clean up with a facing cut and chamfer. This piece was .057" too long.
chair9.jpg

Chucked up in the collet, touched off with the facing tool and then my soft stop dial indicator set to .057" before zero for the facing cut.
chair10.jpg


More pictures to follow.......
 

zmotorsports

Hardcore Gearhead
Vendor
Location
West Haven, UT
Continuing on with the chair repair.

Facing the .500" with the dial now at zero and it should have removed .057" in length.
chair11.jpg

About a half a thou off from zero.
chair12.jpg

Large end placed on the fixture for fitment.
chair13.jpg

Next up was to do the same thing to the .375" diameter (small) end. These pieces were also cut slightly longer than .500" but have a 10-32 drilled/tapped hole through them for mounting screws. Cutting on the vertical bandsaw before facing off the final end to length.
chair14.jpg

After facing these landed right at .500" in length.
chair15.jpg

With two large and two small ends machined it was time to turn to my CAD work.
chair16.jpg

Here I am using my CAD (Cardboard Aided Design) to determine size and profile of the plate that will be welded between the two ends.
chair17.jpg

The pattern transferred to some 10-gauge P&O plate.
chair18.jpg

Cutting the plate on the vertical bandsaw.
chair19.jpg

Testing fitment and adding a small chamfer to each end.
chair20.jpg


More pictures to follow......
 

zmotorsports

Hardcore Gearhead
Vendor
Location
West Haven, UT
Continuing on.

All six pieces cut, deburred and ready for a mock up on the fixture before welding.
chair20a.jpg

Pieces wiped with acetone and ready to be fixtured for the welding process.
chair21.jpg

Small TIG weld on the small end.
chair22.jpg

Clamp removed and now the large end ready for welding.
chair23.jpg

The two blocks cooled and filed to slightly metal finish the blocks and blend the welds. This is how they will sit together and form the hinge/pivot assembly. Two down two to go. I wanted to try out the process on one side before making all the pieces to ensure I wasn't wasting any more time.
chair24.jpg

Chair repairs completed with four blocks machined/fabricated and the chair functions as it should.
chair25.jpg

Chair opened up.
chair26.jpg

Completed and ready to strap down in the back of the Jeep on top of the toolbox.
chair27.jpg


Although the actual repair was relatively easy, I had a hard time coming up with a plan on how to duplicate the pivot block. All in all the total time spent on this was about 4 hours and nearly half of that time was spent devising and machining a fixture to ensure all of the blocks would be identical.

Talk about stepping over dollars to save dimes. :rofl:

Thanks for looking.

Mike
 

Hickey

Burn-barrel enthusiast
Supporting Member
Continuing on.

All six pieces cut, deburred and ready for a mock up on the fixture before welding.
View attachment 151203

Pieces wiped with acetone and ready to be fixtured for the welding process.
View attachment 151204

Small TIG weld on the small end.
View attachment 151205

Clamp removed and now the large end ready for welding.
View attachment 151206

The two blocks cooled and filed to slightly metal finish the blocks and blend the welds. This is how they will sit together and form the hinge/pivot assembly. Two down two to go. I wanted to try out the process on one side before making all the pieces to ensure I wasn't wasting any more time.
View attachment 151207

Chair repairs completed with four blocks machined/fabricated and the chair functions as it should.
View attachment 151208

Chair opened up.
View attachment 151209

Completed and ready to strap down in the back of the Jeep on top of the toolbox.
View attachment 151210


Although the actual repair was relatively easy, I had a hard time coming up with a plan on how to duplicate the pivot block. All in all the total time spent on this was about 4 hours and nearly half of that time was spent devising and machining a fixture to ensure all of the blocks would be identical.

Talk about stepping over dollars to save dimes. :rofl:

Thanks for looking.

Mike
That's the kind of dollars over dimes that is so enjoyable to perform. 😎
 
Top