“Cheater” 3 seat buggy build/assembly

Asbjorn

Active Member
Location
Montrose, CO
For the past few years, I’ve been building, buying, and selling rigs trying to figure out what it is I want and making it happen on a middle-class, zero debt budget. What that means is that I haven’t wheeled for the past 4 years!

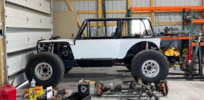
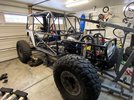
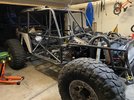
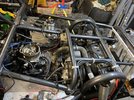
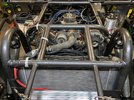
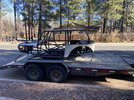
I just brought home this 4 seat chassis built out of Cheyenne, WY. It’s been assembled once by the builder, and I convinced him to sell it to me with quite a few components already on it, to make it easier for me to assemble quickly and finally get back on the trails.

Current plan:
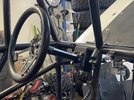
Utilize existing 4 link w/wheelbase of around 108”
TBI350/TH350/Atlas
Dana 60’s front and rear
PSC full hydro
Radflo 2.5x14” air shocks all around
39” Reds on well-used beadlocks
Corbeau seats/PRP harnesses

Disclaimer - I’m horrible at build threads, so hopefully I can capture most of the progress and share.
0FB8F8A8-8CAF-4255-AFC2-8A1E6360EB77.jpeg

More to come…
 

Asbjorn

Active Member
Location
Montrose, CO
Yesterday evening my wife and I worked to get the chassis off of the trailer and into the garage. I didn’t get any pictures because it was sketchy, at best. I finally let my wife text the neighbor, who sent her husband over to give us a hand. It sure was nice to have his help, and a whole lot safer. Apparently I need to work on making some friends.

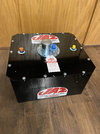
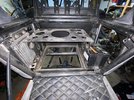
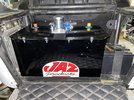
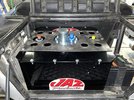
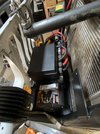
This evening my fuel cell arrived and I decided to install it quickly, rather than let it sit in the way. The builder had been running a Summit cell that is on back order, but I was able to find a Jaz unit that had the same dimensions, and even the bolt holes lined up. I dropped it in, and tightened 6 bolts, and…done! This will be a common theme as I assemble this, hence the “cheater” in the title. It just feels too easy.
AB4937B9-7883-43E7-943B-529E2897988E.jpeg
D76FEE4D-2ADA-4960-9D8E-3675DCD84154.jpeg
F7005C1E-A4CF-4C2D-9D21-40F0ACD03E7F.jpeg
93C064E9-006E-4258-AA34-DF6EB93477F7.jpeg

I also installed the battery that the previous owner sent along with it. It’s an oddball Duracell battery, but it was working for him, and I didn’t want to re-do the battery mount. Time will tell how it works for me. You can see it mounted next to the fuel cell.
 

Asbjorn

Active Member
Location
Montrose, CO
Well, this past weekend wasn’t nearly as productive as I had hoped. Between ordering the wrong fuel fittings, and the axle link brackets not working for me, I didn’t make the progress I had hoped. But, I did do a bunch of little things…

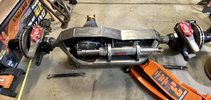
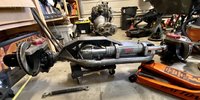
Most notably, finished welding the truss and ram mount on the front D60. This has 6.17 gears, spool, chromo shafts with super joints, Solid knuckles/arms/diff cover. Started to mock up the PSC ram…
3A17D1A6-C137-40A2-A896-4C146E334FEF.jpeg
45F5D34D-3872-4662-8A09-D1D8458D6975.jpeg

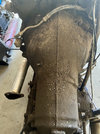
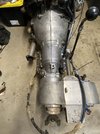
I also cleaned up the transmission (TH350) that was caked with gunk. Decided I didn’t care what happened to the appearance of the case, and soaked it in Purple Power. After a bunch of scraping, brushing, picking, etc it’s starting to look better.
Before
BD0289D5-1962-49C9-80AC-6284557D16F5.jpeg
After
F45AB650-8E8A-4036-9FEB-79BF0705C006.jpeg

In the spirit of keeping budget down, I re-used an old steering wheel I had replaced on another project, bolted up to a PSC steering column, and mounted to a PSC orbital. I also mounted the PSC reservoir.
661ABCC8-2704-4D7F-A6A3-56553D7E153D.jpeg

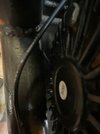
I also mounted up the winch that came off of my donor CJ-7. It’s a newer *cough*badlands*cough* 12k with synthetic rope. It tucks nicely behind the grill and in front of the radiator. It cleared on the long side by about 1/16” or less…
21C132A6-0C35-4A9E-8ED3-80BCC9F6EA7D.jpeg
CA43DB5A-E525-4DD7-9917-78C61292FA00.jpeg

Otherwise, I ran the fuel cell breather line, ran the battery cables from the rear-mounted battery, Moroso shut off switch, to the front of the chassis. I also re-ran the transmission cooler lines from the rear-mounted Derale cooler to the vicinity of where the transmission will sit. The battery cables, trans cooler, and trans cooler lines all came with the chassis and were already cut to fit, so it was a matter of re-attaching them to the chassis. Once again, felt like I’m cheating, but it sure is nice to knock out those little things.
 
Last edited:

Asbjorn

Active Member
Location
Montrose, CO
Just going to drop a couple of pictures in here with a quick update.

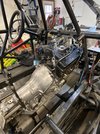
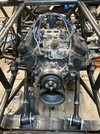
It’s a roller, and the motor/trans/Atlas are sitting in position. I should be able to make the motor mounts and trans mount tomorrow and get moving on getting wired and plumbed.

I told my wife I was hoping to be done by April - she insisted that it needs to be done before that, so I plan to work fast when I can.
3EBF7F06-A0B6-4FDC-9DB2-03E060BDE26F.jpeg
38B8B345-94F5-486F-BF80-4CE436391D21.jpeg
 

Asbjorn

Active Member
Location
Montrose, CO
Well, as you can tell, my build thread lacks any consistency or regular updates. I’ve been slowly plumbing and wiring things. Maybe 60-70% plumbed. And a small fraction of wiring done.

I’ve also been working on driveshafts. Waiting on parts this week and then I should be able to knock out the rear driveshaft, and the mid-shaft of the 2-piece front shaft.

Just a current status picture. Sitting at full bump with a 13” belly height.
B305D7D1-CDD9-45F6-ABEC-F339FFDEE2DA.jpeg

And a couple of the engine bay. Pretty much wrapped up with in there.
04699FE9-EA06-4999-A858-B4E99BC5113F.jpeg
26E149BC-933A-4688-A94C-D597B0FFDA11.jpeg
 

Asbjorn

Active Member
Location
Montrose, CO
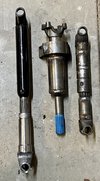
This weekend I took two old driveshafts that came on a donor rig and made them work for the buggy. Also took an assortment of driveshaft components and made up the center driveshaft for the front 2 piece. The plan is to hard mount the carrier bearing. The other end of the slip for the center driveshaft is currently bolted up to the atlas.

The slip yoke on the (front) driveshaft on the right has been previously hacked, hence the multiple welds on it. It’s far from pretty, but is pretty stout.
06614124-9B7F-41C8-958D-F22C5759E5E7.jpeg
 
Top