Show Us Your PROJECTS!

zmotorsports

Hardcore Gearhead
Vendor
Location
West Haven, UT
Little project from last night. I have needed to get my 6" 3-jaw chuck to 8" rotary table adapter completed for nearly 9 months now but haven't had time and it has just been on the "to do" list. Well I have a set of handlebar clamps to machine for a customer and I need the chuck/rotary table to do it. I figured I had better take a night and complete this so I can move onto a paying job.:D

I don't know if I have mentioned it or not, but I HATE machining cast iron, what a mess.

Here is the mess after the lathe work is completed and just prior to removing the backing plate from the 4-jaw chuck.
25yu9h3.jpg


Turning and facing processes completed and ready to drill the mounting holes. The step is .001" smaller than the backside of the chuck so it will self center onto the plate.
292oi7o.jpg


Chuck test fit onto the plate to ensure self-centering. I got a little cocky here but I should have test fit it prior to removing it from the lathe. Had my measurements been off I could have been chucking it back up in the lathe to make a skim cut. Luckily everything fell together perfectly. Another reason I probably shouldn't work this late at night.:eek:

2150epc.jpg


Vise removed from mill table and the backing plate clamped down locating the center. I have it spaced off the table so I can drill through without hitting the table. Using my handy, dandy modified Noga/IndiCol DTI holder. Works awesome. You can also see the DRO that I have zero'd after locating center.
30iuk5c.jpg


Three chuck mounting holes drilled. The bolt hole circle function on my DRO ROCKS!!!
28wkklk.jpg


I used a .375" end mill and countersunk for the socket head capscrews to sit just below flush.
v3q9so.jpg


Next I flipped the adapter over and plugged the dimensions into the DRO for the four bolt hole pattern to match the slots in the rotary table.
dvouug.jpg


Four bolt pattern drilled and countersunk with a .625" end mill.
if4vox.jpg


Completed sitting on the rotary table.
b6zn5s.jpg


Now that my 3-jaw chuck is mounted on my rotary table I can move on to the actual paying job that I needed this for.:rofl: Oh well, at least it is off my bench and crossed off my list of things to do and is readily available when I have the next job come in requiring the chuck and rotary table.

Mike.
 

zmotorsports

Hardcore Gearhead
Vendor
Location
West Haven, UT
any particular reason why you used cast?
nice work

For backing plates that is about all that is available as pretty much all lathe backing plates are cast iron. I was able to locate a fairly inexpensive one on ebay last summer and snagged it just for this application.

Mike.
 

nnnnnate

Well-Known Member
Supporting Member
Location
WVC, UT
I've been putting off doing work on our main floor for a while and just decided to swing the hammer and get some demo done. My wife hates the cubby hole and the faux mantle, I'm going to fill in the cubby and get a real mantle that will have a standard overhang.

20150513_222821.jpg

The "mantle" was sheet rocked 2x4s with bullnose edging. The tile is just stuck to sheetrock as well, it doesn't look like its cement board.

20150516_075458.jpg

I'm wondering if I should sheetrock the lower area where the mantle was initially or will the new mantle be fixed directly to the studs like the old one was? How is this typically done?
 

nnnnnate

Well-Known Member
Supporting Member
Location
WVC, UT
We've got one picked out from Designer Mantels Plus in NSL. Nothing fancy, just something simple and paint grade since we aren't good at picking stain or deciding what would look good with the colors we already have in the house. I still need to pull the tile out from the surround since that is also going to be replaced which will help with the taping.

Thanks.
 

Rock Taco

Well-Known Member
Location
Sandy
It really depends on the type of mantle, I guess. If you're buying a prefabbed unit, it'll likely be one that uses cleats. Still the width and depth will be numbers that can help you decide. If you're fabricating your own, the same is true, I guess. To avoid difficult taping I'd probably pull each side back to the next stud and run larger pieces of drywall.

Yep just go back to the next stud so you have backing for your new sheet rock once you remove the tile. Most mantels are secured to the wall with cleats which are screwed to the wall through the sheet rock then the mantel is nailed/screwed to the cleat. As far as the tile goes you dont usually put cement board under the tile mounted to a wall. It never sees the weight tile on the floor does.
 

MikeGyver

UtahWeld.com
Location
Arem
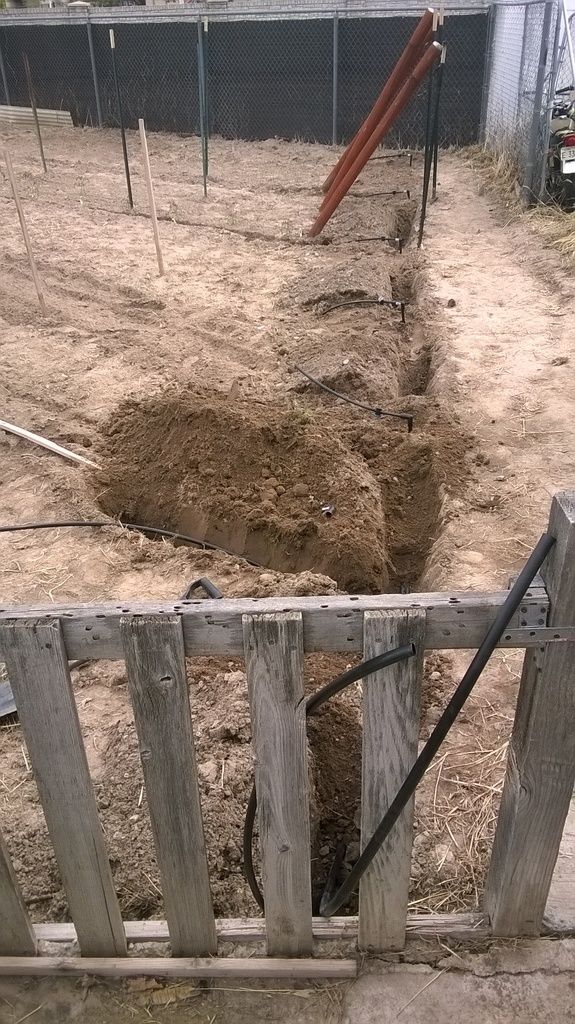
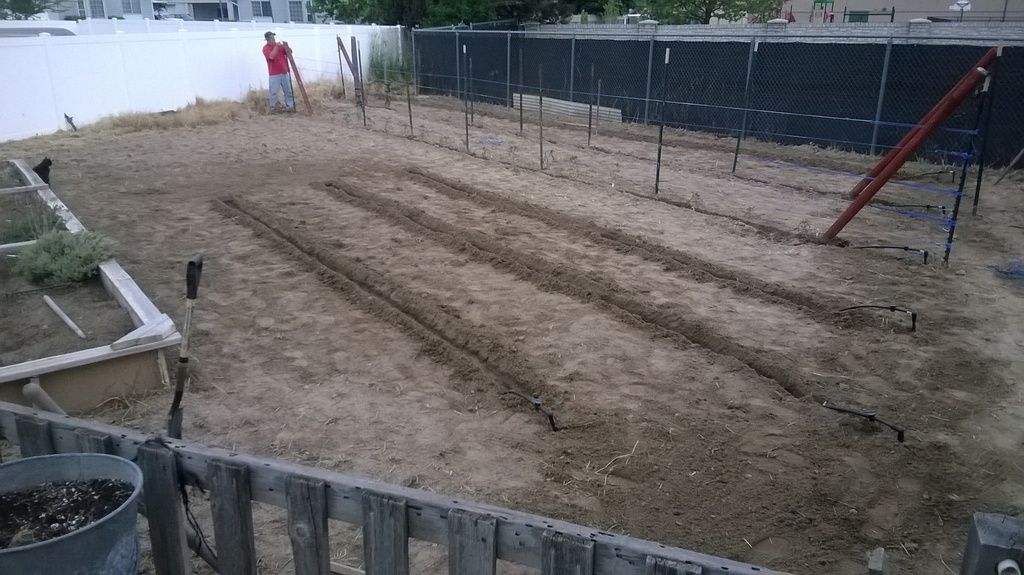
Been helping my dad with his garden... I got a 4 zone watering timer and burried some line to automatically water the entire garden... forever. Shoulda done this a long time ago. The 6 rows are being wateres by 2 of he zones. Each outlet has a valve to finely adjust the flow so the water hits the end of each row at the same time. I'm going to have it water each row for only like 5 minutes, up to 8 times a day. This way water doesn't pool at the bottom end and just grow weeds.


2llm6ph.jpg


temporary_zpsly5ekqr2.jpg


temporary_zpsssn4nbbj.jpg


And so it begins again...
temporary_zpsfsmziiod.jpg
 
Last edited:

zmotorsports

Hardcore Gearhead
Vendor
Location
West Haven, UT
I have a clients 2009 Jeep Wrangler Unlimited Rubicon in the shop that I am regearing and adding sleeves/gussets.

Here you can see the holes drilled and I am ready to install the sleeve into the short side axle tube.
2qtwah4.jpg


Sleeve viewed from the knuckle end.
9kxi14.jpg


Long side axle tube with the sleeve installed. You can see the sleeve inside the drilled .5" holes ready for welding.
9k2tck.jpg


In progress welding pics.
15zi5vo.jpg


2ldbz28.jpg


Rosette weld, sometimes called a plug weld.
jt2xpl.jpg


Some various welds from the project.
2znv69k.jpg


21ne741.jpg


dg43zl.jpg


Axle welding completed.
2mqj95v.jpg


11v4f2f.jpg


Next up will be cleaning the axle housing for paint and then on to installing the new 5.38 gearset before re-installing it back into the front of the Jeep.

Mike.
 

MikeGyver

UtahWeld.com
Location
Arem
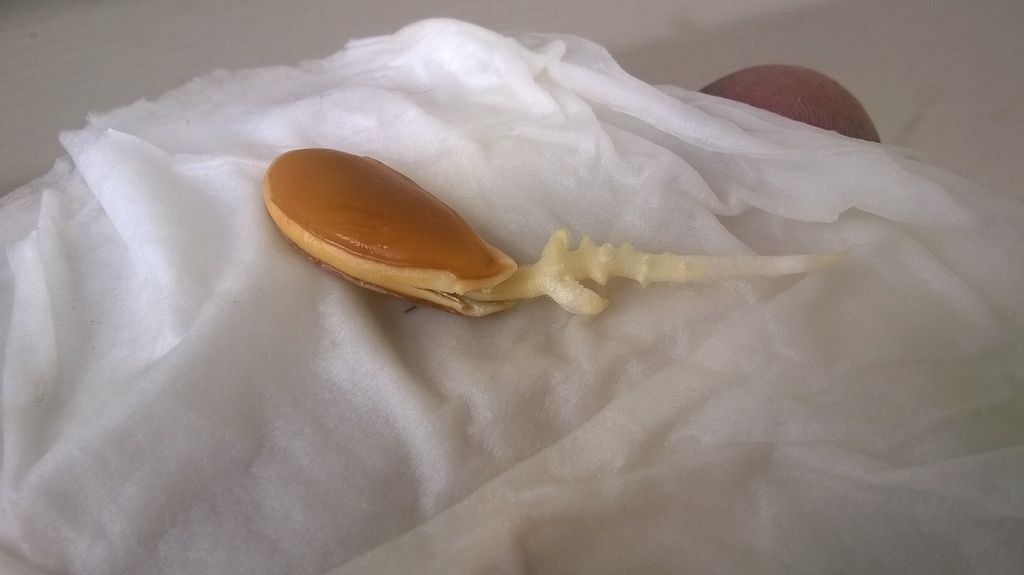
I slacked off this year in finding good seeds. This is just one from last years pumpkin, so I'm not expecting a whole lot honestly.
The best place to find them is probably on utah giant pumpkin growers website/facebook. There's also a huge wealth of knowledge.
 

zmotorsports

Hardcore Gearhead
Vendor
Location
West Haven, UT
Beautiful work, you have the heat dialed in just right.

Thank you.

Nice work Mike! I need to do this to my JKU's axle... if it's not bent already. :ugh:

Thanks Greg. This was one of the first mods I did to my Jeep several years ago right after lifting it. So far so good.:D

Which is better, sleeves or full axle gusset?

By full axle gusset, are you referring to a truss? The sleeves obviously go inside of the axle tubes whereas the gussets are for holding the knuckle "C"s in the correct orientation to prevent them from bending. A truss is an external or skeletal type of structure to provide strength and rigidity to the axle tubes.

Personally I like the sleeves moreso for the cleanliness of the finished product but I have done a couple of Artec trusses for clients and they like them. I think they both aid in keeping the axles from bending but if you are hammering your rig pretty hard on anything over 37" tires, I recommend a Dynatrac or Teraflex replacement axle housing.

Mike.
 

UNSTUCK

But stuck more often.
Also depends on what shafts you are running. Some wont clear the sleeves necessitating using a truss. So plan ahead and make sure all your parts will work together.
 

zmotorsports

Hardcore Gearhead
Vendor
Location
West Haven, UT
Also depends on what shafts you are running. Some wont clear the sleeves necessitating using a truss. So plan ahead and make sure all your parts will work together.

Correct. Good point. If running an ARB air locker they use a 35-spline axle which will not fit through most internal sleeves. 32-splines are no problem.

Mike.
 
Location
West Valley
I drove to SC this weekend to pick up my 87 GT.


The body isn't in great condition so will be be swapping this:


Into this:


And the TKO600 into my Mystic Cobra that I just realized I don't have any pictures of.
 

zmotorsports

Hardcore Gearhead
Vendor
Location
West Haven, UT
I finished up the clients 2009 Jeep Wrangler Unlimited last week.

Here is the OEM ring and pinion out on the bench ready to be cleaned up and replaced.
9vczgg.jpg


Prepped the new ring gear by lightly running a fine file over the mounting surface. Just a little extra insurance that there are not high spots or burrs.
28mmtr8.jpg


I then installed the new inner seals into the houseing so I could start setting up the gearset.
2wd7c40.jpg


Axle completed with ARB differential cover installed, all welded, gears set up/installed and painted.
qnve5f.jpg


Here are the JKS ACOS system that will be installed in the front of the Jeep as well.
2uepddx.jpg


All in all the job went well and the client was very happy. I recalibrated his ECM for the correct gearing and tire size, test drove it, checked everything over and sent him on his way. He will bring it back when he gets about 500-600 miles on these gears so I can drop the fluid, check the gears and fill with synthetic gear oil.

Mike.
 

zmotorsports

Hardcore Gearhead
Vendor
Location
West Haven, UT
I am having new tires installed on my Jeep so I threw the Jeep on the lift last night and removed the tires/wheels so I can drop them off today. I was able to use my new trailer.
2qmevkp.jpg


11qodgo.jpg


She looks pretty good hooked up to my truck. Now that is a trailer I can say I am proud to have behind my truck and she pulls great.:thumbs:

Mike.
 
Top