- Location
- Grantsville, Utah
You are using an out of date browser. It may not display this or other websites correctly.
You should upgrade or use an alternative browser.
You should upgrade or use an alternative browser.
General Tech What did you work on Today?
- Thread starter Gravy
- Start date
- Location
- West Haven, UT
Saturday my son and I cut the spare tire well out of his WJ floor.


We then cut his tank skid. We removed a 6.5" section from it to tuck the tank up tight to the underside of the body.
We then cut a 5”x2.75” hole through the left rear frame rail in which to run the fuel fill tube and a couple of vent lines through. I’ve seen people cut a hole in the floor and build a box to house the fill tube inside the rear cargo area but I don’t think that looks like a very clean mod so we opted to keep everything outside and under the Jeep undetected. I also saw one guy who cut a 2" hole with a hole saw through the frame section and used a piece of exhaust tubing which looked like a nice job but it didn't account for the other couple of hoses that needed to reach either the fuel fill or the charcoal canister. This will allow adequate space for all of the hoses and not crowd them.
Hole cut in the inside rail.

After boxing with 3/16" plate, fully welded and painted.

Outside of frame rail, behind the charcoal canister.

I don’t have any pics of the skid once it was trimmed and welded for some reason so I’ll have to get s couple tonight.
Mike


We then cut his tank skid. We removed a 6.5" section from it to tuck the tank up tight to the underside of the body.
We then cut a 5”x2.75” hole through the left rear frame rail in which to run the fuel fill tube and a couple of vent lines through. I’ve seen people cut a hole in the floor and build a box to house the fill tube inside the rear cargo area but I don’t think that looks like a very clean mod so we opted to keep everything outside and under the Jeep undetected. I also saw one guy who cut a 2" hole with a hole saw through the frame section and used a piece of exhaust tubing which looked like a nice job but it didn't account for the other couple of hoses that needed to reach either the fuel fill or the charcoal canister. This will allow adequate space for all of the hoses and not crowd them.
Hole cut in the inside rail.

After boxing with 3/16" plate, fully welded and painted.

Outside of frame rail, behind the charcoal canister.

I don’t have any pics of the skid once it was trimmed and welded for some reason so I’ll have to get s couple tonight.
Mike
- Location
- West Haven, UT
Yesterday after we returned from breakfast I had a couple of things I wanted to do in the shop.
I have grown tired of chasing my cutoff disks around the drawer so I machined a few aluminum standoffs and secured them in the drawer as pegs to store a few of my more commonly used cutoff and grinding disks.


Done. That should keep things in place. I’ve wanted to do that for several months now but either didn’t have the time or I’d forget until I grabbed another cutoff disk then I would remember.

Later in the day our winter storm settled in.

Mike
I have grown tired of chasing my cutoff disks around the drawer so I machined a few aluminum standoffs and secured them in the drawer as pegs to store a few of my more commonly used cutoff and grinding disks.


Done. That should keep things in place. I’ve wanted to do that for several months now but either didn’t have the time or I’d forget until I grabbed another cutoff disk then I would remember.

Later in the day our winter storm settled in.

Mike
- Location
- Draper, UT
I give you the SmokeMaster 5000 XH
So after making 12 lbs of Jalapeno/Cheddar sausage I needed a way to smoke it at a pretty cool temp so off I went to the garage to cobble together a ventury style cold smoke generator.
After pondering for a while at Home Depot I returned with these

The 1/4" pipe with the brass do-dads on the ends is the ventury jet and the 1/4" pipe gets mounted through a hole drilled in the 1" cap.
I TIG brazed it since the cap is made of cast or low-grade junk.

The 1" pipe get a slot cut into it to draw in smoke from the wood chips when the jet is pushing air through the ventury.
Here is the assembly

Now on to turning some 1/8" plate into a 4" tube
Lets start with adding some 3" wide flat stock to the 13" wide stuff I had so I could make 4" sides from the end result
I did a simple fusion weld with no filler for this

After that I drilled holes for the ventury assembly and for the 1/4" round bar that supports the ash grate and pre-cut the corners with the plasma, leaving tabs to bend and hold alignment of the edges.

The folded and assembled box

Test run after final welding and assembly. Hard to see the smoke.

Mounted on an old junk masterbuilt smoker that I ripped the electronics out of, direct wired the heater, and control the temp with a rheostat.
The original plan was to supply air via an aquarium air pump but mine wasn't up to the task so I re-configured for Shop air.

Better shot of the smoke.

With the heater off, this will cold smoke at temps below 100*
Ultimately, I'd like to build a smoker as well, but I have this now.
I already have ideas on how to simplify the build... 4" square tube for starters
So after making 12 lbs of Jalapeno/Cheddar sausage I needed a way to smoke it at a pretty cool temp so off I went to the garage to cobble together a ventury style cold smoke generator.
After pondering for a while at Home Depot I returned with these

The 1/4" pipe with the brass do-dads on the ends is the ventury jet and the 1/4" pipe gets mounted through a hole drilled in the 1" cap.
I TIG brazed it since the cap is made of cast or low-grade junk.

The 1" pipe get a slot cut into it to draw in smoke from the wood chips when the jet is pushing air through the ventury.
Here is the assembly

Now on to turning some 1/8" plate into a 4" tube
Lets start with adding some 3" wide flat stock to the 13" wide stuff I had so I could make 4" sides from the end result
I did a simple fusion weld with no filler for this

After that I drilled holes for the ventury assembly and for the 1/4" round bar that supports the ash grate and pre-cut the corners with the plasma, leaving tabs to bend and hold alignment of the edges.

The folded and assembled box

Test run after final welding and assembly. Hard to see the smoke.

Mounted on an old junk masterbuilt smoker that I ripped the electronics out of, direct wired the heater, and control the temp with a rheostat.
The original plan was to supply air via an aquarium air pump but mine wasn't up to the task so I re-configured for Shop air.

Better shot of the smoke.

With the heater off, this will cold smoke at temps below 100*
Ultimately, I'd like to build a smoker as well, but I have this now.
I already have ideas on how to simplify the build... 4" square tube for starters
- Location
- Grand Junction, CO
You're a mad man Eric, I love it!
- Location
- Draper, UT
If I had a mill and a lathe I'd be dangerousYou're a mad man Eric, I love it!
I get to replace a axle shaft. Yay!! Who knew high rpm and locked front end in the snow with lots of turning would snap a stock d30 shaft Haha. It was a good 10 year run though with some serious trail time. I have a very noob question though. If I take the outer shaft out can I still drive the jeep to chase parts? Be gentle with your response lol
Attachments
4x4_Welder
Well-Known Member
- Location
- Twin Falls, ID
If you have a hub, yes kinda except the bearings won't have anything keeping dirt out. If it's a unit hub with a nut, no, the nut keeps the bearings together. I have in the past pulled the inner and put an expansion plug in the end of the tube, while keeping the outer in place to hold it all together.
- Location
- Grantsville, Utah
TJ hubs are not captured. You need the stub shaft through the unit bearing to keep it from coming apart. JK Unit bearings are captured.I get to replace a axle shaft. Yay!! Who knew high rpm and locked front end in the snow with lots of turning would snap a stock d30 shaft Haha. It was a good 10 year run though with some serious trail time. I have a very noob question though. If I take the outer shaft out can I still drive the jeep to chase parts? Be gentle with your response lol
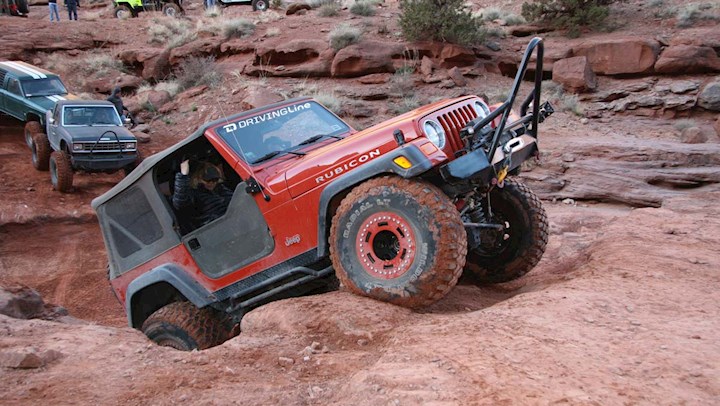
Jeep Wrangler Unit Bearings: What You Don't Know Can Hurt You
The Jeep Wrangler is arguably one of the most capable 4x4 platforms of all time. The open-top and lightweight machines have proven to be exceptionally nimble and competent wheelers time and time again.
TJ hubs are not captured. You need the stub shaft through the unit bearing to keep it from coming apart. JK Unit bearings are captured.

Jeep Wrangler Unit Bearings: What You Don't Know Can Hurt You
The Jeep Wrangler is arguably one of the most capable 4x4 platforms of all time. The open-top and lightweight machines have proven to be exceptionally nimble and competent wheelers time and time again.www.drivingline.com
Thanks. I guess I'll just wait til the fiance comes home with the family hauler.
The_Lobbster
Well-Known Member
- Location
- Richfield, UT.
The_Lobbster
Well-Known Member
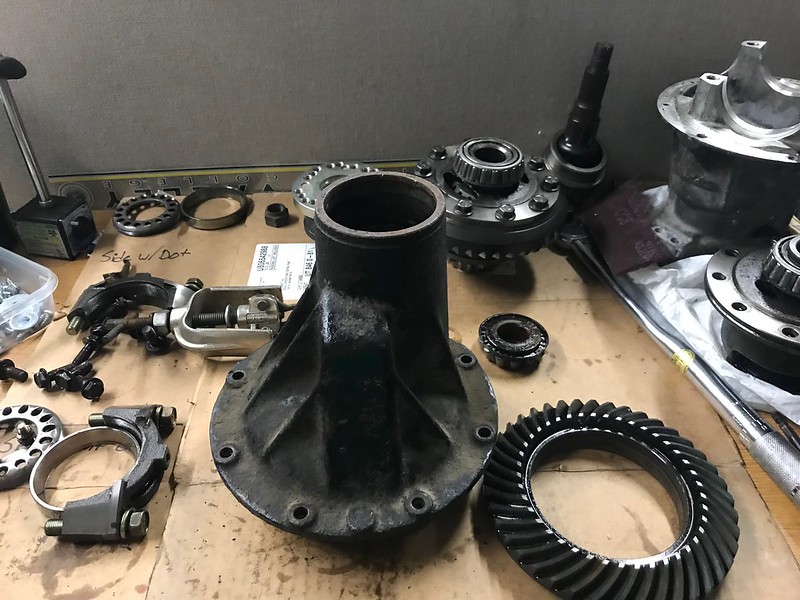
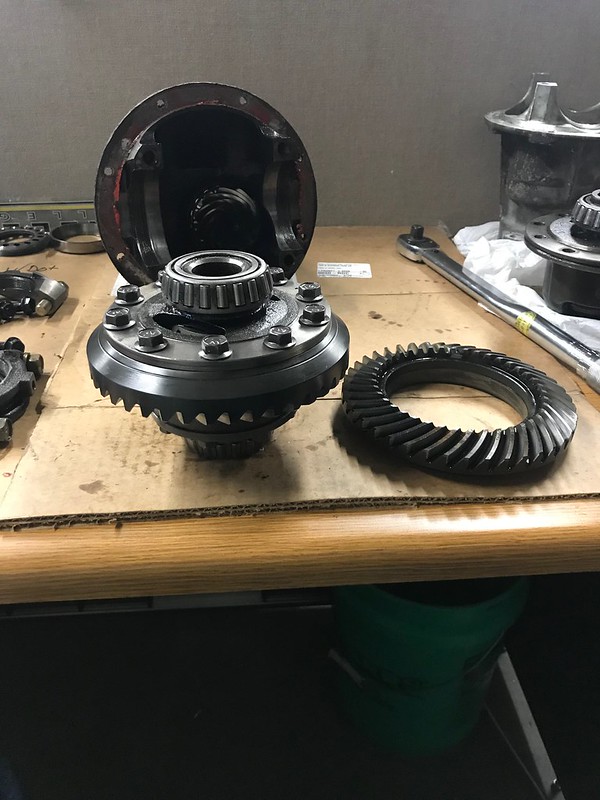
Still working on regearing my diffs. About halfway done with the rear third so far.


The_Lobbster
Well-Known Member
Finished up my setup for now, and set backlash and checked my pattern. How does it look to you professional people? The coast is pretty much the same, I tried to get a pic, but the prussian blue is kinda dark and hard to photograph. My first time setting up gears, and personally I think they came out good, but need some real input.


- Location
- West Haven, UT
It's hard to read the pattern in the pictures. Personally I don't like using the Prussian Blue for this reason. I prefer using actual gear marking compound in either yellow or white as it is much easier to read a pattern as well as it doesn't smear or drag like the bluing does.
Mike
Mike
Homefryy
Active Member
- Location
- Salt Lake City
- Location
- West Haven, UT
I had a quick little job for a friend that’s been sitting on my workbench for the last week or so and I wanted to knock it out last night.
Some Honda hubs that I understand are no longer available in the correct size. I was commissioned to turn the hubs down approx. .041” to match one that was destroyed in a race. I received two used hubs and two new hubs to machine to the correct diameter.


Notes displaying the amount needing to be removed.

Chucked up in the lathe and confirming runout is minimal.

Taking the initial .020” cut.

Final cut. Dead nuts on.

The studs in the two new hubs are very close to the inner step so here’s a good use of an O2 sensor socket.

Two studs removed and two to go.

The last operation is putting a small radius at the root to eliminate the possibility of stress cracking.

All components machined, studs pressed back into the two new hubs and ready to box up and ship back to their owner.

That was a fun little project and hopefully once I get my son’s Jeep completed I can get more little projects like this in to keep me occupied.
Thanks for looking.
Mike
Some Honda hubs that I understand are no longer available in the correct size. I was commissioned to turn the hubs down approx. .041” to match one that was destroyed in a race. I received two used hubs and two new hubs to machine to the correct diameter.


Notes displaying the amount needing to be removed.

Chucked up in the lathe and confirming runout is minimal.

Taking the initial .020” cut.

Final cut. Dead nuts on.

The studs in the two new hubs are very close to the inner step so here’s a good use of an O2 sensor socket.

Two studs removed and two to go.

The last operation is putting a small radius at the root to eliminate the possibility of stress cracking.

All components machined, studs pressed back into the two new hubs and ready to box up and ship back to their owner.

That was a fun little project and hopefully once I get my son’s Jeep completed I can get more little projects like this in to keep me occupied.
Thanks for looking.
Mike


