Willys Crawler 2.0 aka The Bastard

Greg

I run a tight ship... wreck
Admin
First off, this build is killer, awesome job.

I reread the thread quickly and maybe I missed it, but what uptravel and downtravel are you shooting for with the back axle. You using coilovers?

Thanks Jacob, I appreciate the atta boy! :D

I am planning on coilovers, 14" travel Fox 2.0's with remote reservoirs. My goal is 6" uptravel, with either 2" or 3" air bumps. I'd prefer that it wasn't riding around on the air bumps or just off them, with only 1-2" uptravel. If I can pull off 4" uptravel, then 2" of air bump to full compression, I'd be pretty happy.

While this is a short-wheelbase Jeep, I'd really like it to be capable of bombing thru the desert, hucking it off the occasional dune, etc. I realize it's going to have limitations and won't ever be 'fast', but if I can both haul and crawl, I'll be happy. I want to see how it works without an anti-sway bar, but it may end up with one if there's too much body roll. I'm hoping my CO's will be mounted and tuned well enough that I don't need one.
 

Greg

I run a tight ship... wreck
Admin
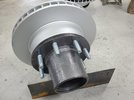
Little progress today, I knocked out some of the old wheel studs on the hubs and was thinking I figured I should try a better system.

I could have paid a local shop to press the studs for me, but I'd be out the money and gain nothing.... so I drove to Harbor Freight and bought a 20 Ton press so I can DIY them. I've gotten by without a press for years, but this build has been giving me good excuses to buy some more tools. And now I can pick up some Dimple Dies and make some fancy sheetmetal parts! It was so much easier using the press!

20201227_143018.jpg


Also did some more work on the frame, capping off open tubes, adding more gussets and worked on a large plate for the inside of the frame that joins 3 pieces of tubes. I've also added gussets to the other 90* turn.

20201224_155324-X2.jpg


20201224_160020-X2.jpg


The inner plate is 3/16" thick and should really help stiffen up the joints and offset. I added a few rosette welds to secure the center of the plate and cut the lower end at a 45* angle so I didn't create a weak spot in the frame with a vertical weld.

20201224_175739-X2.jpg


20201224_180844-X2.jpg
 

Ashcat

Active Member
Location
Wisco
Hesitant to reply but I wouldn’t be a scared to mount the uppers wide and low around the diff. The triangulation will still be plenty enough for lateral control. The “numbers” aren’t always right. Mount the lowers lower on the axle tube. You jeep guys are used to rock anchors down there anyways. Or is rock fangs the new rock anchors? Hey! Nobody get bent out of shape. I own a JL. But seriously the lowers down low would regain separation and being that it’s a short WB, maybe getting the rear links steeper would benefit the rig in climbs getting the AS north of idk say 75? Dunno what your numbers might look like and also because it’s short higher AS will be a rougher ride. But since you wanna go fast it’ll also help your rebound rate and stay on the bars as you’re holding on for your life by the steering wheel and legs flailing behind the Jeep tub across the desert. I for one would love to see that. Build it! I really don’t think you could go wrong whichever way you execute it since options are limited.

Also ibb has some juicy new susp modeling and theories.......cool new perspectives
 

Greg

I run a tight ship... wreck
Admin
Hesitant to reply but I wouldn’t be a scared to mount the uppers wide and low around the diff. The triangulation will still be plenty enough for lateral control. The “numbers” aren’t always right. Mount the lowers lower on the axle tube. You jeep guys are used to rock anchors down there anyways. Or is rock fangs the new rock anchors? Hey! Nobody get bent out of shape. I own a JL. But seriously the lowers down low would regain separation and being that it’s a short WB, maybe getting the rear links steeper would benefit the rig in climbs getting the AS north of idk say 75? Dunno what your numbers might look like and also because it’s short higher AS will be a rougher ride. But since you wanna go fast it’ll also help your rebound rate and stay on the bars as you’re holding on for your life by the steering wheel and legs flailing behind the Jeep tub across the desert. I for one would love to see that. Build it! I really don’t think you could go wrong whichever way you execute it since options are limited.

Also ibb has some juicy new susp modeling and theories.......cool new perspectives

I do have some options at this point, but yeah I'm limited to a degree. I think I can pull it off without cutting up the floor. I think the plan for a beefy truss and mounting the uppers on the sides of the truss, rather than on top, is the best bet. My up-travel will be pretty tight with the frame and tub, but 6" up-travel should be achievable without too much hassle. My rear control arms aren't going to be super long due to the wheelbase, so that will help with more triangulation and lateral control.

My old TJ had the rear lowers mounted lower on the axle tube (I think I had 10" of separation) and I hit/scraped them often. They were beefy, but it was one thing that really bothered me. I think that TJ planted the rear tires pretty well, but it was pretty much a Teraflex LJ Longarm kit.

After talking to @RockChucker about suspension design & setup, we agreed that being able to adjust & tune the link setup is critical. My previous build had adjustable control arm mounts for the rear, at the frame and I'll probably use a similar bracket on this one.
 

I Lean

Mbryson's hairdresser
Vendor
Location
Utah
If you aren't comfortable with the amount of triangulation with the uppers mounted wider, triangulate the lowers also. That has other benefits as well, but is sometimes harder to package.
 

Greg

I run a tight ship... wreck
Admin
If you aren't comfortable with the amount of triangulation with the uppers mounted wider, triangulate the lowers also. That has other benefits as well, but is sometimes harder to package.

I was planning on it, one way or another. My previous Willys build had decent triangulation on the rear upper & lower control arms, with the mounts being on the frame. This axle is even wider, so I can move the lowers out even further if needed.

I might use a similar frame mount, it sure makes it easy to setup, is beefy and adjustable.

20180821_195924-X2.jpg
 

Greg

I run a tight ship... wreck
Admin
Greg, recommend that you throw away the HF press plates and buy something like the Swag Offroad units (I have them; they are very beefy) - https://www.swagoffroad.com/SWAG-Arbor-Plates_c_52.html. Of course dimple dies are good, but even the thumb knob upgrade is nice to have on the press.

I was wondering about the plates when I first used it, didn't realize they were cast! :oops: And I was planning on the thumb knob upgrade, using the jack handle is a PITA. Thanks for the advice!
 

I Lean

Mbryson's hairdresser
Vendor
Location
Utah
I was wondering about the plates when I first used it, didn't realize they were cast! :oops: And I was planning on the thumb knob upgrade, using the jack handle is a PITA. Thanks for the advice!
I'm pretty sure the cast press plates are long gone. The more recent ones are just flame-cut, that I've seen. (unless they changed back to cast) You should be able to tell pretty easily, by looks and maybe hit one with a grinder to see how it sparks.
 

Gawynz

Active Member
Location
Ogden, UT
My 2 cents... I'm with the comments above, mount the links outside the truss/diff, triangulate both uppers and lowers, target a tad under 100% AS, consider mounting the lower links lower on the axle to regain some separation, maybe beef up the upper links and mount points a tad to account for the reduced leverage/increased load. I like your travel numbers, hopefully you can pack it all in there without needing to modify the tub.
 

Greg

I run a tight ship... wreck
Admin
My 2 cents... I'm with the comments above, mount the links outside the truss/diff, triangulate both uppers and lowers, target a tad under 100% AS, consider mounting the lower links lower on the axle to regain some separation, maybe beef up the upper links and mount points a tad to account for the reduced leverage/increased load. I like your travel numbers, hopefully you can pack it all in there without needing to modify the tub.

I think that sounds like the plan from here forward, thanks for the input!


Mine are flame cut, you can see the kerf edge through the paint.

I can see the flame cut in mine as well, the SWAG listing mentioned cast plates and have a pic of a guy from Pirate that had one blow up and just missed taking out his eye.
 

Greg

I run a tight ship... wreck
Admin
Worked on plating joints on the frame again, got the rear all done and started cutting out plates for the front of the frame. I think I'm going to plate the outside and leave the inside alone. Any thoughts on that?

20201227_161737-X2.jpg


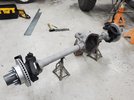
It was a nice day out, so I decided to paint a bunch of the front Dana 60 outer parts. I only had a few cans of paint, so I used what I had.... Hammerite Grey, a couple shades of black, flat & semi-gloss and bright Red for the calipers! X-D

20201226_151411-X2.jpg


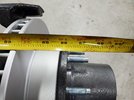
I wanted to get the front end together and double check the width, so I tossed on the hubs, rotors and caliper brackets. Looks like the final width is 66 1/4" wide, which is a great match to the 65" wide Dana 70 rear.

20201227_143646.jpg
20201227_144307.jpg
 

Greg

I run a tight ship... wreck
Admin
Had to put the Dana 60 front end under the frame and bolt up the wheels & tires. I really like the width and height, the Krawlers really are the icing on the cake with this build!

20201227_150535-X2.jpg

20201227_150750-X2.jpg

20201227_152049-X2.jpg


I had to toss on the 'RME 4x4' drive flanges and flange covers that were built by Summit Machine, just to see how it all looks. I love it!
20201227_144028-X2.jpg


Looks like 12 1/2" clearance under the bottom of the diff with 37's, which isn't bad!
20201227_151025-X2.jpg
 
Top