Bart's 2007 JKUR

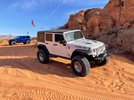
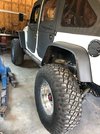
Many of you know that I sold my beloved CYJ last week and started down a new path for wheeling. I've reached the point in life where I wanted something more comfortable to wheel and really wanted to drive a Jeep around town again. Also wanted to do some scenic stuff and have a trip to Silverton planned later this year. A friend made me a good deal on a fairly well built 2007 JK Rubicon and so it begins. It has 61,000 miles, a 3.5" Full Traction lift and sporting 35" BFGs for now. Also has a Ripp Supercharger, Kilby On Board Air plumbed front and rear, and a few other goodies. One thing I'll be removing this weekend is a 13 gallon auxiliary gas tank that is filled through the regular gas cap with a separate gauge and transfer pump. Cool idea and great for extra miles, but I don't need that kind of range.

Short term plans are upgrading to 37s and improving the ride a bit. Future plans include adding the Tera CRD60 I picked up from Davy, and then upgrading the front axle at some time. Way future is to transplant a 5.3 into it for better power and mpg. I don't want a power house, just something that can get me down the road at 80 without struggling. 118600118601
 

zmotorsports

Hardcore Gearhead
Vendor
Location
West Haven, UT
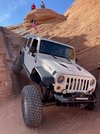
Thanks Mike. The tires are actually the same ones, 39" KM3s that I bought about 8 months ago. The wheels are new Trailready beadlocks with the smaller ring and 8 on 6.5. The old wheels were Trailready's also, in the 5x5 lug, but powdercoated black with the larger rock ring on them. I really like Trailready wheels. I was aired down to 8 psi over the weekend and never burped a tire.

Thanks Bart.

Again, the Jeep looks killer. Like you, I don't like the "in your face" or "over the top" appearance that most Jeeps have with every bolt on accessory imaginable. I prefer a more OE look but with the goodies where they count.

Mike
 

Bart

Registered User
Location
Arm Utah
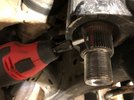
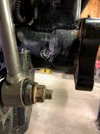
It's been a while since I've added anything to this thread and lots has been done. One thing I noticed after adding the 60 to the front end is that the PSC Big Bore box, which works great with stock JK parts, actually limits left side steering for a couple of reasons, the most being that geometry is just different. Yesterday I went in with Dremel cut off discs and a diamond tip bit and grooved the 4 keyed spaces on the PSC sector shaft. Once grooved and cleaned up I was able to move the pitman arm one tooth to the right and get full steering for the first time since the swap. WOW, what a difference. It would be nice if PSC made a different box for one ton swaps or had an option for a non keyed sector shaft.
 

Attachments

  • PSC.jpg
    PSC.jpg
    32.5 KB · Views: 27

I Lean

Mbryson's hairdresser
Vendor
Location
Utah
Now that you've already ground the sector shaft....for future reference, it's pretty easy/common to remove the keyed splines from the pitman arm to accomplish the same thing. (unlimited clocking, one spline at a time)
 

Bart

Registered User
Location
Arm Utah
Now that you've already ground the sector shaft....for future reference, it's pretty easy/common to remove the keyed splines from the pitman arm to accomplish the same thing. (unlimited clocking, one spline at a time)
We weren't sure if we needed to move one or two teeth over to get maximum steering and since there were just voids in the pitman arm splines to go over the keys on the sector shaft, we grooved the keys to have unlimited clocking. We only needed to move one tooth over.
 

I Lean

Mbryson's hairdresser
Vendor
Location
Utah
There were just voids in the pitman arm splines to go over the keys on the sector shaft, which is why we grooved the keys. By doing what we did I have unlimited clocking, but only needed to move one tooth over.
Oh, so it's backward from everything normal? Makes sense. I guess you did the right thing then. :D
 

Bart

Registered User
Location
Arm Utah
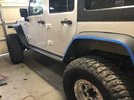
I needed to do something with my broken and sagging fender flares and I didn't really care for most options available. I didn't want anything that was steel or aluminum because I hit them occasionally. I really liked the MCE flares, but they were not quite the look I was going for and pretty expensive. I decided to try something temporary so that I could rehang the broken fasteners to make the flares stop flapping at high speeds. I didn't care for most of the hacked stock flares that I saw so I thought I would keep a little of the edge. It was a lot of work and a lot of cleanup but I really like the outcome. The end result turned out better than I anticipated and I may do this to the new set of stock flares I have in storage. Fenderc1.jpgSideChute.jpgChute2.jpg
 

Hickey

Burn-barrel enthusiast
Supporting Member
I needed to do something with my broken and sagging fender flares and I didn't really care for most options available. I didn't want anything that was steel or aluminum because I hit them occasionally. I really liked the MCE flares, but they were not quite the look I was going for and pretty expensive. I decided to try something temporary so that I could rehang the broken fasteners to make the flares stop flapping at high speeds. I didn't care for most of the hacked stock flares that I saw so I thought I would keep a little of the edge. It was a lot of work and a lot of cleanup but I really like the outcome. The end result turned out better than I anticipated and I may do this to the new set of stock flares I have in storage. View attachment 134494View attachment 134495View attachment 134496
I need to do something with my fronts. I have MCE rears, which I love, but I only have them because of Amazon screwing up an order for a friend. They are way over priced in my opinion.

I'd like to try laminating a few stock front flares together to provide more strength and rigidity, and then cut them like yours.
 

zmotorsports

Hardcore Gearhead
Vendor
Location
West Haven, UT
Those turned out nice Bart. I don't care for most of the options out there either. Of all of the ones I've seen personally, I think I prefer the MCE as well but I still can't seem to part with my OEM ones. I've worked hard to get my bumpstops fine tuned to work with the OEM flares and now I can't even entertain the idea of anything else. Plus, I like the "sleeper" and "clean" look of the OEM flares.

Mike
 

zmotorsports

Hardcore Gearhead
Vendor
Location
West Haven, UT
Bart, are you still running the CRD60 semi-floating rear end or did you upgrade that as well? I can't tell from the pictures very well but the rear appears to be a full-floater.

Mike
 

Bart

Registered User
Location
Arm Utah
I'd like to try laminating a few stock front flares together to provide more strength and rigidity, and then cut them like yours.
I just cut down the inner structure a bit and used it to make the fronts solid. Also just cut down and kept most of the inner liner.
Bart, are you still running the CRD60 semi-floating rear end or did you upgrade that as well? I can't tell from the pictures very well but the rear appears to be a full-floater.

Mike
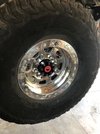
I still have the Tera semi float CRD and really like it. I am trying to be gentile with it so I don't bend axles. A friend did some 3D printing on some center caps that give the rear that full float appearance. Eventually it will get either a full float kit or a different rear axle.
 

Bart

Registered User
Location
Arm Utah
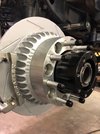
Just an update on the rear CRD. The seals started leaking and I bought a couple of new set 20 bearing and seal kits. Also bought a couple of spare CRD shafts because they're notorious for breaking. When it came down to it I couldn't bring myself to R & R a known failure point. Decided to bite the bullet and bought the Teraflex full float kit. I think this will bring some peace of mind. It also has the big brake kit that will help with the stopping power.
FF1.jpgFF2.jpg
 

Bart

Registered User
Location
Arm Utah
The new spindle for the full float has a press fit into the axle where the old race was, and it is long enough so that you can spot weld on each side to help make it stronger. It does have the 4 bolt mount with a thick retainer also.
 

Bart

Registered User
Location
Arm Utah
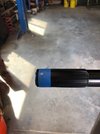
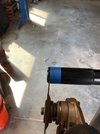
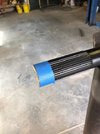
When finishing the project the axle shafts were a bit too long and were both into the diff cross pin. I had to trim a 1/4" off of each shaft to get them to fit.
ff4.jpgff5.jpgff6.jpg
Added a small bevel and cleaned up the splines with a file and everything went together well.
ff3.jpgff7.jpg
 

skippy

Pretend Fabricator
Location
Tooele
When finishing the project the axle shafts were a bit too long and were both into the diff cross pin. I had to trim a 1/4" off of each shaft to get them to fit.
View attachment 140699View attachment 140700View attachment 140701
Added a small bevel and cleaned up the splines with a file and everything went together well.
View attachment 140702View attachment 140703
I have ran into the shafts being to long on a number of Full float kits on the CRD 60... Its also been ongoing for about a year. I thought it have been corrected by now.
 
Top