You are using an out of date browser. It may not display this or other websites correctly.
You should upgrade or use an alternative browser.
You should upgrade or use an alternative browser.
Gawynz Manche Thread
- Thread starter Gawynz
- Start date
-
- Tags
- comanche jeep jeep build truck
- Location
- West Jordan
I vote for a rear exit tailpipe.
For the paint, I don't think it'll hurt anything, but certainly don't expect it to hold up on the cat. It may fare OK on the rest of the exhaust. I used it on a buggy exhaust w/ no cat and it actually stayed pretty nice for a few years. Granted, it was a buggy that saw zero road salt, and hardly ever got wet.
For the paint, I don't think it'll hurt anything, but certainly don't expect it to hold up on the cat. It may fare OK on the rest of the exhaust. I used it on a buggy exhaust w/ no cat and it actually stayed pretty nice for a few years. Granted, it was a buggy that saw zero road salt, and hardly ever got wet.
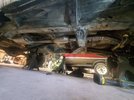
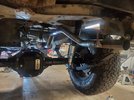
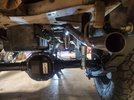
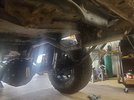
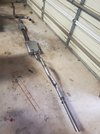
Finish welded everything today. I think I'm going to add a hanger just forward of the cat, but I'm pretty happy with it. I tweaked the factory hangers a bit to tuck it tighter. Mig with 0.023 worked great once I got it dialed in on some scrap (at least as good as I can do). I dumped it straight out the back and left it a little long so that once I figure out the bumper I can tweak it. Plan is to paint all the tubes but leave the flex/cat/muffler unpainted.


RustEoldtrux
RustEoldtrux
- Location
- Evanston, WY
This is currently on the Evanston classifieds. Looks really nice in the pictures. I have not seen this in person and I don't know the seller.
@RustEoldtrux, that link is private, what is it?
RustEoldtrux
RustEoldtrux
- Location
- Evanston, WY
Sorry, didn't check it out before posting. It's a 1989 Jeep Comanche long bed in really nice shape.
RustEoldtrux
RustEoldtrux
- Location
- Evanston, WY
If you post your Facebook name, I'll try to make a comment to you from the ad.
I idled the last of the old gas through the truck until it died, I have no idea how long it's been in there, but at least a few years. Chased it with some fresh gas and injector/engine cleaner and put about 5 miles on it just driving around the neighborhood, obviously it ran way better.
Drained the transmission and t-case, just waiting on fluids to show up.
So now electrical, I'd say about 60% of the lights work. I pulled every bulb except for the headlights which seem to be ok and got replacements on order. There was grease present, but all the old bulbs were so corroded they broke off and had to be mangled out of the socket with pliers. There is a slew of wires cut and sockets disconnected under the dash, and this little truck is a pain to crawl around in, so I pulled the seats, lower dash, and trim. Pulling the interior will make it much easier to work under the dash and while I'm this far I have a few plans:
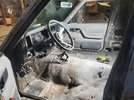
- Figure out all the wiring that's cut or disconnected and clean it up. You can tell there used to be a CB mounted, an aftermarket headset, and I don't know what else.
- All the interior panels are in great shape, including the dash... that is until I set a back cab corner panel on the ground, forgot it was there, stepped on it and cracked it
. It's not too bad, I'll use some JB kwik weld on the back side and I doubt anyone will be able to tell, just pisses you off.
- Pull the old gross carpet and replace w/ a pre-molded vinyl replacement, I was actually surprised there are a decent amount of options for this truck at a decent price.
- Add a simple/decent single DIN stereo with bluetooth capability and replace the door/cab (4) speakers.

Changed my mind on the floor material, I'm going with carpet for a couple reasons 1) concerned about trapping moisture under the vinyl and 2) carpet is quite a bit cheaper.
I'm excited to start using my new bender, going to start w/ bumpers, to do the front bumper I need a winch. Currently there is a pretty good deal on a new Warn VR Evo 8 on KSL, and I keep getting tempted, but I think part of it is I just want a "Warn" sticker ha. Warn is cool, the Evo is their lower tier, but even then I don't think I need it for this rig. I can get a new Smittybuilt XRC 9500 Gen 2 for $250 delivered to my door, which is less than half the price of a new Evo 8. The XRC 9500 Gen 2 is the exact same winch I have on my buggy and it's fine/works, not trick or quite so nice as a Warn probably but it's fine. For this Jeep I think the Smittybuilt will be good enough so I'm leaning that direction unless someone can change my mind ha. Also, I've read the "which winch?" RME thread a couple times and that was very helpful, so thanks all.
I'm excited to start using my new bender, going to start w/ bumpers, to do the front bumper I need a winch. Currently there is a pretty good deal on a new Warn VR Evo 8 on KSL, and I keep getting tempted, but I think part of it is I just want a "Warn" sticker ha. Warn is cool, the Evo is their lower tier, but even then I don't think I need it for this rig. I can get a new Smittybuilt XRC 9500 Gen 2 for $250 delivered to my door, which is less than half the price of a new Evo 8. The XRC 9500 Gen 2 is the exact same winch I have on my buggy and it's fine/works, not trick or quite so nice as a Warn probably but it's fine. For this Jeep I think the Smittybuilt will be good enough so I'm leaning that direction unless someone can change my mind ha. Also, I've read the "which winch?" RME thread a couple times and that was very helpful, so thanks all.
- Location
- Grantsville, Utah
The Smittybilt winches are probably the most reliable thing under that entire company’s label. I’ve never heard anyone have a problem with one.
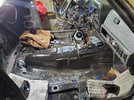
Welp, other than the dash I've about completely disassembled the interior.
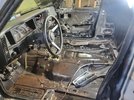
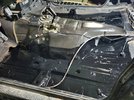
- I'm pretty happy/not too bummed about the amount of rust under the carpet. Plenty of solid steel, I'm in the process of cleaning it up with a wire wheel and then I'll paint the entire floor pan w/ left over POR-15 that I used on the axles.

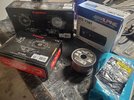
- Got my replacement audio.

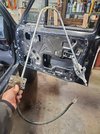
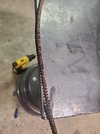
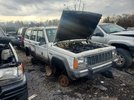
- Something I didn't expect... manual crank windows are not terribly common. My passenger side window had a "dead spot" where it would not roll up or down without lifting the window with my other hand helping it for ~3". Drilled out the rivits and pulled the window regulator and disassembled the crank system (which looked good) but found the "dead spot" in the push/pull spring where the spring is just gapped. Went to order one and couldn't find anything, nobody makes a new replacement. I found used individual regulators on ebay for as much as $200+! Looking at pictures, my guess was a motor driven regulator used the same push/pull spring in the track (never confirmed this), so I headed off to the junk yard, luckily for me I came across this 1989 XJ with manual windows, I pulled both the driver and passenger sides for $22 and they're in way better shape. I was able to pull a bunch of other odds and ends off this jeep as well.


- Fixed all the lights, had to swap out a couple connectors/sockets, a relay, and some fuses but all in all pretty easy.
- Interior plan:
- Charcoal carpet, clean up and use the old under carpet insulation as it's in pretty good shape.
- Make my own door panels out of 1/4" plywood, epoxy coat, then cover with vinyl interior, medium grey (the old panels are trash).
- Patch up and cover the headliner board, medium grey.
- Need to figure out the parking brake, the pedal mechanism is pretty mangled and again they're not easy to find. Also need to figure out how to connect to the 8.8, but from what I've read that shouldn't be too bad.
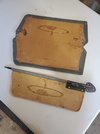
Been out of town a lot lately but finally getting some shop time in. I spent my quota of cuss words yesterday but fixed the parking brake. To get the pedal assembly out you have to remove the fuse block and a some other crap which was the most annoying part. The PO smashed this thing, but once I had it out it wasn't too bad to fix, straightened some linkages, added a much bigger 2lb release spring, added a return stop, and fixed the pull handle.
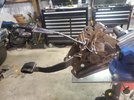
With the old release spring, if the brake was engaged and you yanked up on the pedal it'd let go, i was worried that idling/vibrating may cause the same problem, the beefier spring fixed it, before and after spring below.
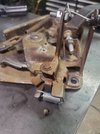
This was not the most fun task and I'd been putting it off for a while, a few times I thought to myself, "I'll just carry chocks" ha, but I'm glad it's done.

With the old release spring, if the brake was engaged and you yanked up on the pedal it'd let go, i was worried that idling/vibrating may cause the same problem, the beefier spring fixed it, before and after spring below.

This was not the most fun task and I'd been putting it off for a while, a few times I thought to myself, "I'll just carry chocks" ha, but I'm glad it's done.
Well I don't know how... but I think I actually made it uglier. On the plus side I got rid of all the banged up original pieces and it's straighter. I'm waiting on some sound deadening material to come in before I start reassembling the interior, so I decided to install all the new body parts I've stollen from a couple scrap yard XJs.
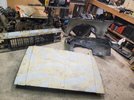
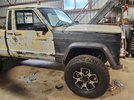
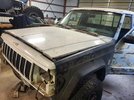
Next up is reassembling the interior, fix the hood latch assembly which has never worked, and start building a front bumper w/ winch. Plan is to keep the winch low and tucked behind the bumper, hopefully I can avoid cutting the front crossmember and get what I want.


Next up is reassembling the interior, fix the hood latch assembly which has never worked, and start building a front bumper w/ winch. Plan is to keep the winch low and tucked behind the bumper, hopefully I can avoid cutting the front crossmember and get what I want.
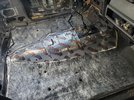
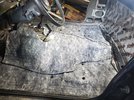
Fixed the hood latch and started reassembling the interior. Applied cheap Amazon sound deadening material (Kilmat) to the floor and back of the cab, this material was great to work with as it's easy to cut, lays down and adheres well, I recommend a good 2" roller. I can see how this material would make an improvement, just thumping around before and after it makes a good difference in sound. I have enough left over I intend to cover the roof of the cab as well as the b-pillars/doors somewhat.
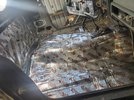
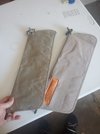
Fit some new sound/heat under carpet.
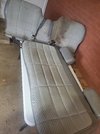
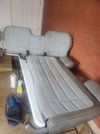
Then I got distracted and decided to clean up the seats. This should be a Dawn dish soap commercial as that's all I used along with a soft bristled brush and a wet/pet vac. Took a bit over an hour, not perfect but I'm happy with it, may still have some oil stains but it's clean.
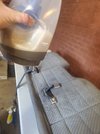
30+years of Idaho dust and grime, I dumped out several bottles like this.
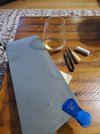
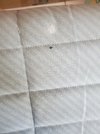
And finally, I repaired 3 cigarette burns in the seat. Again, not perfect but good enough.

Fit some new sound/heat under carpet.


Then I got distracted and decided to clean up the seats. This should be a Dawn dish soap commercial as that's all I used along with a soft bristled brush and a wet/pet vac. Took a bit over an hour, not perfect but I'm happy with it, may still have some oil stains but it's clean.


30+years of Idaho dust and grime, I dumped out several bottles like this.

And finally, I repaired 3 cigarette burns in the seat. Again, not perfect but good enough.

Slow and steady, but it's progress. Finished the sound deadening.
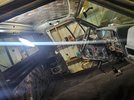
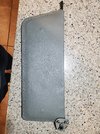
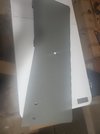
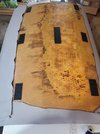
Cleaned up/patched the old raggedy headliner and recovered it. Put some strips of velcro on it to adhear to the cab.
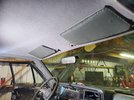
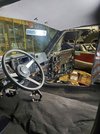
Headliner installed. The carpet is cut and fits nice and tight but it's not really relaxing and lying flat, it'd probably be better if it was warm. Cleaning up the trim pieces and starting to reassemble. I don't plan to use any adhesive on the carpet or under-carpet insulation, is this a bad idea?

Cleaned up/patched the old raggedy headliner and recovered it. Put some strips of velcro on it to adhear to the cab.

Headliner installed. The carpet is cut and fits nice and tight but it's not really relaxing and lying flat, it'd probably be better if it was warm. Cleaning up the trim pieces and starting to reassemble. I don't plan to use any adhesive on the carpet or under-carpet insulation, is this a bad idea?


