Here we go... 1969/70 Chevy C10/K20 projects

Greg

I run a tight ship... wreck
Admin
Finally getting back to this old thing... I did some research & review reading on the ProForm 1.5 roller tipped rockers that I used and found some bad news... one buyer had a rocker break apart shortly after being installed. - https://www.summitracing.com/parts/pro-66923c/reviews

I decided not to roll the dice.... the last thing I need is a rocker breaking into pieces and sending metal down into the freshly built 355. I purchased a set of Comp Cams stamped steel roller tipped rockers in 1.6 ratio, to get a bit more lift out of the valve. - https://www.summitracing.com/parts/cca-1418-16

The 1.6 ratio rockers mean that the Intake valve will lift to .560 (versus .525 with 1.5's) and Exhaust valve will lift to .555 (versus .520 with 1.5). That's a significant difference and is a great way to get more lift without going to a less streetable cam.

The quality difference between these two similar parts is amazing, there's no comparison... the Comp Cams parts are super high quality. I had to remove the ProForm rockers, install the Comp Cams rockers, go thru the process of lashing the valves and double checking it.... all over again.

20230802_185346-X2.jpg


I tossed the valve covers back on and bolted them down.... not a ton of progress, but it's a start! Now to bolt up the flexplate, starter, the transmission and torque convertor and work on stabbing it into the C10!

20230802_190219-X2.jpg
 

Greg

I run a tight ship... wreck
Admin
Nothing crazy, but progress is progress.... starter is bolted up, installed the flexplate, filled the convertor with 2 qts of ATF and bolted up the TH350. I also installed an adjustable vacuum modulator, then filled the trans with 6 qts of ATF... and noticed it was leaking out of the kickdown cable, which had been cut off. I wasn't going to run it, but it leaks pretty bad. I ordered a plug kit from Speedway.

Next up, need to remove the rivets holding the manual trans crossmember in place and drop it out, so I can swing the engine & transmission into their new home!

20230806_194709-X2.jpg
 

Greg

I run a tight ship... wreck
Admin
I'm at a point where I don't know what to do next.... the "rebuilt" TH350 trans was leaking like a stuck pig and there was silicone in places there shouldn't be (around seals).

A few weeks ago I unbolted the trans and took it to a friends shop, wanting it checked out. They ended up tearing it down fully and after showing me all the worn parts, pump, etc, etc.... sent me a estimate of $1900 to rebuild it. :oops: I'm simply not willing to spend nearly $2k to rebuild a trans w/o overdrive, so I told them to box it up and forget about it.

I'm not the biggest 700R4 fan and rebuilds aren't cheap.... even the low dollar ones are around $2500.

I have a take-out LM7 5.3 LS in the shop, it has 140k on it.... I could refresh it with a mean cam, a new oil pump and combine it with a 4L60E. That would really make the truck much more reliable & driveable, not to mention desirable with a LS swap. I used a Summit Racing 4L60E for the El Camino that worked great, costing $1600.

If I went that route, the 400+ HP Vortec 350 could go into the CJ5.... 😈
 

Greg

I run a tight ship... wreck
Admin
My transmission woes are over! A local guy had a very low mile, rebuild takeout TH350 that had about 500 miles on it for $1000.... it had been replaced with 5 speed manual and is in damn near new condition. The transmission is a Monster transmission "SS Mega Monster" rated at up to 600 HP! This should be way more than enough for my mild 420 HP Vortec 350 and last for years to come.

Now I just need the time to bolt it up to the engine and stab it in, then working on all the related parts to get it running again!

i-NT3tp6h-X2.jpg
 

Greg

I run a tight ship... wreck
Admin
Moved the C10 into the 'work bay' part of the shop, getting ready to stab the Vortec and TH350 into place. Also picked up some upgraded parts, like an aluminum radiator with dual electric fans. I have a rebuilt Holley 3310 (vacuum secondary 750 CFM carb) on the way as well, should be a good match to the engine.

i-9P3pnP3-X2.jpg

i-Tk72JtD-X2.jpg


I need to get some interior work done before the engine & transmission go in, like installing the shifter... but need to make sure the seats will fit with the shifter body. I decided to keep the bench seat in the '69 K20 and upgrade this C10 to buckets. I picked up a pair of Procar lowback bucket seats, along with a frame mount and center console. (still missing the console). The bucket seats, frame mount & center console were all less than the foam and high quality seat covers for the bench seat. The seats are comfortable, have decent bolsters and weren't expensive.

i-fzZgPJf-X2.jpg


I really want to get this truck back on the road, but there's a lot of other upgrades that need to happen along with the engine install... F & R disc brakes, power steering, etc. I also want to add big anti-sway bars F & R and possibly air bag it... 😍
 

NYCEGUY01

Well-Known Member
Location
Willard, UT
I have those same seats in my C10. Youll like them.
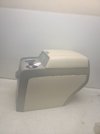
Look for a 2003-2006 ish Lincoln Navigator.
Grab the rear console. It fits between the seats and is a perfect fit for these old trucks. Lots of storage and Great cup holders. Also the right height for a nice arm rest..
The Black / Grey ones are way easy to find, it took a while to find a tan one for my last truck..


nav.jpg
 
Last edited:

Greg

I run a tight ship... wreck
Admin
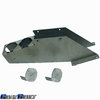
Took longer than hoped, I had to modify the seat bracket quite a bit to make it work with the floor mounts. Once the seats were in and Sidewinder shifter was mocked up, it was quite far away from the drivers seated position. I decided to build a shifter tower to raise it up and make it easier to reach. Took some measurements, did some CAD and broke out the tin snips, then moved on to the sheetmetal brake.

i-DtXwSQt-X2.jpg

20231209_130853-X2.jpg

i-6Js3F5c-X2.jpg


I DIY powder coated in the shop, it came out OK.... could be better, but it's good enough for this truck.

20231222_125345-X2.jpg


I also needed to build a patch panel for the manual trans shifter hole, again the tin snips got put to work and cut out a cover, then beat it to fit tight. I needed to drill a hole in the floor for the shift cable too. The carpet I put in this truck before had a gaping hole in it for the old manual transmission and the shift tower wouldn't cover it.... so I bought new carpet. Also added the new seat belts to tie it all together.

20231224_124431-X2.jpg


I think the interior came together very well, it looks nice, feels comfortable and sporty. I need to dump that giant steering wheel for something that's a closer match to the new parts. The shift lever just clears the dash and center console with my big hand on it, so that'll work.


20231226_164334-X2.jpg

20231226_164353-X2.jpg


The center console that was part of the seat frame had these funky rectangular recesses and no cup holders... so I removed the glued in insert and I have something in the works, I'll update the thread when it's done. ;)

20231229_171436-X2.jpg
 

James K

NO, I'm always like this
Location
Taylorsville, Ut
Took longer than hoped, I had to modify the seat bracket quite a bit to make it work with the floor mounts. Once the seats were in and Sidewinder shifter was mocked up, it was quite far away from the drivers seated position. I decided to build a shifter tower to raise it up and make it easier to reach. Took some measurements, did some CAD and broke out the tin snips, then moved on to the sheetmetal brake.

i-DtXwSQt-X2.jpg

20231209_130853-X2.jpg

i-6Js3F5c-X2.jpg


I DIY powder coated in the shop, it came out OK.... could be better, but it's good enough for this truck.

20231222_125345-X2.jpg


I also needed to build a patch panel for the manual trans shifter hole, again the tin snips got put to work and cut out a cover, then beat it to fit tight. I needed to drill a hole in the floor for the shift cable too. The carpet I put in this truck before had a gaping hole in it for the old manual transmission and the shift tower wouldn't cover it.... so I bought new carpet. Also added the new seat belts to tie it all together.

20231224_124431-X2.jpg


I think the interior came together very well, it looks nice, feels comfortable and sporty. I need to dump that giant steering wheel for something that's a closer match to the new parts. The shift lever just clears the dash and center console with my big hand on it, so that'll work.


20231226_164334-X2.jpg

20231226_164353-X2.jpg


The center console that was part of the seat frame had these funky rectangular recesses and no cup holders... so I removed the glued in insert and I have something in the works, I'll update the thread when it's done. ;)
Very nice
 

NYCEGUY01

Well-Known Member
Location
Willard, UT
Ive bought a couple versions of these over the years and then built my own off this design too but I seem to use the Winters shifters in everything...
My only complaint with them is getting them mounted up nice and hi where you can reach it easily

gb.jpg
 

Greg

I run a tight ship... wreck
Admin
Continuing on with the interior and started working on the small things to get ready to install the engine.

Finally decided on a steering wheel, a sporty 13.5" Grant 8511. I think it really finishes out the look and ties it all together.

20231229_171507-X2.jpg


I mentioned the center console insert and lack of cup holders. I decided to have a piece of steel cut from SendCutSend, drafted up the needed dimensions and found a pair of cup holder inserts that should work perfectly. I need to round out the forward corners a bit, to try match the radius on the console. I'll powder coat the steel and glue the pieces in place once I have the cup holders.

20240102_140529-X2.jpg

20240102_140614-X2.jpg


I'm adding power steering to this truck and decided I'd rather swap out the steering box while the engine was still out. I bought a 'complete' kit from Speedway Motors, but it was missing a couple parts. Stock the truck had a 3/4" steering coupler... the new box has a 13/16" coupler. I couldn't find one locally, so had to order it. Same story with a lower crank pulley for the power steering belt. I found 4 ARP bolts that I used to mount the 4 bolt box to the frame. At least the box is in now.

20240106_125504-X2.jpg

20240106_150426-1704645139687-X2.jpg


Then it was onto the carb, I bought a rebuilt Holley 3310, which is a 750 CFM vacuum secondary carb. I loved this model carb when I was working at Super Shops and ran one on my '71 Camaro with a full roller 355. I learned these carbs tweaking mine and really think they're a great street car carb. Even though mine was rebuilt, I wanted to make a couple changes to it. I swapped out the 68 jets for 72's, which should be what I need for my altitude. Then I pulled off the spring assembly for the secondaries, added a quick change cover and swapped in a lighter (Yellow) spring so the secondaries open up easier. It'll make for less MPG, but more smiles per gallon. It's been since the mid 90's that I've worked on a Holley 3310 carb!

20231229_173027-X2.jpg

20231230_133817-X2.jpg


I'm to the point with the engine & transmission install that I need little parts here & there and they're Nickle & Diming the progress, which is a PITA. It's just part of putting new parts in with upgrades, but gets old. Oh well.... I think I'm pretty much ready to swing the engine & transmission in place!
 

Greg

I run a tight ship... wreck
Admin
Engine and Transmission have been dropped into place and bolted up! I have a long list of stuff to finish up, but I'd like to try getting it running tomorrow and break the engine in. Need to install the transmission cross-member, bolt up the shift cable to the trans, install the trans cooler lines, install the radiator hoses, wire and install the new electric fuel pump & regulator, wire up the radiator fans, install the headers & exhaust,, distributor cap, wires, plugs etc, etc, etc!!

20240113_141519-X2.jpg

20240113_154552-X2.jpg

20240113_154728-X2.jpg
 

Greg

I run a tight ship... wreck
Admin
I got this running yesterday, but I keep having carb issues. I bought a rebuilt 3310 750 CFM vacuum secondary carb on Ebay and it's been fighting me at every turn.

I've had the carb off and apart 5-6 times now for leaks and after the initial break-in (30 min at 2500 RPM) I just can't get the carb to idle. I've set the timing, don't have any vacuum leaks, etc. I really like the 3310, but I'm getting tired of trying to get this one to run correctly. I'll pull it apart one more time and put a brand new metering block in. I'm just frustrated... need to check float levels and keep tweaking the carb.

I will say, the Vortec 355 sounds good... it revs crazy quick, for the little bit I've ran it. Can't wait to hear what it sounds like at idle, the cam should have a decent chop to it.
 

Greg

I run a tight ship... wreck
Admin
I need to get better about acting on Kurts well known 'Buy once, cry once" philosophy. I try to save a little money and it usually bites me in the ass. I
got tired of messing with the Ebay "rebuilt" Holley carb, the time and frustration of it not running right was disappointing, so I ended up buying a brand new Holley 3310. Out of the box, I installed some 70 jets (had 72's) and swapped the secondary spring for a lighter one, then bolted it on.

20240328_173825-X2.jpg


Turned the ignition on, the electric pump filled the bowls, gave the throttle a few pumps and cranked it over... it fired right up and idled perfectly. I turned the idle up a bit, adjusted the timing a little more, now that it actually idles, and played with the fuel mixture screws. They were about 1 turn out and it seems to run well right there. I let the engine go thru a couple warm up and cool down cycles, checked the ATF levels, watched the gauges, etc. At a cold start the engine had over 65 PSI oil pressure and once warmed up at idle, about 55 PSI! That's good to see, it's a standard pressure, high volume oil pump and the oil pressure is very healthy.

20240329_132452-X2.jpg


20240329_132734-X2.jpg


I'm a bit surprised the engine doesn't sound more nasty at idle... it's got a little lope, but I figured with with a 112 LSA and .560/.555 lift at the valve, it would sound pretty nasty.
 

Greg

I run a tight ship... wreck
Admin
Finally got the shortened driveshaft in, pulled it out of the shop for a bath to clean off a years worth of dust, then took it for a cruise around the neighborhood! It's nice to be driving it again, finding some bugs that need attention but that's OK. Driving is a huge step forward!

img_2024_04_24_19_38_38-X4.jpg
 

Greg

I run a tight ship... wreck
Admin
Finally buttoned up the power steering upgrade, it makes driving this truck so much better! Did a little more tuning and bolted the hood on. I've been driving it quite a bit today, took it to the hardware store in Fruita for some needs, then up and down the highway nearby. It's a fun cruiser!

With 3.08 gears and giant, 32" tall tires the gearing is way high. It's not quick out of the hole, but it revs pretty well and gets up to speed fast. It's not 'quick' but good enough to get your heart going.

I'm not sure what to do from here... I like the truck, but I'm not in love with it. I have more $$$ into it than I had planned, I don't think I could get out of it what I have into it. 🤷


1000012929.jpg
1000012933.jpg
 

Greg

I run a tight ship... wreck
Admin
The Magnaflow mufflers have been hanging on a rubber bungee cord since I got them in place, so this morning I spent time mounting the exhaust on proper hangers. The exhaust is tucked up as high as it could be without hitting any frame, crossmembers or the rear axle. The tips dump just ahead of the rear axle, so without full tailpipes it's a bit loud... but I like it. :p

20240713_111629-X2.jpg


I found a deal I couldn't pass up yesterday, brand new in box air ride system for a '63-72 C10... it's an EZ Ride kit with an adjustable track bar. I picked up a used set of ugly, chrome 20" wheels to put on the truck which *should* tuck inside the fenders when it's aired out. I need a set of tires for the 20's, I'll have to C notch the rear frame to clear the rear axle and I need a pair of 2.5" drop spindles up front to get low as possible.

Maybe I'll fall in love with it once it's bagged? If I really like it, I'll probably buy some much nicer and more appropriate wheels. I don't like staggered wheels, so hopefully I can keep it on 20's all the way around.

I'll put the 4 wheel discs brakes on at the same time as the air ride.... so it'll be quite a project all together.

20240713_072639-X2.jpg

20240713_072548-X2.jpg

20240713_072347-X2.jpg


I think these 20x9 6 lug Torque Thust lookalike wheels would work well, a bit of polished aluminum and a bit of Grey.

Screenshot_20241125_100029_Chrome.jpg


Greg

I run a tight ship... wreck
Admin
Been working on the swap to air bags, there's a lot going on and it's taking time to make progress.... upgrading to disc brakes, replacing all the ball joints, painting control arms, adding 2.5" drop spindles, notching the rear frame, adding the rear track bar, etc.

I picked up a cheap set of used, chrome 20" wheels and set of new, cheap 245/40/20 tires to test fit size, backspacing, etc at full drop.

20240730_150654-X2.jpg

20240730_161124-X2.jpg

20240730_181125-X2.jpg

20240731_120508-X2.jpg


I got the front bags, drop spindles and new parts on and had to set it on the ground. The rear isn't notched yet, so the frame is sitting on the axle housing. It'll drop another 2.5 to 2.75" once it's notched. I can't believe how AMAZING it looks at this point.... it looked OK before on huge 22's with the 3" & 4" drop, but this is a totally different level! It's going to be so fun to drive!

20240731_145912-X3.jpg

20240731_145856-X3.jpg
 
Top