Project Fauxverlander 200 Series Land Cruiser Build Thread

cruiseroutfit

Cruizah!
Moderator
Vendor
Location
Sandy, Ut
What'd be even COOLER is if I knew what internal bypass ports were. :D

Ah great question. This explains it nicely:
http://www.fourwheeler.com/how-to/0804or-fox-racing-bypass-shocks-assembly/

"bypass shock functions by allowing a metered amount of oil to flow around the valving piston by way of the tube(s). By allowing some oil to flow around the piston, the damping of the shock will be only a fraction of the total amount of valving on the piston. By controlling the bypass amount with the adjuster, the shock can be broken into small zones, each zone with a different amount of control than the previous. this is only true while the piston is passing through the bypass circuit or tube. Once the piston has reached the end of the circuit or tube, the effects of that adjuster are no longer effective. if the piston has entered another bypass circuit, then that adjuster is now controlling the bypass. if the piston is passing through any bypass tube, then there is no bypass and therefore 100 percent of the control is coming from the valving on the piston. typically, this area of zero bypass is common in the last 25-30 percent of travel. as the shock is compressing, bypass only occurs from the blue compression tubes, and as the shock is extending, bypass only occurs from the red rebound tubes."

Different technology but this video will explain it too:
https://www.youtube.com/watch?v=HBjZu3TfjF8
 
Last edited:

cruiseroutfit

Cruizah!
Moderator
Vendor
Location
Sandy, Ut
Stage Three - The Install Process

My initial plans were to do a marathon build similar to those we've done here in the past (fun video of the 100 build) but it just wasn't in the cards this year. We've been busy in the shop and I've been in an out of town a fair bit with work and play so I just couldn't put all the pieces of the puzzle together for a 48 hour build. I had hoped to get it ready enough to use as a chase rig for our Baja 1000 race a few weeks back but that too just wasn't in the cards. Fast forward a bit and I'm happy with the decision, the 100 worked perfectly in Baja and with 4 dudes living out of it for a week it was more appropriate than the clean interior of the 200 :D. Really though, with a handful of new to me installs including the OME BP51 system, it just made more sense to take my time and really get to know the vehicle.

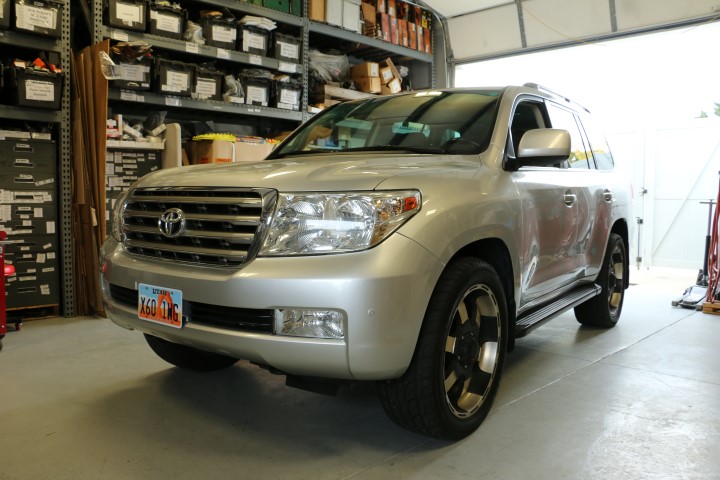
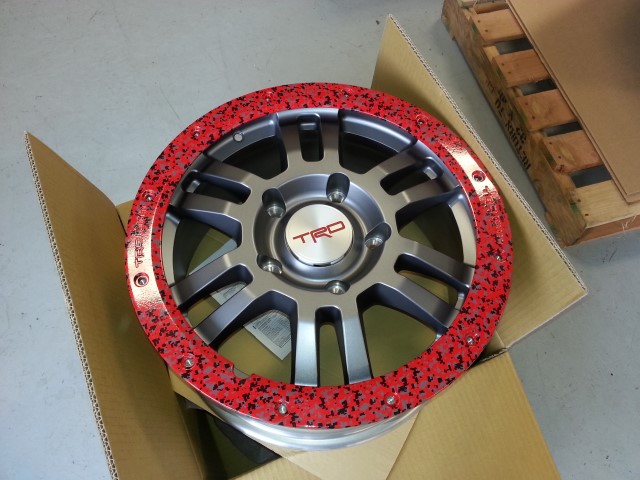
Project numero uno was getting rid of those nasty 22" wheels in favor of something more appropriate, like a lot more appropriate. The TRD Rock Warrior wheels feature a removable trim ring, some call it a bead protector (let me be clear it is not a beadlock), I call them beauty rings. You can either run them in their native bare aluminum finish or paint or coat them to a different flavor of your liking. Not if but when they get rock rash, you can remove them and re-coat, ensuring a nice finish for years to come. I opted to have mine power-coated with a little bit of flare, hydrographics. One of our local powder-coaters (Armor Coatings) is offering some neat hydrographic options which is basically a decal that is applied over the top of a powder-coated piece and then clear coated to lock the graphic into place. It has some really neat potential and adds a neat aesthetic flare, not typically my flavor but I figured this 200 needed something to make it stand apart from the other Sequoias on the road. ;)

sus_bump_1.JPG


We decided on a candy red powder finish with a black/grey digital camo hyrdrographic. A few days later they had them finished up and I rushed over to check them out. I must say I was super happy with the end product. Again different and not for everyone but I dig the flare and if my appetite for them wears in the future, I know a sandblast and powder-coat guy. :D

sus_bump_10.jpg


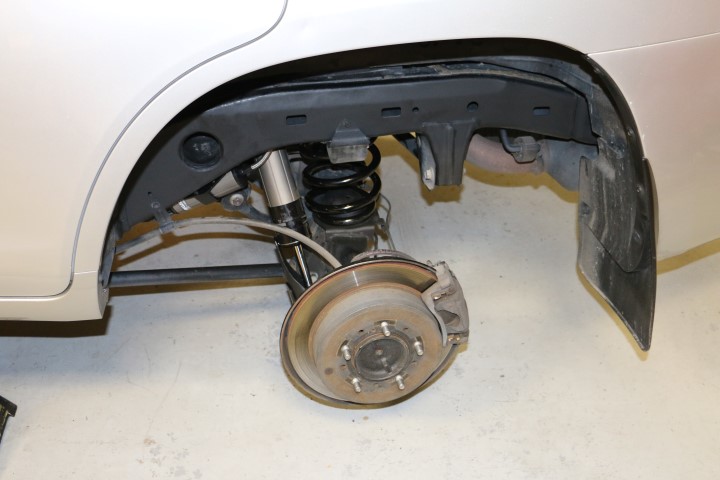
Next up was the suspension. A Sunday morning freed up and a couple of good pals offered to come help rock out the suspension, Dave (DMC), Johnny (WildYoats), both of whom are 200 Series owners and Micah (Micahman) came over and helped make fairly quick work of the process. There were a few learning curves with the mounting of the BP51 reservoirs and front coilovers. As my units were some of the very first into the US we found some minor variance that we had to addressed, the most important being to chase the holes on the top plates of the struts. The BP51's use a bolt into the upper strut mount rather than the typical stud/nut configuration on the stock. We fought the 1st side for a bit of time before we concluded the holes were tapped prior to the anodizing and thus the bolts would start and seat approx. half way before stopping dead in their tracks. It's possible we could have drove them home and cut the threads a bit in the softer aluminum. We pulled the coilover assemblies, gave them a quick chase with the tap and reinstalled with minimal affair. The rear was very straightforward, shocks and coils. The reservoir mounts took a minute to sort but in the end the fit and finish were impressive. The KDSS sway bar system does add a few additional steps in the install process, make sure you're up to speed on the system prior to working on it.
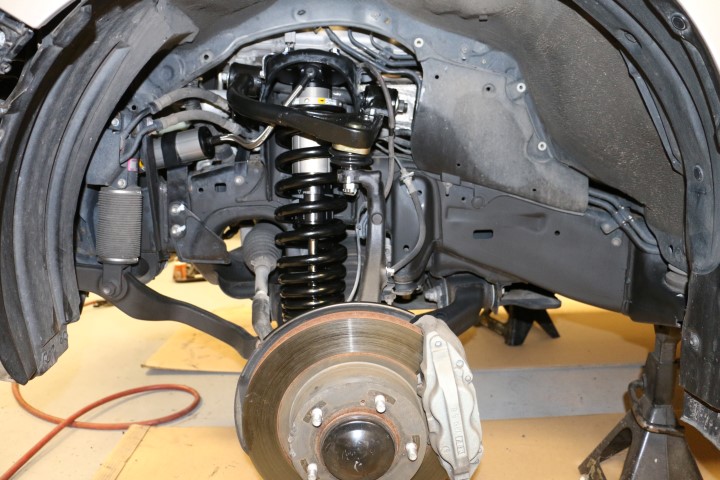
sus_bump_2.JPG

Front OMD BP-51's with Light Racing Upper Control Arms

sus_bump_3.JPG

Rear OME BP-51 Suspension

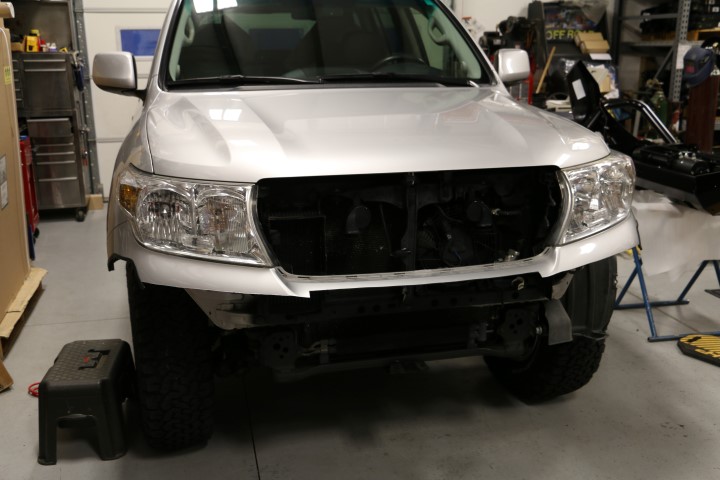
While the front suspension was coming apart for the suspension, the stock front bumper was coming apart as well. The 200 Series ARB winchbar fitment requires reuse of the upper portion of the front bumper cover. This allows for a tidy look and a winchbar that doesn't have to have an awkward top deck trying to match the curvature of the fenders, headlights, grill. We called it a day with the completed suspension and I picked up on the bumper install a few nights later that week. In the meantime, I needed to get some rubber installed. We work closely with our local Big-O, they've been taking care of our tire and alignment needs for the last 10 years and I can't say enough about their solid service. The mounted up the tires and those 22's were a thing of the past... finally.

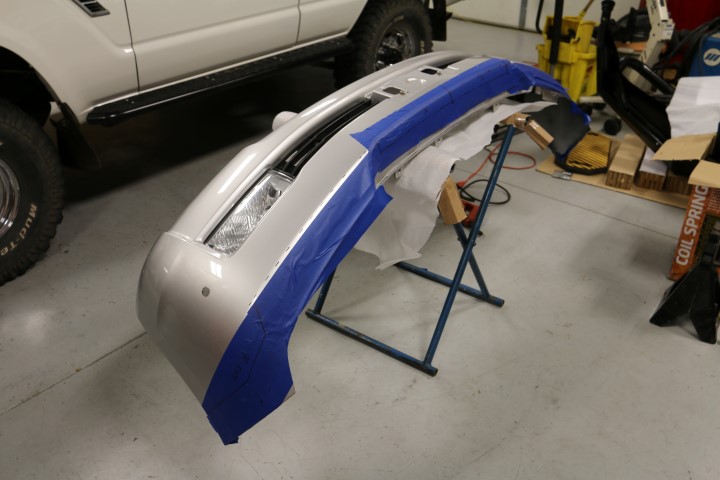
Trimming the front bumper isn't much of a task with the supplied templates but as always, measure twice, cut once. A paint matched front bumper cover isn't cheap, measure a third time. I used masking tape to mark the template cut lines as well as protect the finished pieces that will be utilized to finish the install. The plastic cuts really cleanly without much effort and any exposed edges finish off with an edge trim included with the bumper fitting kit.

sus_bump_4.JPG

Marking the front bumper cover to trim

sus_bump_5.JPG

Trimmed bumper cover installed

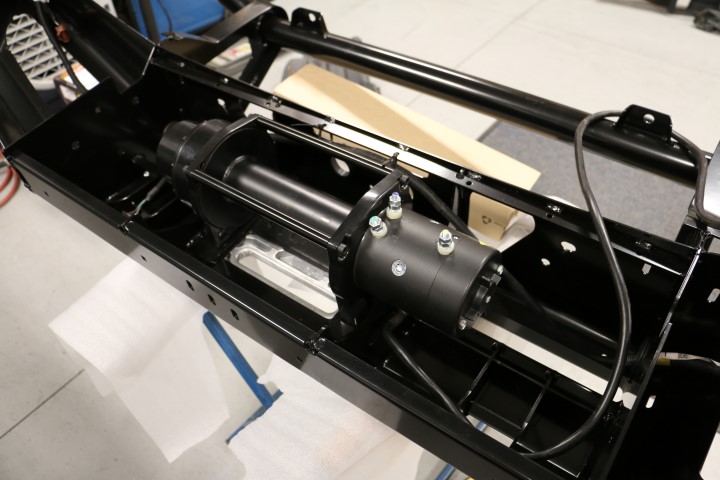
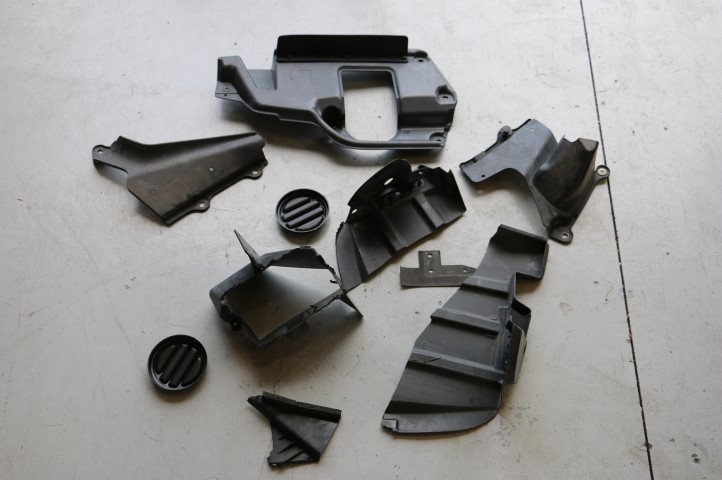
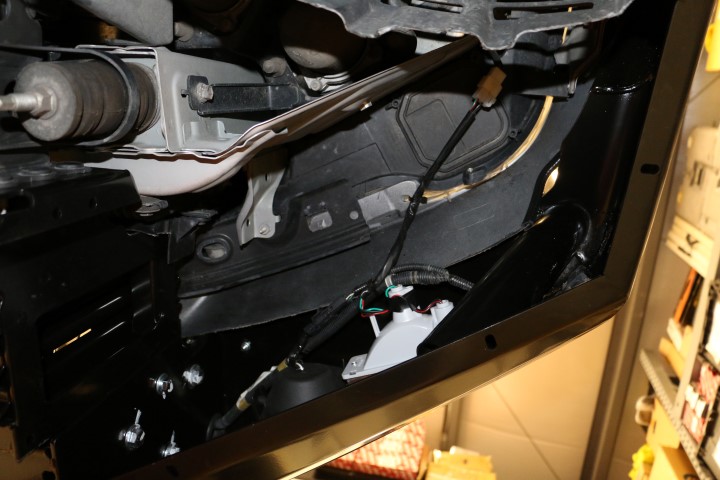
The stock bumper isn't the only trim item, in fact by the time the suspension is completed you'll have a nice assortment of plastic bits that you can toss in the trash. I mounted the VR10000-S, modified the lower frame mounts with a drain hole. The inner fender liners will require trimming, the 200 winchbar has a very nice system for retaining the now trimmed liner with cage nuts that leave it with a clean finish.

sus_bump_6.JPG

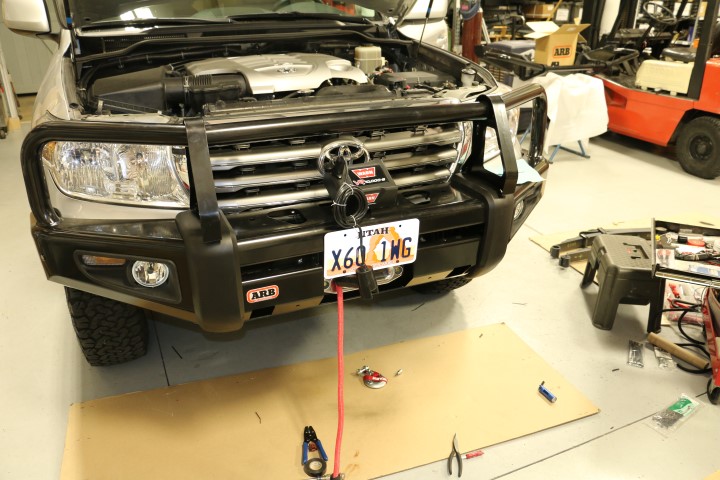
Mounting the Warn VR10000-s

sus_bump_7.JPG

Left over parts from trimming

sus_bump_8.JPG

Wiring complete to the fog and turn signals using weatherpack connectors.

sus_bump_9.JPG

Spooling the synthetic rope on the winch

sus_bump_11.jpg

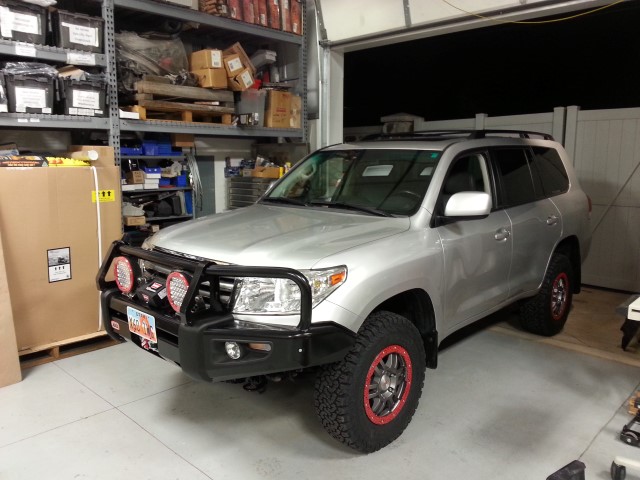
Finished up :cool:

Now it was time to start stretching it's legs and see what this BP-51 is all about. Sorry video isn't super tight on the action, it was really an impromptu run as we were out testing Monica (the Canguro 200). I started making some passes on a light whoop section and bringing up the speed as it felt comfortable. At this point... super impressed!

[video=youtube;xLJ4Lbv0SiU]https://www.youtube.com/watch?v=xLJ4Lbv0SiU[/video]

Next up, snorkel, steps, side rails and rear bumper :eek:
 

Tacoma

Et incurventur ante non
Location
far enough away
I totally skipped this back in October, because I figured there'd be more later, and I was not disappointed. ;) The HP/TQ numbers look fantastic for this vehicle, much more lively than the slightly underpowered 100Series. The weight is up there, but that's to be expected of the quiet, comfortable, flagship Toyota SUV, and the payload is also impressively high. I'd expect this to be a very cozy home on long road trips.

As we've discussed previously, I think Toyota designers are paid to make ugly front ends, from the 80 up. This was no exception, but as usual, the ARB bumper changes it to an appropriately menacing ninja style, and it looks fantastic. Not digging the rock rings, but I don't have to because they aren't mine. :D And they're not awful, I just like anodized aluminum a lot more, and you can blame Summit and my past life as an MTB racer during the CNC explosion of the 90's for that.
It's my opinion that the styling of these sweet barges really wake up with minor modifications (small lift, bumpers, tires) and this is really no exception. Looks fantastic with the ARB bits and new sneakers. SO much better than factory.


One thing I missed, or maybe it isn't in this thread, is a short explanation of just what the "KDDS sway bar" is? I"m assuming it's some sort of actively-damped setup from the pic but I'm curious and I'd rather hear your explanation than google. ;)

Stellar project as usual! The 1/2t Brodozer guys should be all over those wheels!
 

cruiseroutfit

Cruizah!
Moderator
Vendor
Location
Sandy, Ut
...One thing I missed, or maybe it isn't in this thread, is a short explanation of just what the "KDDS sway bar" is? I"m assuming it's some sort of actively-damped setup from the pic but I'm curious and I'd rather hear your explanation than google. ;)

Great question. KDSS is Kinetic Dynamic Suspension System. While it has a swap bar connected to both ends of each axle, there is a hydraulic dampener mounted in between each half, thus allowing it to make on the fly changes to the sway's spring/dampening rate. On the road it can have an extremely stiff torsion spring preventing body roll at high speeds and off-road it can act similar to a disconnected system. It's pretty well acclaimed in the Toyota realms as a worthwhile system and if/when it proves otherwise, it can be replaced with a traditional sway bar using all the same mounts. Here is an exciting video highlighting the KDSS system: https://www.youtube.com/watch?v=NLF6n3nMwww

...The 1/2t Brodozer guys should be all over those wheels!

And to think I was only trying to impress you. :D

Had you been able to swing SEMA it would have been a 3 year dejavu on the 100 maiden road trip.
 

I Lean

Mbryson's hairdresser
Vendor
Location
Utah
I'm glad I watched that exciting video, toward the end I finally understand what it's doing. It's not disconnecting the swaybar, it's disconnecting the swaybar mount. Pretty simple solution really. Pretty cool!
 

cruiseroutfit

Cruizah!
Moderator
Vendor
Location
Sandy, Ut
Oooh baby, these are works of art.

Kurt are this going to be available for all models? I am mostly interested in some for 4th gen 4runner.

Eventually, yes. Currently they have stock in the US for the JK, 200 and late model FJC. As they get caught up on production/sales, the 5th gen 4runner, Tacomas and then older 4Runners will get applications and fitting kits.
 

cruiseroutfit

Cruizah!
Moderator
Vendor
Location
Sandy, Ut
Stage 3 continued, baby steps:

Time has been scarce this winter as I've been busy with work, play and other projects (finally making some headway on the Old Lady's 66' FJ45 build) but we had a few minutes of down time last week during the holidays and more importantly, the 200 wasn't buried in snow. This thing has needed brakes since day one, in fact I commented on the warped rotors to the seller (husband) and his reply was that his wife hadn't mentioned a thing about it. I laughed and said "they never do". They were not horrible but when braking at 60+ mph hour speeds there was definite shimmy that needed to go away. I had conceded to using stock OEM rotors and our aftermarket AISIN pads (same as OEM other than box color and price) but I started investigating higher performance options even before I had ordered the first part for the build. Performance 360 kept popping up on my radar and we had been impressed by a set we recently installed a customers FZJ80, so why not give them a go?

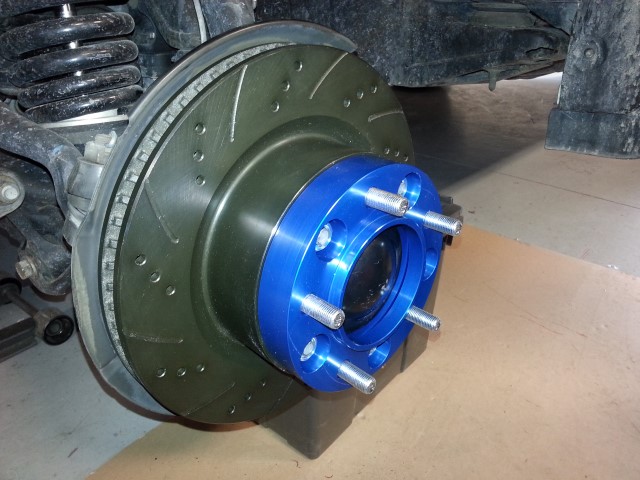
I chatted with the gents at Performance 360 and things snowballed, the next thing I know we had a full stock order worked out, all of their front and rear LC applications. We ordered most in the native zinc/silver coloring but I did snag a front and rear set of drilled and slotted rotors with a black coating for the 200. While the front wheels were of off to swap rotors, it was also perfect time to install Spidertrax 1.25" wheel spacers. I hadn't included these in my original build parts list but following the suspension and wheel/tire install, I felt the front end needed a tad more width. Many have reservations about wheel spacers and a number of diatribes have been offered about them one way or the other. I've been running them for a long time on my 100 and other rigs previous to that, I've got customers who have been running them for 10+ years. My diatribe, a quality spacer, properly installed and periodically maintained is a non-issue. Your results may vary so take it for what it's worth. Rotor's on later model Land Cruisers are super cake to do, like 2 bolts on the caliper, slip the old rotor off, the new rotor on and you're done. We knocked out the fronts rotors and spacers and went back to work on paying projects. :D

front_brake.jpg

Front Performance 360 drilled/slotted rotor & Spidertrax spacer

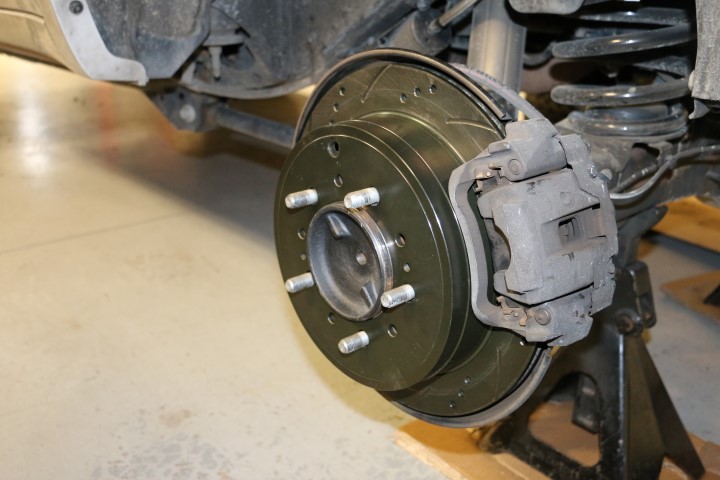
This afternoon offered a bit of shop time to finish up rotor upgrades, we swapped the rear, inspected and adjusted the park brake and snugged it all back together. The rear is also a slip-fit rotor but the caliper assembly has a couple of additional bolts you have to deal with but nothing major. The brakes weren't the only shudder I wanted to resolve, both side mirrors had an annoying shake at highway speeds. Toyota is well aware of this and offers a repair "kit" to fix the issue. The kit consists of 3 new screws that incorporate a lock-washer and flat washer rather than the original integrated flat washer. It's a 5 minute job to swap them out and as the bottom mirror trim is likely to break when you access the screws, they include that too. If your 200 Series mirrors are wiggly, check out the Mud thread that includes a copy of Toyota's Technical Service Bulletin (TSB) and the needed part numbers for repair.

rear_brake.JPG

Rear Performance 360 drilled/slotted rotor

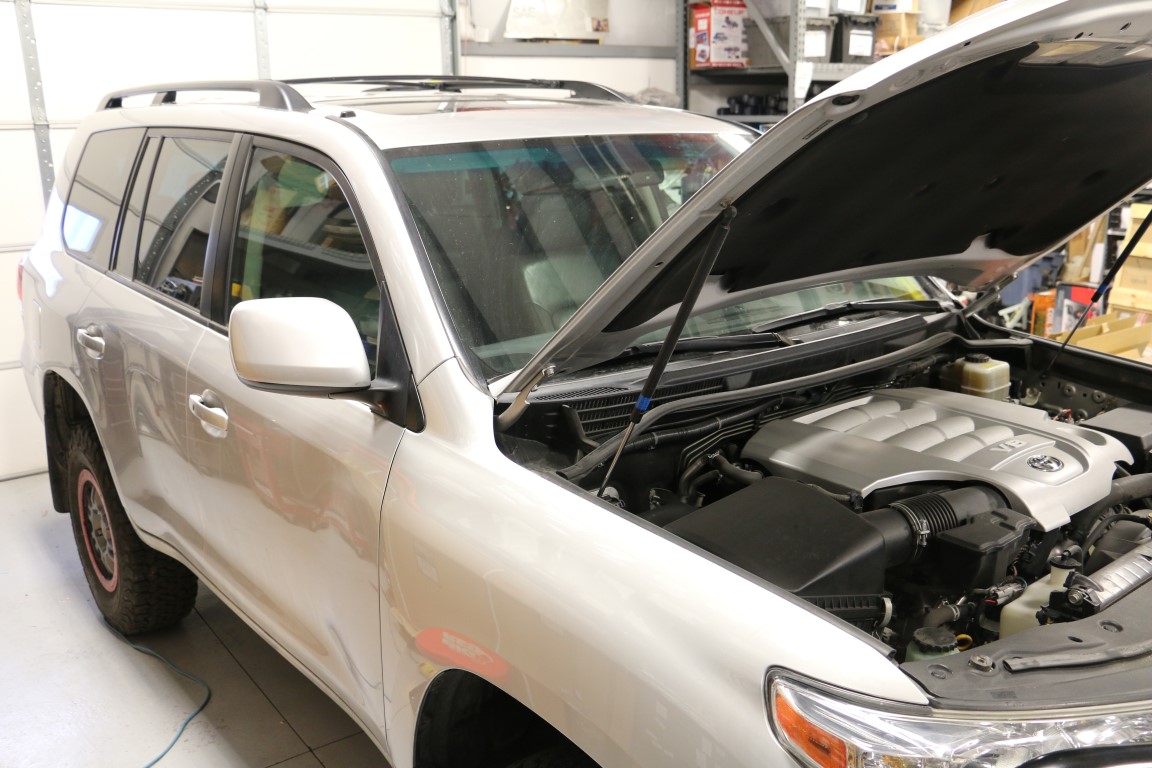
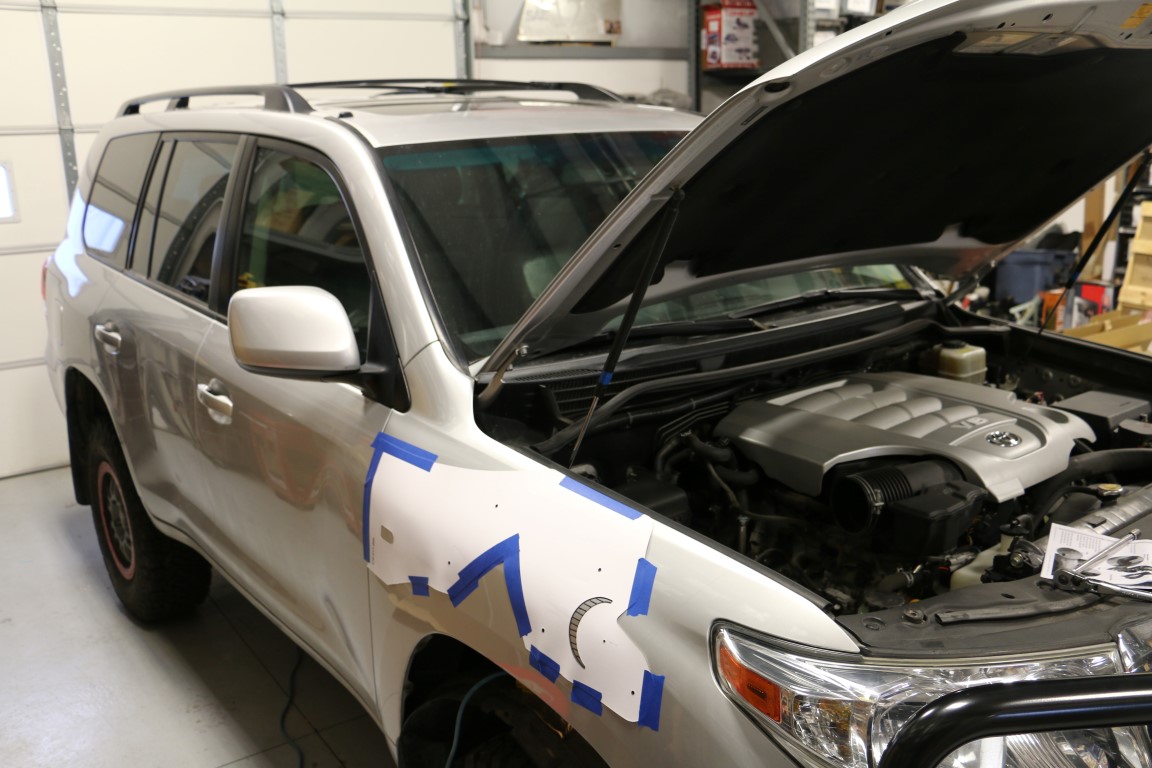
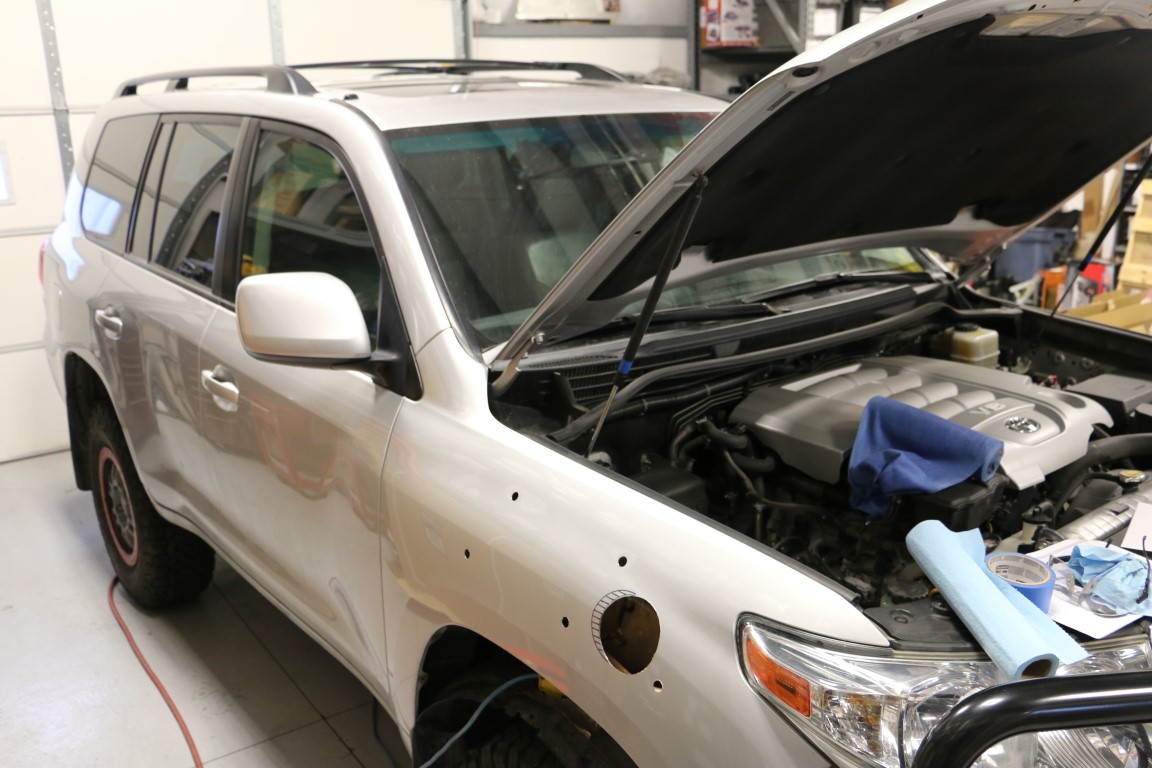
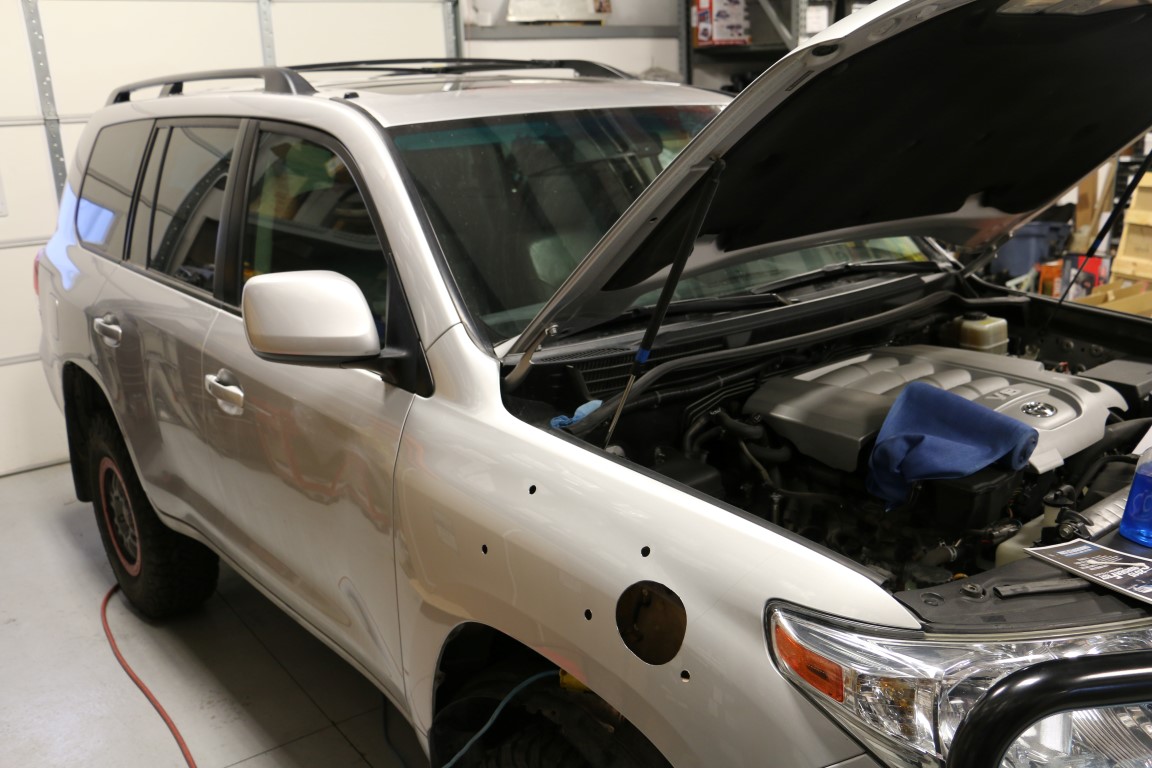
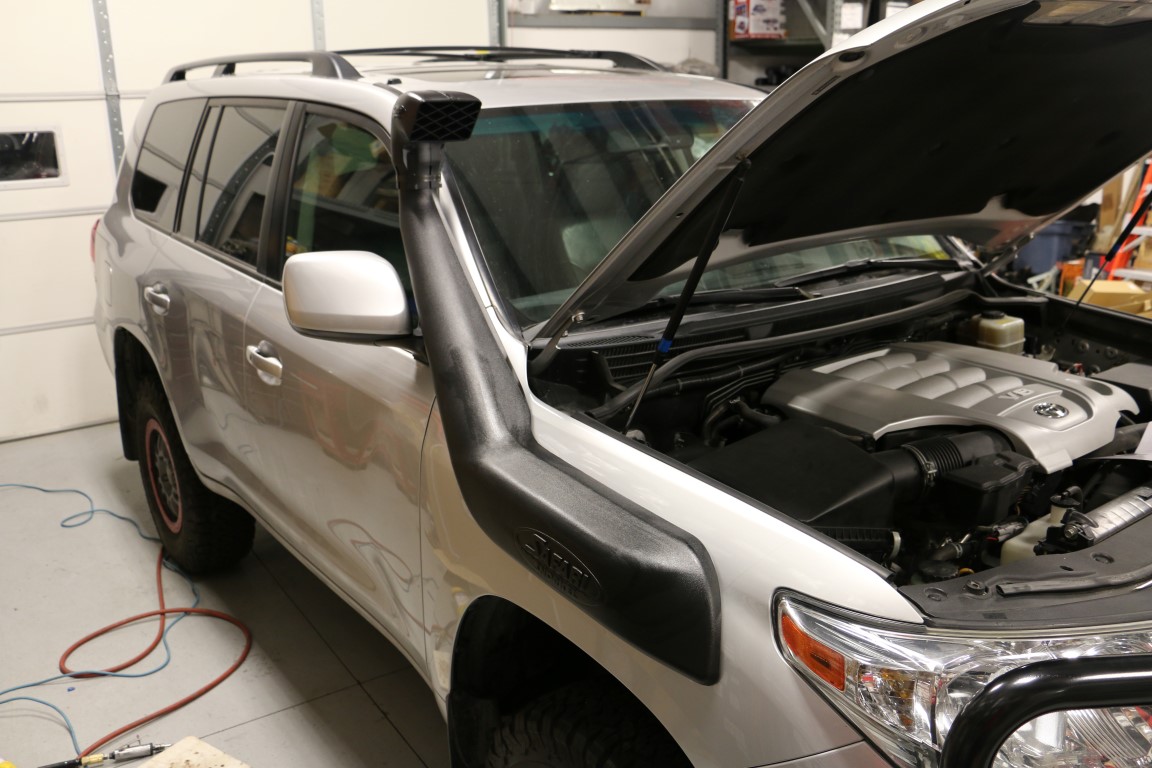
So, what next? Drawers would be nice to get tackled but I wasn't feeling that energetic, the rear bumper would have to wait until I had more time. Snorkel it was. The 200 Safari Snorkel is very straightforward, the instructions are complete and they've made some pretty nice changes to the kit comp. Now, allow me a minute to preach if you will. There are a bunch of knock-off snorkels hitting the market that are nothing short of a direct copy of the Safari Snorkel. We know them well, as we move a fair number of snorkels each year we get suited by companies trying to sell us kits and through that process we can learn a bit about their R&D (or lack thereof), their customer service, tech support, spare parts availability, etc. I fully know that Safari Snorkel's cost 2-3x that of a no-name Alibaba solution but I also know I can call them if something doesn't fit, I can get a spare part if something fails in the future and I know their plastic is going to last 20+ years in the sun, in the snow and even on the rocks. Rant off, picture time!
snorkel_1.JPG

Before

snorkel_2.JPG

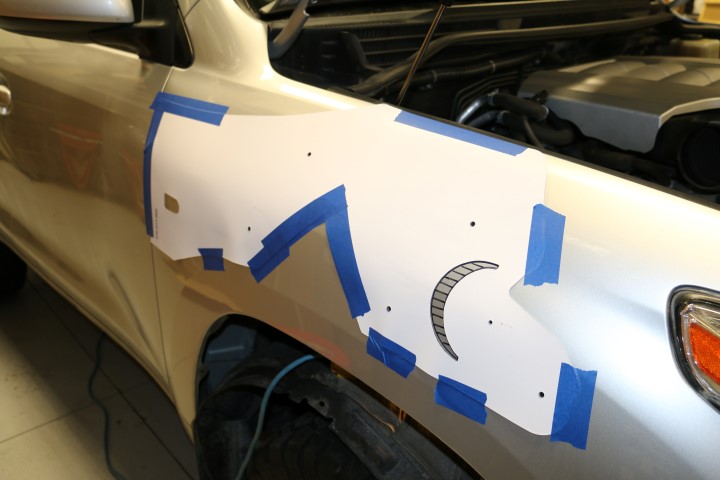
Template attached, holes marked

snorkel_3.JPG

Holes

snorkel_4.JPG

Bigger Holes

snorkel_5.JPG

Finished!


Some detail shots of the process.

template.JPG

Closeup of the template and fender marking

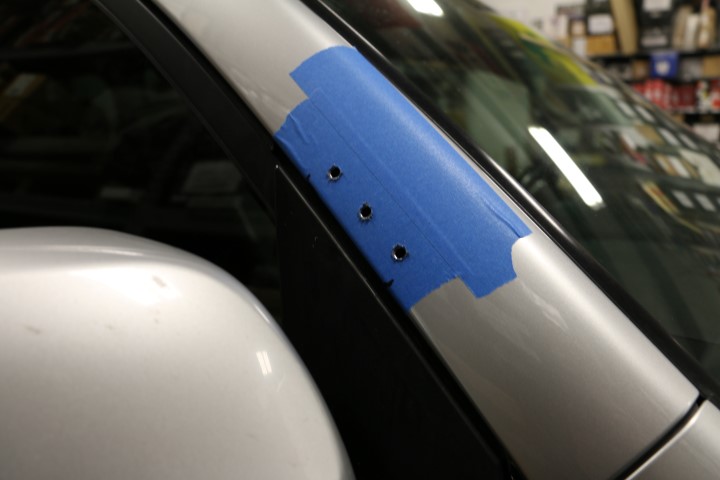
pillar.JPG

A-Piller marking and drilling using a step-drill

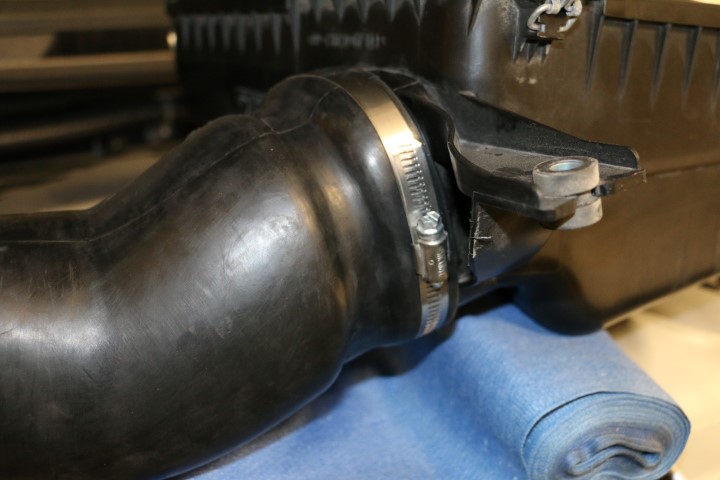
hose.JPG

The hose mounting between the factory airbox and snorkel body was giving us some fits so we ended up warming it up to make the rubber more pliable. That did the trick and it slipped tightly onto the factory airbox and did the needed contorting to adapt to the snorkel body.

The snorkel is just part one of the waterproofing process, I'll be using the ARB Differential Breather kit (part# 170112) to tie the gear boxes up to the breather manifold which will be mounted up high in the engine bay. Some other considerations on the snorkel install can be found in a Tacoma Magazine article I wrote here.

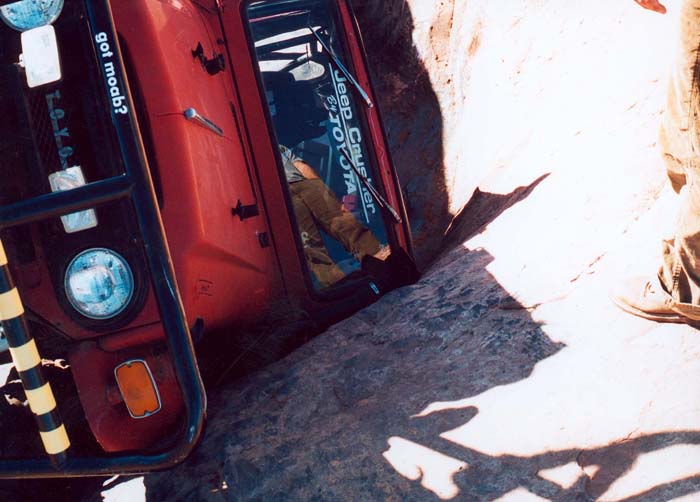
One last pic to echo my earlier genuine Safari Snorkel comments. My buddy Greg laid his FJ40 on it's side in a Moab hot tub in the late 90's. He was sure the snorkel was going to be cracked. Nope, flexed right back into shape. 15 years later and that snorkel still looks and functions great on Greg's daily driver FJ40, Safari Snorkel for the win.

Cruzr-41.jpg
 

TJDukit

I.Y.A.A.Y.A.S.
Location
Clearfield
I totally agree with you on going with the better quality, better customer service, and the company that actually put the time into R&D even at 2-3X the cost.
 

cruiseroutfit

Cruizah!
Moderator
Vendor
Location
Sandy, Ut
I totally agree with you on going with the better quality, better customer service, and the company that actually put the time into R&D even at 2-3X the cost.

It's an ethical dilemma. These Chinese companies to date have failed to innovate on anything, they simply copy/paste often using inferior parts and construction. Hell, I saw a guy on Facebook making a business of taking China made knock-off led light bars and opening them up and sealing all the leaks and poor connections. Rigids and Safari Snorkels and Maxtrax, etc innovate and that comes at a certain cost. We (Cruiser Outfitters) refuse to stock and of knock-off parts despite the often huge margins. If it's worth doing, it's worth doing right. Buy once, cry once. I'm too poor to buy cheap parts.
 

bobdog

4x4 Addict!
Location
Sandy
I can see where a snorkel could be an engine saver and could be the difference between making it out of certain situations, but by the time you are over the stock intake wouldn't that sweet interior be pretty much a total loss?
 

Hickey

Burn-barrel enthusiast
Supporting Member
I can see where a snorkel could be an engine saver and could be the difference between making it out of certain situations, but by the time you are over the stock intake wouldn't that sweet interior be pretty much a total loss?

A lot of guys are running snorkels for heavy dust, such as when traveling with several vehicles in desert areas.
 

Tonkaman

Well-Known Member
Location
West Jordan
In many vehicles like my Tacoma the air filter is down low and right in front of my tire. It got super dirty before the snorkel, now it's never dirty.
 

cruiseroutfit

Cruizah!
Moderator
Vendor
Location
Sandy, Ut
I can see where a snorkel could be an engine saver and could be the difference between making it out of certain situations, but by the time you are over the stock intake wouldn't that sweet interior be pretty much a total loss?

Great question. So long as you are moving, the cab is quite sealed. Floors all have drain plugs if/when you do get some moisture but it would have to be pretty long exposure to get wet. Along with water fording an often ignored yet important consideration is the cooler/cleaner air you get from a snorkel versus from within the fender.

Here is a good example of a wet engine but a dry cab from our Expeditions7 trip in Russia.

river_cross_vid_capture.JPG
 

cruiseroutfit

Cruizah!
Moderator
Vendor
Location
Sandy, Ut
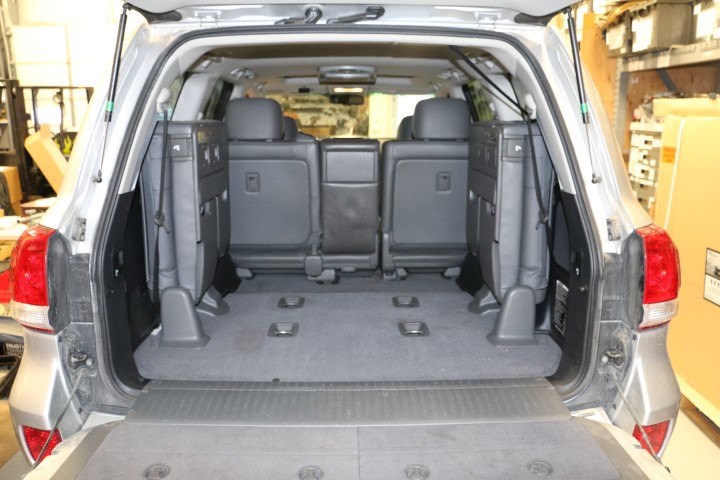
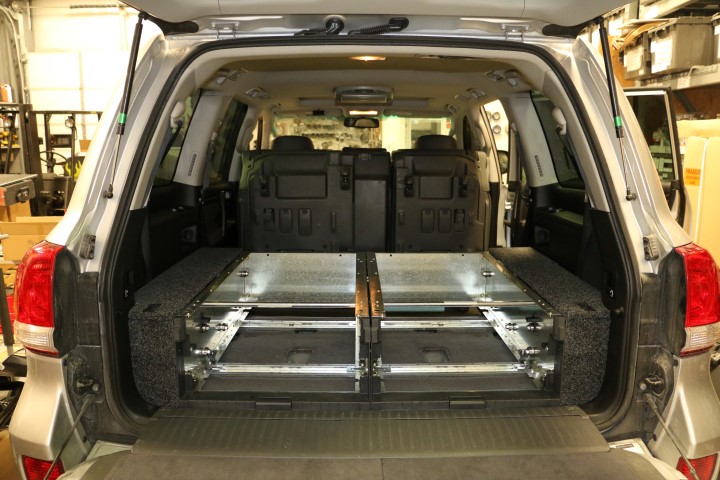
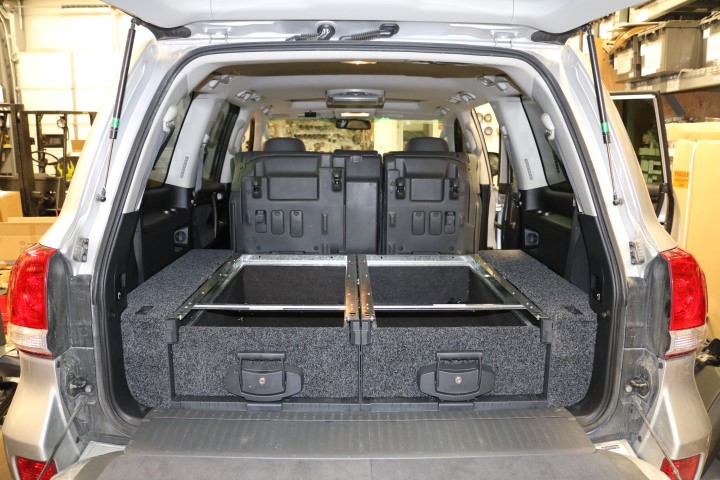
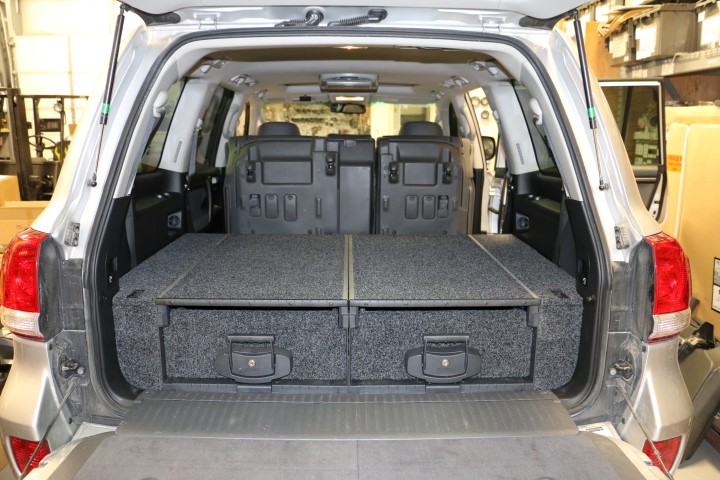
Stage Three Continues - Drawers

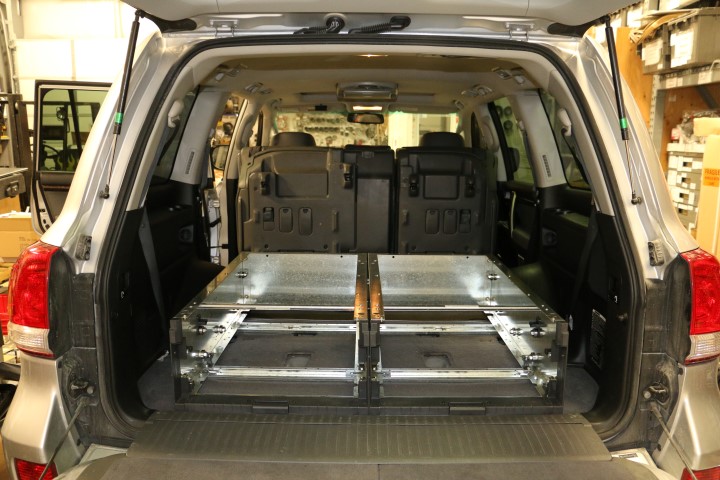
My buddy Dave is a fellow 200 Series owner and recently installed a set of Outback Drawers in his 200. He had actually purchased them along with a 100 Series fit kit for his UZJ100 but it went on to a new home before he mounted the drawers so he mounted them into the 200. At the time there wasn't a 200 specific fit kit here in the US so he used the already purchased 100 fit kit and cleanly modified it to fit the slightly different side profile of the 200. His install was super tidy but he was still curious about the 200 fit kit, just curious enough to help me install my drawers this evening. :cool:

Start to Finish

drawer_1.JPG


drawer_2.JPG


drawer_3.JPG


drawer_4.JPG


drawer_5.JPG


drawer_6.JPG


drawer_7.JPG


The install went pretty smooth. We've installed a handful of drawer kits in the shop and Dave did his not to long ago so most of it was pretty familiar to us. We varied a bit from the instructions. They have you assembled the two drawer frames outside of the vehicle and then install together. However not only are you dealing with a bulky frame, it's a VERY tight fit in the 200's and I found it easier to install on side with the bolts loosely started and then install the second. With both loosely fitted we can them mount them together and true them up. It worked perfectly and we had it finished up in just about 3 hours total including some vacuuming/cleaning before hand and some BS time through the middle. I've got a couple of things to work on back there yet to come including 12V/USB outlets and mounting/wiring the fridge. I need to spend some time laying out my electrical wants needs for the entire vehicle so I can knock it all out at once rather than have wires heading every direction twice. I'll save that for another day.

I've gone on and on about how much I've enjoyed the drawers in the 100 Series over the years, so I'll save you my diatribe tonight :D
 
Last edited:
Top