Project Skuggy

Corban_White

Well-Known Member
Location
Payson, AZ
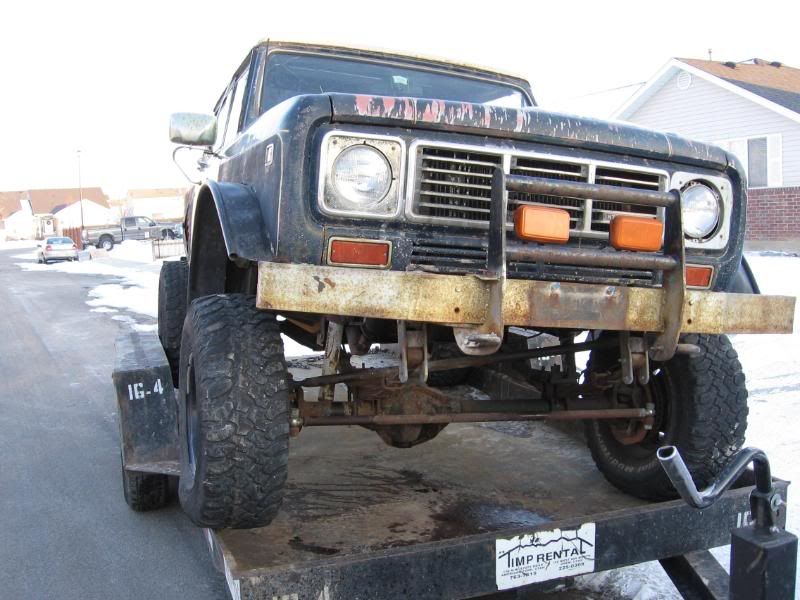
Well, I've been on here for a while and working on this build even longer so I figured it's time to start a build thread. A while ago my friend and I picked up a 76 IH Scout II for around $600. It ran but that's about it. We then began the slow (more time than money but not much of either) process of making this into a street driveable wheeling machine aka "skuggy" (scout-buggy) :D
Here it is when we got it home:
IMG_0707.jpg


IMG_0709.jpg


Then it sat behind the house for a while getting some freeze plugs replaced, new ignition, etc.

IMG_0713.jpg


Then we removed all the nasty carpet from the floor, walls and celing and wire wheeled the rust off (this only took about 4 days and 4-5 wire wheels):eek: but, I neglected to get any pics of this step. When we got the Scout it was w/o seats so we stole some from a 87 civic and fabbed up some mounts to use the origional risers.

IMG_0810.jpg


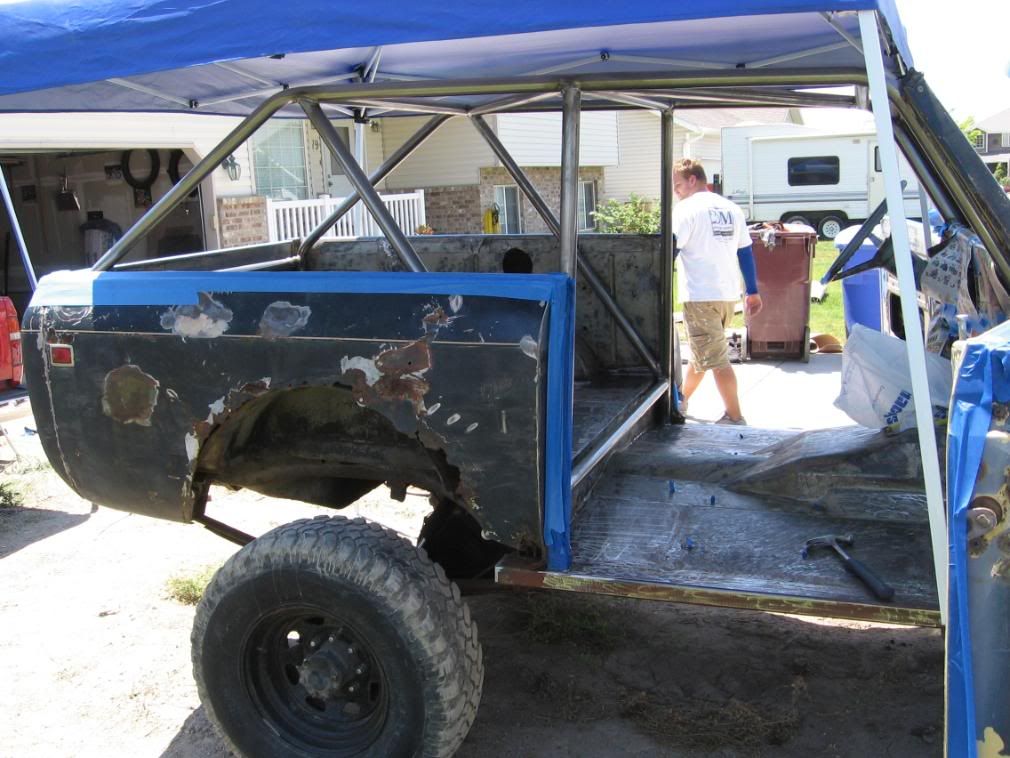
Then we started cutting out all the rusted thru spots of the floor. In hindsight we should have just replaced three pieces; the drivers side, the pass. side and the back. :D Since this is a budget build (not my budget-my buddy's.......well, his wifes:)) it was decided to just replace the pieces below.
 
Last edited:

Corban_White

Well-Known Member
Location
Payson, AZ
IMG_0811.jpg


IMG_0812.jpg


IMG_0813.jpg


IMG_0856.jpg


IMG_0859.jpg


IMG_0861.jpg


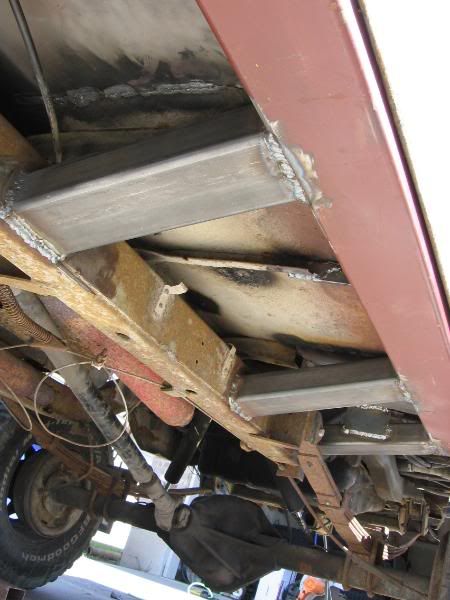
Oh yeah, and somewhere in the middle of all this cutting we cut out the rockers and welded in some integrated rockers/sliders made from 2x4x.120 tube. Yes I know that the body is now welded solid to the frame.....in fact, I have removed all the rotted rubber and rusted steel body mounts and replaced them with my own steel ones. This will facilitate the mounting of the cage in the near future as well as helping keep the rusty body attached to the rusty frame.

IMG_0862.jpg


IMG_0863.jpg


IMG_0864.jpg


IMG_0870.jpg
 

Corban_White

Well-Known Member
Location
Payson, AZ
IMG_1018-1.jpg


IMG_1017.jpg


I didn't get any good pics of the patch panels welded in but they can be seen in this one.

IMG_0993.jpg


And these for the rear:

IMG_0998.jpg


IMG_1015.jpg


IMG_1016.jpg


I also had to weld some supports onto the back as the weight of the tailgate was ripping the back of the body off:

IMG_0999.jpg


Now to get started on the cage!!!!!!!
 
Last edited:

Corban_White

Well-Known Member
Location
Payson, AZ
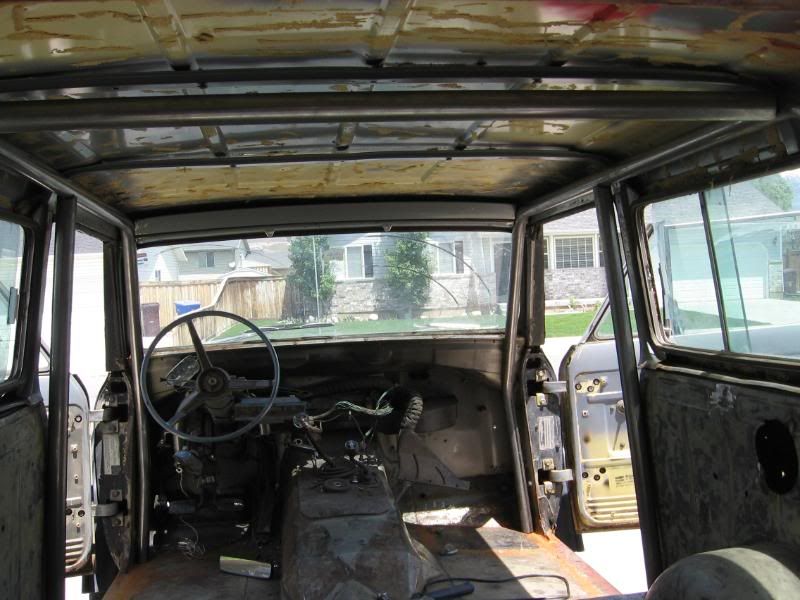
We measured and measured and measured to get the cage to follow closely to the body. we had to do a little trimming and patching up front and the dash had to come out (we will custom make a new one) but I'm very happy with how it turned out.

IMG_0995.jpg


IMG_0996.jpg


IMG_0993.jpg


IMG_0997.jpg


IMG_0994.jpg


IMG_1001.jpg


IMG_1000.jpg


IMG_1002.jpg


IMG_1003.jpg


IMG_1004.jpg
 

Corban_White

Well-Known Member
Location
Payson, AZ
It's all in now, just tacked. I need to get it all welded and then start on the dash. Oh, and there will be one more bar across the back (just waiting on some tube clamps to make it removeable) as well as some gussets on the corners. I know it should have an angled piece on the B-pilar but my buddy says no so we can still access the rear seat. He knows the weakness and isn't such an extreme driver. (yet, maybe we will add it later)

IMG_1005.jpg


IMG_1006.jpg


IMG_1007.jpg


IMG_1009.jpg


IMG_1010.jpg


IMG_1013.jpg


I'll post updates as we progress but this is a pretty slow build so don't expect too much. Still needs front and rear bumpers, tube fender flares (tied into the bumpers and rockers/sliders) and a few other things before we can get it registered.
 

Corban_White

Well-Known Member
Location
Payson, AZ
not yet.......that's why its a project!!!


Although I don't think it will ever be quite as extreme as yours, we are planning on topping out around 40's and such, but eventualy there will just be tubes and flat sheet metal between them for a body :D
 

Bart

Registered User
Location
Arm Utah
Nice write up so far. Are you going to add a horizontal piece of tube to follow the top of the tub line in the rear? That would help to triangulate the rear section.
 

ChestonScout

opinions are like Jeeps..
Location
Clinton, Ut
not yet.......that's why its a project!!!


Although I don't think it will ever be quite as extreme as yours, we are planning on topping out around 40's and such, but eventualy there will just be tubes and flat sheet metal between them for a body :D


Gotcha. Good luck on the build. If you have any questions or need ideas...my Scout is just sitting
 

Attachments

  • 44 flex.jpg
    44 flex.jpg
    13.8 KB · Views: 38

Corban_White

Well-Known Member
Location
Payson, AZ
Some updates on the scout, I finished welding the cage, sprayed bedliner on the inside, reinforced and painted the seat mounts, and fabbed up a dash. It is just temporarily mounted (hot glue :D:D) for now. Pics:
IMG_1086.jpg


IMG_1090.jpg


IMG_1091.jpg


IMG_1092.jpg


IMG_1096.jpg


IMG_1098.jpg


IMG_1093.jpg
 
Last edited:

Corban_White

Well-Known Member
Location
Payson, AZ
IMG_1094.jpg


IMG_1095.jpg


IMG_1103.jpg


IMG_1104.jpg


IMG_1105.jpg


IMG_1106.jpg


Oh yeah, thanks to summit machine for the tube clamps for the rear bar. Great product, great service. Highly recomended.
 
Last edited:

I Lean

Mbryson's hairdresser
Vendor
Location
Utah
It always amazes me how much a coat of paint (or bedliner) can add to the look of a project. Looking good!
 

rmpipe

Member
Location
Eagle Mountain
wow man, that's lookin' good!!! I really like the diagnol bend in the dash. The removable bar in the back is a good idea to still be able to access the truck bed. Strangely that Scout looks very familiar
 
Top