The saga of my atlas install

astjp2

Active Member
Location
Riverdale/Alaska
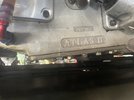
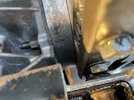
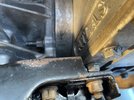
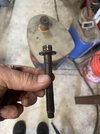
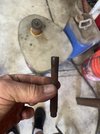
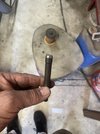
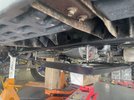
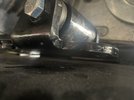
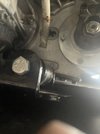
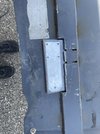
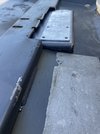
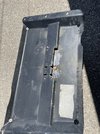
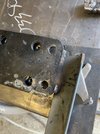
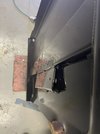
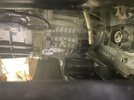
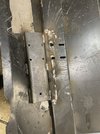
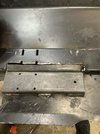
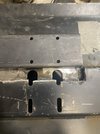
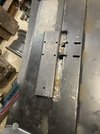
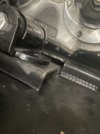
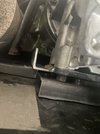
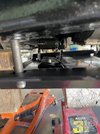
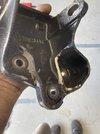
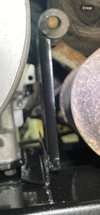
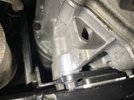
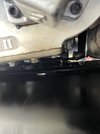
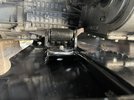
So I bought my 05 LJ in 19 as a wreck. Copart delivered it and I was able to put on a basic lift, 2 different dana 30’s and straighten the frame. This summer after years of collecting parts, including an atlas and a ucf high clearance skid it was time to get to work. Well the skid and frame alignment is acceptable after straightening, but now it’s time to get the skid and transmission mount to fit with the atlas.
 

Attachments

  • IMG_9414.jpeg
    IMG_9414.jpeg
    340.9 KB · Views: 19
  • IMG_9281.jpeg
    IMG_9281.jpeg
    276.9 KB · Views: 19
  • IMG_9280.jpeg
    IMG_9280.jpeg
    314 KB · Views: 19

astjp2

Active Member
Location
Riverdale/Alaska
So I made some alignment pins for the ucf skid. They were front unit bear bolts. This sure makes it easier to put in 2 bolts in the center. Now I can see what my clearances are.
 

Attachments

  • IMG_9423.jpeg
    IMG_9423.jpeg
    251.1 KB · Views: 13
  • IMG_9424.jpeg
    IMG_9424.jpeg
    241.2 KB · Views: 11
  • IMG_9425.jpeg
    IMG_9425.jpeg
    234 KB · Views: 14
  • IMG_9427.jpeg
    IMG_9427.jpeg
    321.9 KB · Views: 14

astjp2

Active Member
Location
Riverdale/Alaska
So the engine and transmission is not parallel to the skid, I am also installing zone mml to match the 1.25 body lift and reduce the rear driveshaft angle.
 

Attachments

  • IMG_9430.jpeg
    IMG_9430.jpeg
    223.2 KB · Views: 9
  • IMG_9432.jpeg
    IMG_9432.jpeg
    253.4 KB · Views: 9

astjp2

Active Member
Location
Riverdale/Alaska
The reason I am going this rout is because the LoPro doesn’t clear the atlas and the original mount with the ucf skid location put the atlas hard into the tub. So moving the LoPro to the transmission from that goofy factory bracket gives me 7/8-1” lower and clears the tub now. I will have to countersink the bolts on the atlas and I have to weld a wedge of steel as a new skid plate location for the more forward position. I will match the angle of the transmission and skid which loos like about 15-20 degrees. I won’t know till I get the mml installed. I also extended the 4wd shift switch wires. Standard supply electronics on Main Street carries heat shrink with adhesive so I hope no corrosion in the future. That’s all for now. Till tomorrow when I can see how the mml changes the angles and start making the new bracket to weld the exhaust hanger to and make the new bracket to weld to the skid.
 

bobdog

4x4 Addict!
Location
Sandy
A lot in those posts I don't understand. I am really going over in my mind though why a Motor Mount lift is ever a good idea and why driveshaft angle would be a problem on a LJ.
 

I Lean

Mbryson's hairdresser
Vendor
Location
Utah
This stuff is tits. I've been using these heat shrink solder connectors from Amazon for a while now and love them. I'll have to go see what Standard has on the shelves.
A lot of what they have is in back, not up front on shelves necessarily. And the grumpy guys working there will roll their eyes if you don't know exactly what you want, or call it by the wrong name or something. 😉
 

astjp2

Active Member
Location
Riverdale/Alaska
I will say that the zone offroad mml was supposed to take 1-2 hours, took 2 days and I need to pull the passenger side and trim some more once I get the the skid and lopro mount installed. I trimmed the exhaust hanger and welded a piece of angle to support it. T
The cutting and trimming was slow, trying to only remove enough but the heat finally got to me. The cut on my had told me it was time to go home.
 

Attachments

  • IMG_9474.jpeg
    IMG_9474.jpeg
    416.3 KB · Views: 21
  • IMG_9475.jpeg
    IMG_9475.jpeg
    258.4 KB · Views: 18
  • IMG_9470.jpeg
    IMG_9470.jpeg
    554.7 KB · Views: 14
  • IMG_9477.jpeg
    IMG_9477.jpeg
    368.2 KB · Views: 15
  • IMG_9486.jpeg
    IMG_9486.jpeg
    307.5 KB · Views: 21

astjp2

Active Member
Location
Riverdale/Alaska
Made progress, skid should bolt in, I also get the exhaust hanger welded up and painted. Once skid is bolted up, I can get the passenger mount clearanced a little more and the shifter installation.
 

Attachments

  • IMG_9531.jpeg
    IMG_9531.jpeg
    272.3 KB · Views: 7
  • IMG_9522.jpeg
    IMG_9522.jpeg
    220 KB · Views: 7
  • IMG_9530.jpeg
    IMG_9530.jpeg
    267.5 KB · Views: 7
  • IMG_9529.jpeg
    IMG_9529.jpeg
    492.8 KB · Views: 7
  • IMG_9528.jpeg
    IMG_9528.jpeg
    462.5 KB · Views: 7
  • IMG_9527.jpeg
    IMG_9527.jpeg
    465.4 KB · Views: 7
  • IMG_9526.jpeg
    IMG_9526.jpeg
    404.3 KB · Views: 7
  • IMG_9525.jpeg
    IMG_9525.jpeg
    407.3 KB · Views: 8
  • IMG_9520.jpeg
    IMG_9520.jpeg
    322.3 KB · Views: 8
  • IMG_9521.jpeg
    IMG_9521.jpeg
    283.7 KB · Views: 8

astjp2

Active Member
Location
Riverdale/Alaska
Right motor mount clears and the skid now fits. So if there is no weird vibration it’s good. Now off to getting the rear axle back together and the pinion angle set. Then front with new dual piston calipers and elockers. The skid bolt went right it once the transmission was lowered a tad bit and the skid plate bolts went right into the frame!
 

Attachments

  • IMG_9577.jpeg
    IMG_9577.jpeg
    328.4 KB · Views: 7
  • IMG_9578.jpeg
    IMG_9578.jpeg
    271.3 KB · Views: 7
Last edited:
Top