ZMotorSports 2011 JKUR Build Thread

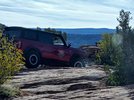
I am new here but thought I would throw up some pictures of my latest Jeep build. It is not real time as I have owned it now for almost two years.

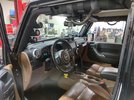
I bought the Jeep with only 3208 miles on the odometer and commenced building my "Dream Jeep". This is my daily driver and weekend wheeler.

ecm6-jpg.150279


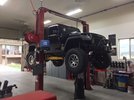
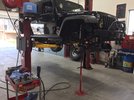
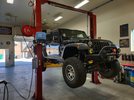
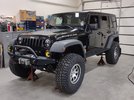
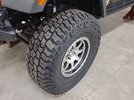
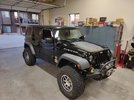
On lift just before sitting it down with the 4" BDS Suspension Lift and 35" KM2 tires/ATX Crawl wheels.
21909d.jpg


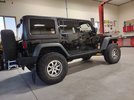
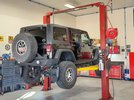
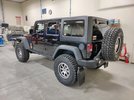
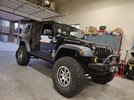
Backed outside the shop after just barely sitting her on the ground with new lift and tires/wheels.
s4v28o.jpg


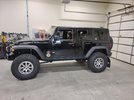
More to come as I dig through the pictures. Also pictured here is the Warn Rockcrawler bumper/Powerplant combination that I purchased used just to get me by until I could fabricated my own bumpers.

Mike.
 
Last edited by a moderator:

zmotorsports

Hardcore Gearhead
Vendor
Location
West Haven, UT
You don't have any issues with the shocks bottoming out during full bump with your new lower shock mounts? If so, that's a job well done.

No issues as I have proper bump stops set correctly just before shocks bottom out. That is what I spent a lot of time on two years ago after switching from 35" tires to 37's. Now both up-travel and down-travel are both optimized.

My rear shocks have 10.6" of travel and I have right at 10", limiting both up and down by approx. 1/4" and front shocks have 11.1" stroke and limited to 10.5" travel up and down.

Mike
 

zmotorsports

Hardcore Gearhead
Vendor
Location
West Haven, UT
Last night I racked the Jeep to give everything a good once over and change the engine oil, transfer case oil and power steering fluid. I've been in full-prep mode for our annual Ouray/Silverton trip that we take each year. Ouray/Silverton trails really torture test the Jeep and all of its systems as going up the steep passes stresses the engine, transmission, transfer case and differentials more than usual and then coming down you need to have complete confidence in the brakes and steering so any little deficiency in your vehicle will rear its ugly head on these trails.

jeep1.JPG

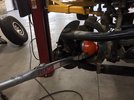
Tried out my new Carlyle oil drain plug magnetic tool. I don't know why I didn't buy one of these years ago. It works great to keep hot oil off of your fingers and wrists when you clear that last thread.

jeep2.JPG


I also double checked suspension measurements yesterday after finding a place to flex out and last night taking measurements. After a bit of work on the rear shock mounts and adding a little longer limiting straps last week my Jeep now has rear uptravel at 4.25" and droop at 5.625" (43/57 ratio) and my front at 4.5" uptravel and 5.75" droop (44/56 ratio). I am more than happy with those suspension numbers, especially with OEM fenders and no cutting of the body for a clean sleeper look.

Thanks for looking.

Mike
 
Last edited:

RockChucker

Well-Known Member
Location
Highland
I got one of these Fumoto drain valves. Planning on getting one for my duramax and the wife's grand cherokee too. Love that I can put a hose on the nipple and control the drain. It helps a ton with my full belly skid that makes conventional oil draining a disaster that fills the skid plate.
 

zmotorsports

Hardcore Gearhead
Vendor
Location
West Haven, UT
I got one of these Fumoto drain valves. Planning on getting one for my duramax and the wife's grand cherokee too. Love that I can put a hose on the nipple and control the drain. It helps a ton with my full belly skid that makes conventional oil draining a disaster that fills the skid plate.

Yes, the Fumoto valves are nice in certain applications. I have a Fumoto valve on the Cummins ISL in my coach but don't want anything hanging any further away from the oil pan on my Jeep as it would be something to get snagged and broken. I like the GM drain plugs as they have a nice thick and heavy quad ring that fits into a nicely machined groove to avoid "squishing" the rubber out yet stay close to the oil pan.

The biggest issue I see is people overtightening drain plugs and destroying the threads followed by not replacing the gasket. Many use a copper or brass crush ring which should be replaced with each service as once they become compressed they don't torque as well and then is when they get over-tightened.

Mike
 

zmotorsports

Hardcore Gearhead
Vendor
Location
West Haven, UT
While I was prepping the Jeep a couple of weeks ago going over everything, rebuilding shocks, raising rear shock mounts and servicing the engine and transfer case I had one other task that I waffled on completing. I have RCV chromoly axle shafts in my front ProRock 44 axle and have had them since I originally built the Jeep with the original Dana 44. I developed the inherent "RCV click" back in 2017 while we were in Ouray, CO during our annual Jeep gathering that the wife and I hosted. That is when I ordered my ProRock 44 bare housing to swap out while rebuilding the RCV shafts because my son wanted my OEM housing to run in his 2004 WJ, so I built my ProRock 44 using my old components from the original Dana 44 front axle in our 2011 Jeep Wrangler Unlimited Rubicon which I set aside for my son's project which followed shortly afterwards. At the time while I was swapping axle housings and rebuilding my RCV shafts I also adjusted my steering stops to slightly reduce the steering angle to hopefully prolong the RCV joints but I don't think it had much effect on prolonging the inevitable clicking.

I had ordered the parts a few months ago to rebuild my RCV shafts knowing I was passing the mileage that I had on them previously and my original intent was to rebuild them while I was doing my major prep prior to our marathon of Jeep gatherings coming up. I hadn't had any noises coming from the RCV's so I was reluctant to throw the new components in them and wanted to see just how many more miles I could go before they developed the click. Well, I should have rebuilt them while the Jeep was on the lift doing the prep work because mid-way through our trip last week to Ouray, CO I started to detect the ever so slight clicking sound from the RCV joints. SHIT!

Oh well, I have just under 60k miles on them now over exactly the last four years so I knew it was coming and I should have just rebuilt them a couple of weeks ago.

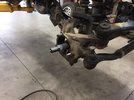
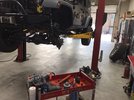
Last night I racked the Jeep, pulled the axle shafts and rebuilt them. Started with the passenger's side. I use of of my trimmed down pole jacks to slightly raise the side I'm working on to keep the diff. fluid in from running out into the axle tubes when the shaft is removed.
rcv1.JPG


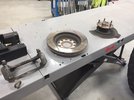
Brakes, caliper adapter, unit bearing and backing plate removed and set aside.
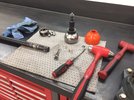
rcv2.JPG


Package containing the new splines, race and roller balls/bearings at the ready as well as my newly fabricated chisel hammer which worked slick.
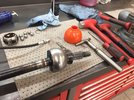
rcv3.JPG


Axle shaft, old race and balls as well as stub shaft and polyurethane boot freshly cleaned in the solvent tank and ready for reassembly. I saw no noticeable wear or anything to be concerned about so just a good cleaning of old grease and ready to start reassembling.
rcv4.JPG


Passenger's axle shaft rebuilt with new parts and fresh grease. Ready for installation back into the axle houseing.
rcv5.JPG


Axle shaft installed, some anti-seize applied to the splines and ready to install the backing plate, unit bearing and brakes.
rcv6.JPG


Tightening the unit bearing fasteners to proper torque spec.
rcv7.JPG


With the passenger's side completed it was time to move over to the driver's side and repeat the process.
rcv8.JPG


Completed the job and put the Jeep back on the road. I'm torn whether I should have rebuilt these prior to our trip or not. The clicking sound is freaking embarrassing and I was mortified when I first detected it mid-way through our trip but I think if I had rebuilt them preemptively before our trip I would have been second guessing myself and wondering just how many more miles I could have gone. I fell like I now have a good baseline for rebuilding the axle shaft joints.

Now I know to have the rebuild kits at the ready to rebuild them prior to 60k miles/4 years to avoid those embarrassing looks from people when the clicking begins.

Thanks for looking.

Mike
 

zmotorsports

Hardcore Gearhead
Vendor
Location
West Haven, UT
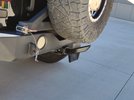
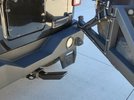
I racked the Jeep on Saturday to give her a good once over before the next trip and after looking the undercarriage over I decided to finally fabricate myself a hitch stinger to prevent any rear glass damage. I've seen two Jeeps this year catch the rear tire after coming off a ledge and shattering the back glass and I've kissed my bumper twice now over the past couple of trips. I refuse to hit the trails without a spare so I figured I'd better be safe than sorry.

sting1.jpg

sting2.jpg

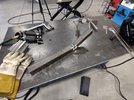
I dug through my metal stock and found a piece of 2"x 1/4" wall receiver tubing about 20" long that would work perfectly.

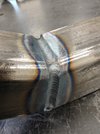
After determining I needed a 25-degree bend to clear the bottom of the 37" spare tire I took a pie cut out and put it in the press to form the angle vs. cutting and welding all four sides. Here is the first root pass on the top of the stinger.
sting3.jpg

sting4.jpg

Before welding I ground a chamfer on the three sides leaving about 1/8" land in the tubing wall. I knew I could get full penetration into 1/8" and you can see how the root pass sunk just a little as I was feeding the keyhole of the root pass.
sting5.jpg

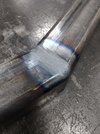
I followed by a weave pass using 3/32" filler rod to ensure a good deposit of metal to bring the weld profile slightly proud of the parent material which would allow it to be removed and metal finished.
sting6.jpg

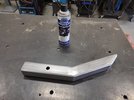
Metal finished and ready for paint.
sting7.jpg

Paint dried the next morning.
sting8.jpg

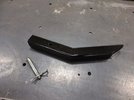
Test fit.
sting9.jpg

Clears the spare as it swings open by about 1/4" yet still provides plenty of protection to prevent catching the spare on a ledge.
sting10.jpg

Thanks for looking.
 

zmotorsports

Hardcore Gearhead
Vendor
Location
West Haven, UT
I then wrapped it up in a towel to prevent rattling and stuck it in the storage bay of the coach to have it readily available when we know we will be running a trail worthy of needing it.
sting11.jpg


sting12.jpg


Thanks for looking.

Mike
 

zmotorsports

Hardcore Gearhead
Vendor
Location
West Haven, UT
Great work as always Mike. I haven't seen a rear tire do that before, but I can see how it could easily happen.

Thanks Bart. I saw a video a couple of years ago when a guy dropped off the fall on Steel Bender and thought to myself "why did his tire catch?" Then 2 times this year I saw people catch their spare so I'm a little nervous now. Last year in Moab on Flat Iron Mesa two guys in front of me were on 40's and both smacked their rear bumpers dropping off of Tilt-O-Whirl at the hard right turn at the bottom. I'm only on 37's so when I saw that I obviously got nervous as I was right behind them descending down the obstacle. Once my front end dropped off, I turned slightly driver to let my rear tires step down off right rear first, then left rear and I was able to avoid even touching my rear bumper. However, that meant that the passenger's side tilted quite drastically to the right and needless to say my wife was less than pleased with my decision to come off at an angle. :mad2:

After kissing my rear bumper twice now this season I thought I would take a few minutes to build a rear stinger to hopefully prevent any damage on those rare trails that I run where it is a possibility.
 

zmotorsports

Hardcore Gearhead
Vendor
Location
West Haven, UT
My wife and I just returned from our annual fall Moab trip where we wheeled with the same group of friends that we did in Spearfish, SD last month. It was great to see them again, especially so soon after the last trip but unfortunately we won't see most of them again until next season.

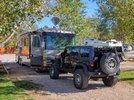
Our parking spot for the week after arriving and getting set up. Weather was great with the exception of the last day which rained pretty hard after a night of high winds.
moab1.jpg

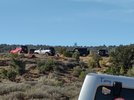
As we were airing down we joked about having the first day's trail mostly to ourselves. We decided to run a trail that is about 30 miles east of town and as we were driving out to the trailhead we saw absolutely no one on the highway nor the trail head as all was quiet. Well that changed within the first mile of Dome Plateau when we came upon 16 of the new Bronco's. :rolleyes: They were led by some Ford exec's and all were driven by fairly new to the off-road scene drivers. No worries as we were all newbies at one point in time, however, trying to get around 16 vehicles was a bit more of a task than we bargained for. Over every obstacle, small or large, the leader would get out and spot the new drivers over them which took a LOT of time getting 16 vehicles over them. We finally got around them after a couple of miles when they pulled to the edge in various spots and let our smaller group past.
moab2.jpg

moab3.jpg

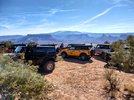
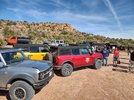
Here we are at our overlook lunch spot on Dome Plateau. We were just finishing up lunch when the group of Bronco's pulled in behind us. We figured they were going to be along so we parked pointing back out of the lunch spot near the top but leaving a lot of room for the group to still be able to park. Here is my Jeep trying to make those Bronco's look good, trying being the key word.;) One thing I noticed as they were pulling in that gave the indication that they were new to off-roading was the fact that they all pulled up very close and tight to one another. Barely enough room to walk between the vehicles and then it was obvious to some the error in their choice as they attempted to get into the rear cargo areas to retrieve drinks and/or jackets. Their tailgates would not clear the vehicle behind them. Watching them try to hold the rear tailgates while the other person tried to squeeze into the cargo area to retrieve their belongings was notable as most instantly saw the flaw in their parking choices. Like I said though, we were all new at one point and I'm certain they didn't make that mistake at the next stop. The Ford personnel quickly pulled out tables with drinks, sandwiches, chips and cookies for the drivers to partake of while enjoying the breathtaking view of the overlook.
moab4.jpg

We hung around for a bit as we were approached by several drivers from the group and discussed the area, the terrain, the weather and more importantly, what it was that drew us to off-roading in the first place. Several were interested in just how long we have been off-roading and what areas across the country we have visited to enjoy the off-road possibilities, especially when they learned that we were all RV'ers that traveled around together yet were from all different locations across the country. It was kind of cool talking to many of the drivers who were also from all across the country yet getting off the pavement to enjoy the outdoors is what brought us all together at this point in time and location.

Evidently the Bronco training course is a service offered by Ford for those who have already purchased or ordered a new Bronco. They were responsible to cover transportation getting to and from Moab but once there and signed up they were taken out for a 10-hour crash course in off-roading and more specifically, how to operate all of the electronics on the new Bronco as well as basic driving techniques when driving off road.
moab5.jpg

After we left the group we were headed over to Boca Arch when we ran across an older (late-80's) Bronco that pulled in beside us. The gentleman got out and walked over to us when I noticed he also had the Ford logo on his shirt and was dressed similar to the other guys leading the 16 newbies. I jokingly said he must have made a wrong turn from the group. He asked if we had encountered the group of 16 new Broncos and how they were doing. He was following along behind them to ensure they "left no trace". Most of you know my personal feeling on the "blue oval" brand but I have to admit, I was extremely impressed after talking to this gentleman about how they wanted to ensure they were being respectful of the environment and other drivers. We talked to the guy for about 20-minutes and he told us that teaching them the intricacies of their new Bronco was only part of the equation. He said that while they were on the trails they were also teaching proper trail etiquette, tire placement and other driving techniques and more importantly how to treat the trails with respect so that we all can enjoy them together and for a long time. This is something that I think needs to be taught much more with those new to the off-road community, especially with the side by side owners that we have encountered over the past couple of years. I think more dealerships, rental agencies and clubs/groups should do a better job of educating new off-road drivers because trail etiquette and respect for the outdoors has dramatically slipped over the last while. The fact the Ford was taking this responsibility seriously is in fact, impressive.


We arrived home from Moab on Wednesday afternoon and I gave the coach a bath before backing it back into the shop's RV bay but finally got around to washing and detailing the Jeep yesterday afternoon/evening.


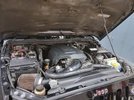
The trails weren't nearly as dusty in Moab this past week which means the Jeep wasn't nearly as dusty as past trips which was kind of nice but I did blow out the engine bay and give it a wipe down before blowing out the interior and wiping and vacuuming it. Lastly after running a chamois over the paint to dry the exterior I removed the Sunrider top and reinstalled the fiberglass freedom tops for the cooler months approaching here in northern Utah.
jeep1.jpg

jeep2.jpg

jeep3.jpg

jeep4.jpg

jeep5.jpg


I think the Jeep still looks great considering it now has 133k miles on the clock. Both interior and exterior are in fantastic condition. I didn't even get any pinstriping on the Jeep between South Dakota and Moab this year. Last year I got a few large scratches between those two trips and had to buff the paint out earlier this spring. I did have to grab my small hand shears that I keep readily available under my seat and trim a few small branches in South Dakota last month on two of the trails and only once did I have to get them out this past week in Moab to prevent any contact of foliage with my paint.

If anyone didn't know any different they would assume this thing never leaves the pavement.;)

I received a call from my tire shop while on vacation that my new tires have arrived so next time you see the Jeep it will have new shoes.

Thanks for looking.

Mike
 

zmotorsports

Hardcore Gearhead
Vendor
Location
West Haven, UT
Love your pics and narration Mike!


(one day I need to talk my wife into a coach---at least for a couple years)

Thank you. RV's aren't for everyone but for the wife and I it is definitely a lifestyle choice. The people we have met and wheeled with over the years have created life long friendships and there is no other way I would want to see this great country we live in.
 

mbryson

.......a few dollars more
Supporting Member
Thank you. RV's aren't for everyone but for the wife and I it is definitely a lifestyle choice. The people we have met and wheeled with over the years have created life long friendships and there is no other way I would want to see this great country we live in.


I'd like to have one for at least a couple years. She can give me that. I live near SLC, not for me, for her. I think she can give me a few trips in a coach for a few weeks at a time. I think a class A pusher hauling the Jeep or the Buick on a trip for a month or so at a time could be a fun way to see the country. I've got at least 10-15 years before I get to that point but I'm starting to keep an eye out for pricing and models I'd be interested in at that time.
 

zmotorsports

Hardcore Gearhead
Vendor
Location
West Haven, UT
I replaced my 37" Nitto Ridge Grapplers with new 37" Mickey Thompson Baja Boss A/T's over the weekend.

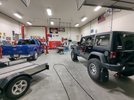
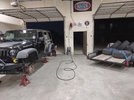
Jeep pulled in the shop Friday night and up on jack stands to remove the 5 Nitto's. I haven't had to work off of jack stands in quite a while but I had a client's truck going on the lift first thing Saturday morning. Yes that is a Ford in my shop. It belongs to a fellow RME forum member and is in for a re-gear. Don't go thinking I'm changing my ways and coming over to the dark side. ;)
tires1.jpg

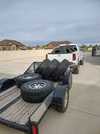
Tires loaded up on the trailer so I could drop them off first thing Saturday morning.
tires2.jpg


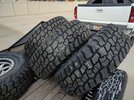
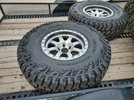
Old tires in the bed of the truck as I have them sold and the newly mounted Mickey Thompson's on the trailer ready to be installed.
tires4.jpg

I was a bit concerned about road noise when I first saw the lug size but then upon closer look seeing the asymmetrical tread pattern and the way the pattern is broken up in the middle led me to have faith they wouldn't be noisy.
tires5.jpg

Great looking sidewalls as well.
tires6.jpg

Installed and ready to be set back down on the ground.
tires7.jpg

That is a aggressive looking tire for an all-terrain. I can see these hybrids catching on quick similar to the popularity of the Ridge Grapplers.
tires8.jpg

Torqued to proper spec and ready for a road test.
tires9.jpg

tires10.jpg


Thanks for looking.

Mike
 

zmotorsports

Hardcore Gearhead
Vendor
Location
West Haven, UT
Do you have a review of the Ridge Grapplers? I'm thinking about them for the next set on my half ton.


Sorry, I was going to do a full review of them on my YouTube channel but didn't have time over the weekend. I will try to summarize here.

I installed the 37x12.5x17 Nitto Ridge Grapplers in January 2019 when I did my LS swap. In just shy of 3 years I had acquired just over 40k miles on them and I had an additional 15k miles of being flat-towed behind our coach. I rotated them every 4k-4500 miles when I performed LOF service on my Jeep. My Jeep is relatively heavy at 6040 pounds in normal travel trim and when chalked out I found 28 PSI to be the sweet spot for air pressure on pavement. I would inflate to around 34 psi when flat-towing however to decrease rolling resistance and where they were not being "driven" by power the wear was pretty much non-existent at those pressures.

Upon removing the tires for the last time the least tire tread depth was 8/32" (1/4") and the tire with the most tread depth had just over 9/32". I think I could have gotten another 8k-10k miles out of them.

Driving impressions were excellent in all conditions with the exception of snow covered winter roads where I feel they did a fair job. Better than any of the mud-terrains I had previously ran but not quite as good as my previous set of BGF KO2's. I think the KO2's did slightly better on snow-packed winter roads. Dry, wet and off-road I feel they did excellent and better than my KO2's in those categories. The only terrain I cannot give an honest opinion on is heavy mud. I hate mud and avoid it at pretty much any cost and have been known to drive miles to get around gooey muddy sections of trail. Wet off-road trails in SW Colorado or South Dakota where the mud is not that gooey, clay type of mud they did excellent in but again, I have tried to avoid the thick heavy mud so cannot accurately describe how they would perform.

As we know the slickrock of southern Utah and Moab is pretty easy to get traction on. The Ridge Grapplers did amazing in those areas but we also wheel routinely in the Black Hills of South Dakota and SW Colorado around Ouray and Silverton areas. The rocks in these areas are more smooth and slick compared to the slick rock of central and southern Utah. The Ridge Grapplers wrapped around and grabbed the rocks better than my KO2's in these locations. I feel they gripped the rocks better than my KO2's with less slippage. However, I don't think it was a completely fair comparison as I aired my KO2's down to 14 PSI and my Ridge Grapplers I would air down to 12-12.5 psi. I think that 1.5-2 psi may have had some influence.

Even as they were getting down on tread depth to the 8-9/32" range they performed exceptional on wet roads. With the wet weather we have been having here in northern Utah over the past several weeks and a torrential rainstorm we got caught in while in Moab last week they never lost traction nor gave the impression they were about to. I paid particular attention to the wet traction as I knew the tread depth was decreasing and even in heavily wetted areas the tires never began to lift when the tread was flooded with water. I feel there was still enough tread void to allow the water to easily evacuate prior to hydraulically lifting the tire from the pavement (hydroplaning).

Throughout the entire life span and tread depths of these tires they have never exerted any noise such as howling or droning of any kind. They have remained completely quite under all road conditions. I was worried about this upon purchasing these tires being as they were marketed as a new "hybrid" or aggressive all-terrain.

Would I purchase these tires again? Absolutely. I was very torn between replacing these with the same thing vs. trying the new Mickey Thompson Baja Boss A/T. When the Baja Boss A/T was released in April of this year they grabbed my attention as a direct competitor to the Nitto Ridge Grappler as they were both being touted and marketed as hybrid's. Time will tell if I made the right decision but I can recommend the Ridge Grappler as a good all around tire.

I hope that small review is helpful.

Mike
 
Top