#iwannagofast ZJ build

Johnny Quest

Web Wheeler
Location
West Jordan
With my SYE finally off backorder, it was time to do the SYE and 2low in my 231. Unfortunately, i needed the input out of the 249, as the stock 231 input shaft is just barely too long to allow a proper mating surface behind the trans. So the 249 got pulled apart, and along with the SYE and 2low, got slapped into the 231. I did not do the 6 gear planetary or wide chain kit yet. I know that i should have, but that's an upgrade for the future. or maybe i just put that $ towards an Atlas. Idk. I unfortunately have to open the case back up, since there is some excessive binding when trying to switch into 2low/4low. hooray.

A774A16E-C463-49A0-87DC-E9AC7818DF89.jpeg


I hate Snap rings.
81855FEE-DC85-4D47-8D7B-DD0ADEBAD3EF.jpeg


During a quick break, i jumped on KSL to see if anything new had popped up on the rock crawling classifieds, and there were some cutting brake levers that I didn't need, so I snagged those and added them to the parts pile.

59F9E67C-1B9F-4C27-BE6F-B9966727A751.jpeg


Its getting there. slowly but surely. once the tcase is buttoned up, i need to tear into the axle, and get that squared away. pull shafts, pull knuckles, weld up hi-steer, yadda yadda yadda

F69A3597-C7AE-4880-9DC2-5A40589BB7F5.jpeg
 

Attachments

  • 0B6A5E9F-2836-4EB8-8B75-0C3132A7D796.jpeg
    0B6A5E9F-2836-4EB8-8B75-0C3132A7D796.jpeg
    415.3 KB · Views: 4
Last edited:

Johnny Quest

Web Wheeler
Location
West Jordan
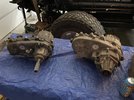
after taking apart the 249, i found that i in fact had the "wrong" np231, meaning that the planetary from the 231 wouldn't match with the input from the 249, even though the split for tooth shape was in 94, and my 231 was a 96, and the 249 is a 98. So for shits and giggles, since everything was apart, i threw the 231 input back into the front half of the case, with the 231 planetary, and threw it up under the Jeep and guess what? it fit. I was able to push it up to the point that i did not feel any movement, and that was without bolting anything up. once i bolt it up, i'm fairly confident that there wont be any leaks. I *might* still use a flap disc to take a little bit of the end of the input shaft off, in the off chance that its a few thou too long, and ill have a slow leak.
 
Last edited:

Gravy

Ant Anstead of Dirtbikes
Supporting Member
I was going to write yesterday to do a hybrid case. That's good it worked.

It's pretty easy to find the 6 gear planet and throw a tack on the shafts too while you have it apart. I got mine from a 231c that was in the a scrap pile behind a trans shop, I asked them for it and they gave it to me for free.
 

Johnny Quest

Web Wheeler
Location
West Jordan
I'll do a 6 gear planetary and wide chain kit at some point. As weird as it sounds, i didnt want to do too many changes all at once, plus the chain is in really good shape. The SYE and 2lo were in this round, and then do the wide stuff next round.
 

Johnny Quest

Web Wheeler
Location
West Jordan
Time to get the ball rolling on this thing so I can *maybe* get it together for the Delta Classic on Memorial Day. @Greg kinda put me on the spot (thank you) and created a Build Party to help me get this done, but many things had to happen before that happens.

First up is the knuckes, which I just got welded up last night. Not a fan of welding to cast, but I think they came out decent. They're not the prettiest, but they should hold, and thats all I can ask for. I also had to weld up a frame stiffener so my trackbar bracket had something solid to be welded to that wasnt the unibody (no pics of that though).

knuckle.jpg

I also got some new wheels. I found these on FB marketplace a few months ago. the tires are too small, so those will be swapped out for a set of 37s; maybe the Grappler rollers I have, but hopefully something else, if my budget allows it.
wheels1.jpgwheels2.jpg


I also grabbed a set of used driveshafts that were originally built by Tattons; they each need to be shortened a little bit, but they'll work just fine until its time to upgrade to some beefier units. new hardware, ujoints, and a rear flange yoke are on their way.
 
Last edited:

Johnny Quest

Web Wheeler
Location
West Jordan
New tires aren’t in the budget, but then I came across these 37” Trail Grapplers today for a price I couldnt refuse. Same as what I’ve got, but less chewed up, and a bit newer, so they’re softer than what I’ve got. (theyre not as bald as they look in the pic).

So now I’ve got a decent set to mount on the beadlocks, and the other set for spares. I’ll probably groove the wear bars back into these and let ‘em eat.

B3BAE027-2225-446F-B916-DB3B3B7CE73C.jpeg
 
Last edited:

Johnny Quest

Web Wheeler
Location
West Jordan
Things are going back together! Now that the knuckles are on, the shafts and wheel assemblies are next; no biggy. What I’m more looking forward to is the steering stuff- drag link and trackbar are already eyeball-measured, but I need to grab the DOM for the tie rod. Then it’s just measure eleventeen times, cut once, and weld them up. Might go offset steering joint on the pitman arm, or might drill the pitman arm out, and go with a heim run single sheer for the short term.

I’ve got 1310/1350 conversion ujoints coming for the driveshafts, which both need to be shortened a few inches as well.

I *might* be able to get by with just some longer brake lines, and not need to do the new master cylinder, even though I have it. I’ll worry about that once it’s back on it’s own weight.

Then it’s shocks, fluids, a nut and bolt check, aaaaand it could be drivable?

DCB20545-9A23-4CCE-ADF5-739432EF5CD2.jpeg
 
Last edited:

Johnny Quest

Web Wheeler
Location
West Jordan
Starting to figure out steering. Got the axle side Artec bracket welded up, so now i'm just waiting for delivery on a frame side trackbar bracket, or else this wouldve been wrapped up this weekend. Things are looking tight, but it looks like everything *should* fit. fingers crossed.

ZJ steering.jpg


Opened the front diff up last night. I was going to get the new 1550 axle shafts in, and button the front axle all back up, but the vacuum seals on the shafts are a PITA to get installed, so I figured I should just throw the TORQ locker in now, and save myself time and aggravation down the road. I also got a chance to actually figure out what gear ratio I have, and after some careful archeology, it looks like I've actually got 4.10s in there. Not exactly ideal, but far better than the 3.54s I was expecting. So I will most likely be putting the regear off, for now. So front locker, shafts, wheel assemblies, and steering should all be able to be scratched off the 'to-do' list this week. also, if I can confirm brake lines, hopefully those can be taken care of this week, and I might even be able to get started on the driveshafts. the 1310-1350 conversion joints were delivered just before I left for Moab last week; I know I need to shorten both the shafts I have, so its just a matter of measuring all of the times, and then cut and weld.

Things are happening.

ZJ gears.jpg
 

Johnny Quest

Web Wheeler
Location
West Jordan
OMG I hate roll pins.

I spent over an hour last night and probably a half hour the night before trying to get that stupid roll pin out, so I can get the TORQ locker installed. yea, I know I can pull the ring gear and carrier, and have better access to everything, but one of the highlights of the design is that you don't have to pull those to install the locker.

#frustrated
 

skippy

Pretend Fabricator
Location
Tooele
OMG I hate roll pins.

I spent over an hour last night and probably a half hour the night before trying to get that stupid roll pin out, so I can get the TORQ locker installed. yea, I know I can pull the ring gear and carrier, and have better access to everything, but one of the highlights of the design is that you don't have to pull those to install the locker.

#frustrated
The roll pin will typically only come out one way, So make sure your trying to pound it out the correct direction.
 

N-Smooth

Smooth Gang Founding Member
Location
UT
I find a screwdriver that's barely smaller than the roll pin diameter and cut the head off of it for a handy dandy roll pin removal tool. Sometimes they are super stubborn and you'll break a screw driver handle but it's worth it.
 

skippy

Pretend Fabricator
Location
Tooele
I find a screwdriver that's barely smaller than the roll pin diameter and cut the head off of it for a handy dandy roll pin removal tool. Sometimes they are super stubborn and you'll break a screw driver handle but it's worth it.
Or you could use a 3/16 punch and never break it and its the perfect size..... But modified screwdrivers are cool too
 
Top