My Next Project: 1959 VW Beetle

UNSTUCK

But stuck more often.
I guess I should take some pictures of where I'm at right now. The body and pan are separated. In the first pictures I posted, the body was just sitting on the pan loose. I have the body sitting on a roller cart made just for it (I didn't make it!!!). I modified the cart a bit so that the body will bolt to it and be fully supported. I found the body to be quite rigid. Didn't notice any flexing as I moved it around a few times. Overall I would say the pan is in great shape. I pealed, scraped, and cussed at the original sound deadener stuck to it to get it all off. There was fresh looking shinny black paint under it! The only "bad" area is where the battery sat. It's got rust, but not through, and is a bit soft with weight on it. I'll likely cut it out and replace that section.

We will likely purchase a new rebuilt transmission from EV West that is built with the electric motor in mind. They leave out 1, 2, and reverse gears and modify the shift rails/fork so that it only moves forward and backwards for 3 and 4th gears. They also use different than stock gear ratios for those gears.

I've been pushing kind of hard on the IRS swap, but I'm not getting much feedback on it from John. John has the idea of just putting around town in this car, going back and forth to his office. The motor we want is rated at 120 HP. The stock engine is 30-40 HP. We can't expect the stock suspension to handle 3 times the power and keep the car pointed in the right direction. But it's his call and less fab work on my end is ok with me.

For the front, he's been talking to a local shop that build a beam front end already set up for 2" drop and better handling. Should be bolt in.

I just wish we could get all the motor parts ordered!
 

UNSTUCK

But stuck more often.
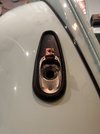
Time to update this project as well. The bug as been at the paint show for twoish months and looking good. I actually thought it was in great shape to begin with, but these guys found a ton of issues that needed to be dealt with. The passenger rear had been hit at one time and a poor repair was done. The hood (engine end) wasn't even close to close to fitting right. I think they said they moved it all over about an inch. The fenders all need work. We then added a later model fuel fill door. This is where the charge port will be located. They filled in a bunch of extra holes throughout the body and did some general clean up and resealed all the seams. It's now ready for paint. That should be done today or tomorrow and then cut and polish.


0043.JPG0044.JPG0045.JPG0047.JPG0048.JPG

Parts are finally showing up too. My family made a trip to Huntington Beach last week so we scheduled to have this swing arm transaxle built and ready for us to pick up while we passed through Riverside. It's a "superstreet" build, but modified to meet our needs. It's now a two speed with the stock 4th gear ratio and a slightly lower 3rd gear, 1.41 if I remember right.

0040.JPG

John went back to EV West and got them going again on their conversion kit. It finally showed up. I haven't opened them yet, but looking at the boxes I'm sure I'm in over my head. That's never happened before!
0041.JPG

So I need to get in gear and sandblast, prep, and paint the pan this week. There is also a floor repair where the batter was that I need to make. Then install some sound deadening mat. I'd like to do all that this week, though it will take a miracle. The family is going to see grandma and grandpa this week so that will give me some alone time. Hopefully it will all come together pretty quick after this. I'm already WAY ahead of the last car build.
 

UNSTUCK

But stuck more often.
I'm way overdue for an update on this. Progress is slow, but steady. I think the pan is just about finished. At least as far as I can go without the body in place. I sandblasted it then repaired the rusted out section where the original battery sits. Then painted it with POR15. Came out pretty nice. I then installed sound deadening pad on the pan. Apparently the car is actually louder with the electric motor because you notice the road noise so much more. This will help cancel that out. I will also put it all over the body once I get it back. We were able to order a complete front axle assembly so that was an easy bolt on. It's a custom build that's 2" narrower and 2" lower than stock. I think the tubes are messed up though as the bushings are loose. It will go back to them in AZ once it's finished. It will still be a driver, just might clunk a bit on bumps. I adjusted the rear suspension to hopefully be 2" lower as well. I was surprised to find brand new looking torsion springs and bushing in the rear when I took it apart. Those are some of the very few items that are not new or rebuilt for this build. With the transmission in I was able to install the rear disc brake conversion, run all new hard and soft brake lines, new park brake cables, camber compensater (sway bar?), clutch cable with clutch and brake pedals, and master cylinder.
The motor came preassembled with the transmission adapter and flywheel/hub assembly. That made it nice for me. I installed a Kennedy stage 2 clutch and mated the motor to the transmission. For some stupid reason they countersunk the four mounting bolt holes on the transmission adapter. Finding long (4-5") countersunk bolts is not easy. Took three stores to get them. Then I find out the countersink angle does not match the bolt head angle. Looks like they used a normal drill bit to countersink the hole. So that's where I'm at now. I need to fix the hole so the whole bolt head is contacting the surface of the hole. Pretty cool motor though. Only three wires and two connectors. Not bad. If only there were instructions on how to put all the rest of the parts together!
The body is all painted and just about ready to go. They are working on installing the windshield and rear window glass now and then I'll pick it up.
I'm really liking the looks with the wheels and tires on. I'll try to roll it outside today for some pictures. I need to clean up bad.

0059.JPG0065.JPG0073.JPG0092.JPG0123.JPG0121.JPG0050.JPG0053.JPG
 

UNSTUCK

But stuck more often.
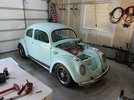
Got it home. Always makes me nervous hauling these things around. They told me the price included free touch up as needed once the car is done. Thought that was pretty cool. I did find a small spot that didn’t get sanded/filled properly on the engine cover. Other than that it looks good. Pretty deep shine. The color is growing on me. Can’t wait to see what it looks like on the pan. Maybe tomorrow.

2C31FA38-49C2-4669-AC56-4E8E3BD5AFC6.jpeg

C7FFA7C3-1AE6-4D15-8E60-7BC99B833351.jpeg

9D7E84AA-CFC3-47CB-8FDC-59F3E17A7F22.jpeg

EA621046-1197-460E-AAF3-8585D52707F2.jpeg

A0EB0A63-08C8-4621-ABC5-A24EE58C0A7A.jpeg
 

UNSTUCK

But stuck more often.
Can someone with some photo shop skill take that side shot up above and give it a couple different shades of window tint for me. I think it would look great. Just need to sell the idea.
 

UNSTUCK

But stuck more often.
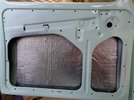
Another update for you guys. Things are moving SLOW. Just been super busy at work. Working 6 days a week makes it hard to play. Anyways, we last left off with attaching the body to the pan. With the body in place I installed sound mat everywhere. In the doors and all over the roof and side panels. I'm truly sold on this stuff. It went from full on tin can rattles to solid steel when you knock on it. With mat and carpet it should be even better.


126 (8).JPG

I started adding all the body parts. Turn signals are in, bumpers are in place. Side steps are on. Starting to look like something now.
126 (9).JPG

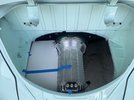
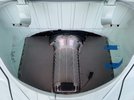
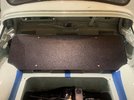
I've spent a lot of time back here. I needed to fill in the area around the motor. The idea here is to have it as empty as possible. Just a big chunk of aluminum and a couple wires.
126 (7).JPG

The entire engine bay will get upholstered to match the inside of the car. We are thinking black with a mint/white plaid accents.
126 (6).JPG

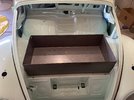
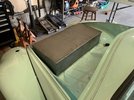
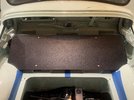
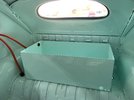
Carl cut and bent me up some battery boxes and lids. I welded them up and placed them. One up front and one behind the rear seat.
126 (1).JPG

126 (5).JPG

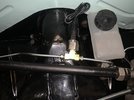
I've been putting off the wiring of this thing for as long as possilbe. I pretty much have no choice now but to dive in. First move was to install this brake sensor into a brake line. This will tell the controller its time to slow down and switch into regen. Try finding a metric flare to NPT T fitting. Good luck. I had to take a 3 way flare, drill it out and tap for 1/8 NPT. The wall is thinner than I would like, but it seems to be holding when I stand on the brakes.
126 (11).JPG

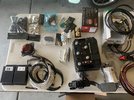
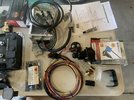
Pictured below are most of the parts to make this motor run. There was still a few other items not shown such as the dc/dc charger and a few other accessories.
126 (4).JPG

126 (2).JPG
 
Last edited:

UNSTUCK

But stuck more often.
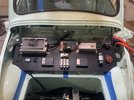
I built a raised board to mount all the electronics to. This will help keep the wiring mess hidden as it will all be underneath the board and out of sight.
126 (13).JPG

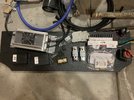
A poor picture showing kind of how things will fit on the board.
126 (15).JPG

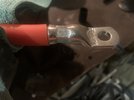
I bought one of those fancy hydraulic cable crimpers on Amazon. The tool is super handy. It will make building cables inside the car very easy.
126 (16).JPG

126 (17).JPG

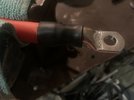
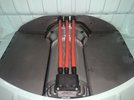
My first three cables ran! Normally the controller is mounted on the motor. I just think it looks terrible there. I mounted the controller under the rear seat on the driver side. It adds about 3 feet to these cables. At this point I can really only hope it wont overheat the cables. The cabling will all be ran through the heater tubes inside the car. These three high voltage (ac), then there will be two more low voltage (dc) cables on each side of the car running through the heater tubes to the front of the car, connecting the rear battery box to the front battery box and then those cables to the controller. In all there should be about 60 feet of this 2/0 cable inside the car.
126 (18).JPG


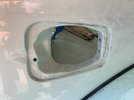
The '59's didn't have fuel door on them. John wanted to plug into it just like it was being fueled like a modern car. So the body shop grafted this fuel door in from a later parts car that John had.
IMG_2948.JPG

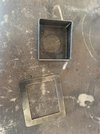
Carl and I then built a box to hold the 220v charge plug. It will get powder coated to match the car, then welded in place. I would have been nice to have this in place before paint, but well.....
There are a few spots the paint shop needs to fix so I will have them touch this up as well.
IMG_2949.JPG

Rear battery box fitment.
126 (14).JPG

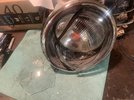
So these headlights were a nightmare for me. We swapped out the bulbs for LED's and in the process of installing new seals I managed to break the lens on the first one. I think I was two hours into rebuilding this light. I finally got it all together and was trying to adjust the taper on the mounting screw holes when POP. I had to walk away.
126 (12).JPG
 
Last edited:

UNSTUCK

But stuck more often.
This car got put on hold for a long time, but the good news is that I’m on track to still finish faster than 5 years. But it will be close. If things go well I should be able to test all the systems next week. I finished running all the car and EV wiring this week. I need to build some 12 wire connectors to hook the chassis harness to the electrical board I built. Then it will be ready to test. By the way, that electrical board is the biggest PIA ever. Wiring OCD is a real problem. I need professional help.

I’m just going to cruise through my phone and pick some highlights to post up.

4C2DC58C-3852-44B0-AE4F-7677029E2DB8.jpeg
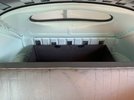
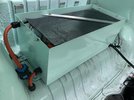
Battery box for the rear holds three batteries.

98E7F607-67DD-4098-851C-26868B56CF2E.jpeg
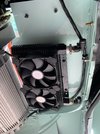
This is the coolant cooler with fans. Under the car and out of sight.

6107872F-2986-45F7-B780-7C553A09833C.jpeg
The stance is now too low with all the batteries installed. Will need to be adjusted. I sure like the way it looks here.

5BC6932D-CFD0-4565-9C5F-9F0530B9C641.jpeg
A blank canvas. Ready to start installing all the electronics.

BF8CDC24-706A-49A2-8508-D17DC13DF4DB.jpeg
Starting to mock up the electronics. The final product is a little different. This has been the hardest part of the build. Most people kind of just throw all this in with wiring going everywhere. I wanted more of a display piece.

5E3417D4-BF90-4031-B16B-7E68F94C5B74.jpeg
The rear battery box loaded up. The amp meter on the left sends a signal to the stock fuel gauge so the SOC will be easy to see.

355C8D29-04D9-4B97-BDF7-92B12E2CFD36.jpeg
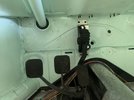
The Prius throttle pedal installed.

B990B07E-9764-49CC-AD96-BE9AC4D67CE3.jpeg
This shows the mess that makes up the coolant lines for the rear battery pack. I have no idea how shops or other builders run these lines. It’s a mess, but held pressure when I tested them.

024A8074-071E-4DC5-AB3A-270DF3FFE7B1.jpeg
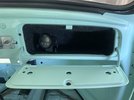
I used some extra speaker box carpet I had to line the glove box then installed the EV system gauge inside. It’s not a gauge that normally gets looked at so I wanted to hide it. The EV system puts out kind of a “check engine” signal that I tied into the generator light on the speedo. Thought that was fitting.

A011CBE2-090D-4DB7-9A33-62155F711E43.jpeg
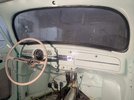
The finished dash. I used the same speaker box carpet behind the empty speaker vents so you can’t see through it. Instead of a speaker being there I mounted the microphone for the retro radio for phone control. The upper left knob, in the shadow, runs the headlights like stock. The upper right is the windshield wiper switch. No wipers on this car so now the switch controls the regen braking function when turned to the left. Then off in the center position. When turned to the right position the car will drive in reverse. The lower left knob is for the ash tray. The lower right would be the manual choke knob but now is just a knob to fill the hole in the dash. All this with a totally factory looking dash.

Expect another update in a year or so. 😂
 
Top