Ben and Kami’s TJ Overhaul

benjy

Rarely wrenches
Supporting Member
Location
Moab

Gravy

Ant Anstead of Dirtbikes
Supporting Member
For sure tie it all together.
I've rolled hard and tweaked by tube fender because it wasn't tied in. I'm going to rebuild a set Highline style and tie them into my grill hoop, A pillar and shock mounts.

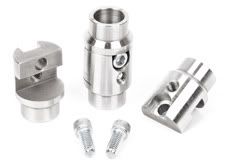
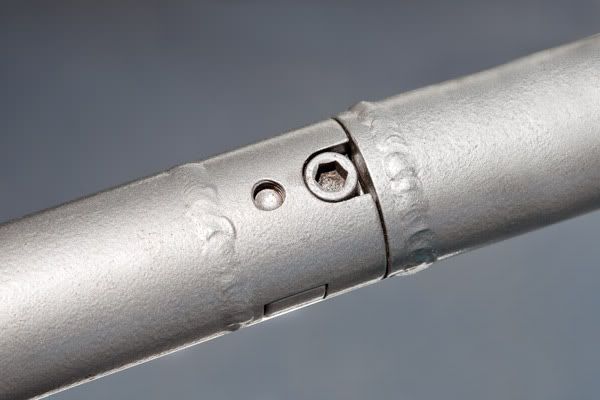
Ben: have you seen these style tube clamps?
tubeclamp1.jpg

180095-alt1.jpg

(images borrowed from Trail-Gear, but there are plenty of other vendors who have been making them for a long time)
 

benjy

Rarely wrenches
Supporting Member
Location
Moab
I've been working on this quite a bit since my last update. This week I started getting burnt out :-\ Worked on it Monday and Tuesday, and not again until yesterday, and all I did yesterday was start on the atlas shifters. Anyone want to come finish this for me?

Has anyone installed an atlas behind a NV3550 recently? I was trying to clock it as flat as possible (don't mind forcing the tub to comply), and this seemed like the best position:

dscn2664v.jpg


Best side view I could get:

dscn2668p.jpg


Everything has been coming along well, all air bumps and landing pads are tacked in. The radiator, battery tray, and fusebox have all been mounted. The tube fenders have been started. The fenders were a little tricky to get to look right, since I had to mount them to the grill hoop (inside the grill). I'm ok with how they turned out, but the hood does hang over a little.

dscn2651.jpg


dscn2665z.jpg


The whole build has gone much smoother since my awesome wife bought me a new tool :greg: We went with the Hypertherm 30. This was the beginning of the top radiator bracket.

img20100911130947.jpg


I also ordered our springs (déjà vu... :rolleyes:) Now I could have it sitting on it's own weight at ride height.

dscn2667.jpg
 
Last edited:

jevyguy

Active Member
Looks like a pretty good circle to me too. :)

I wish my wife would buy me a plasma cutter.

Let me know if you need any help when it comes time to burn it all together.
 

Tacoma

Et incurventur ante non
Location
far enough away
Looks good!! you have less that 2wks to get it done and enter the WEROCK Na... oh, uhmmm you did know you're signed up, right? :D

Nice work so far. :D
 

chadschoon

Well-Known Member
Location
lehi
benjammin, I had my atlas in my jeep clocked flat, but I had to cut the floor out and rebuild the floor. I was using the full traction skid plate though. didn't really want to build a new one. you have to cut under the drivers seat.
 

benjy

Rarely wrenches
Supporting Member
Location
Moab
Let me know if you need any help when it comes time to burn it all together.

Thanks man.

Looks good!! you have less that 2wks to get it done and enter the WEROCK Na... oh, uhmmm you did know you're signed up, right? :D

112" wb on 40s.... sure, I'll keep up with the unlimiteds... :rofl:

benjammin, I had my atlas in my jeep clocked flat, but I had to cut the floor out and rebuild the floor. I was using the full traction skid plate though. didn't really want to build a new one. you have to cut under the drivers seat.

Thanks Chad. So you had yours clocked the same as the picture I showed?
 

benjy

Rarely wrenches
Supporting Member
Location
Moab
Made some virtual progress tonight :p

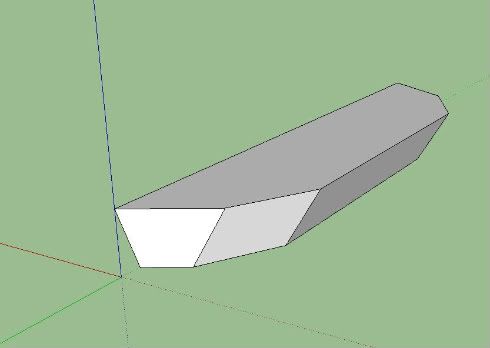
I've been tossing around some different ideas about the front bumper. I made one out of cardboard, and decided there had to be a faster way. I remember hearing about Google Sketchup, so I gave it a shot. It is extremely user friendly, I got the hang of it after about 10 minutes, and after trying a few designs and minor tweaking (much faster than cutting out cardboard), I decided on this:

Frontbumper.jpg


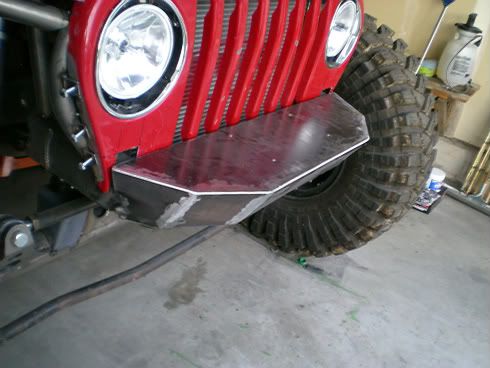
I cutout the top and bottom pieces, and drilled holes for the winch mount. Now I'm just waiting on headlights from Nick to finalize the front end (grill, bumper, and headlight mounting locations).
 

benjy

Rarely wrenches
Supporting Member
Location
Moab
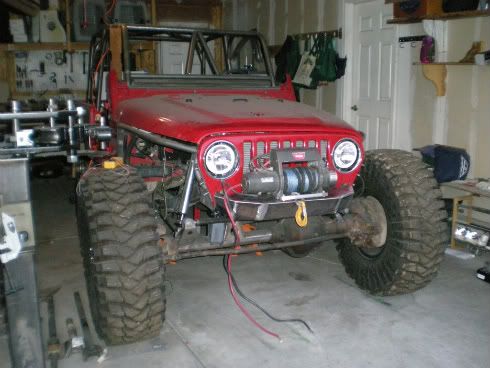
I made some much needed visually rewarding progress this week. I mounted the HID headlights (from Panos, excellent service btw), the grill, and finished the front bumper.

DSCN2704.jpg


And here's a closeup of the bumper

DSCN2711.jpg
 
Top