The Rubi Q Build

DAA

Well-Known Member
Supporting Member
I've messed with the sub in the console a bit. My first mod was the Kicker 2 ohm. And, it worked pretty great with the factory amp. Substantial upgrade. That was awhile ago, and I don't remember the details, but I'm wanting to say I had to trim some plastic to make it fit right, but it wasn't a big deal.

About a year ago, I went sort of nuts with the tunes in my LJ. Upgraded everything. Initial round, was with a Kenwood powered sub, the Kenwood KSC-SW11. It fits perfectly in the console with removing the factory amp.

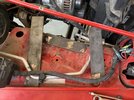
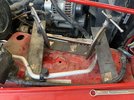
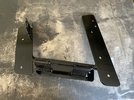
I just made an angle iron bracket for it, bolted to the floor, and the console sits right down over it nice and slick.

untitled-13W.jpg


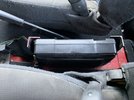
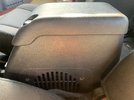
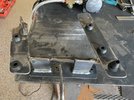
But I immediately went phase 2 on the audio upgrades. Needed more amp for the speakers I had chosen. So, while I was ordering another amp, I got stupid and ordered a bigger powered sub too. A Kenwood KSC-PSW8. This one required chopping a couple inches off the bottom of the cassette tray inside the console and is a tight-tight squeeze to make fit. But, fit it did.

With hindsight, the first powered sub, the KSC-SW11, would have kept up with the rest of the system. I run the bigger one in there now at about 75% most of the time and it way fills things out. The smaller one would have been fine. But I'd already altered the console and stuff, so left the bigger one in.

Anyway... I probably, maybe still have the Kicker. If you want it, let me know and I'll see if I do still have it, yours for the taking.

But I also still have the barely used KSC-SW11 (and the bracket I made). It's barely-barely been used. Like, maybe 4 hours. I have it complete with all the wiring that comes with it. Would let that go for $150. It stomps a mud hole in the Kicker upgrade.

- DAA
 

DAA

Well-Known Member
Supporting Member
I just looked and I don't think I have the 2 ohm Kicker anymore. I remember throwing away the old Polk 5.25's that had been in the dash and I think I must have chucked the Kicker at the same time.

- DAA
 

UNSTUCK

But stuck more often.
@DAA If I went with your SW11, I need to remove the factory amp, right? Does that amp power just the factory sub or does it power all the speakers? I don't really care enough about "great" sounding music to rewire all the speakers, run power wires, ect... What all needs to happen to make your sub/amp work?

Also, I have an aftermarket Alpine CD player, if that matters at all.
 

DAA

Well-Known Member
Supporting Member
You know, my memory sucks... I know at some point I had to remove the factory amp. Whether that was to fit the SW11 or the PSW8, I'm actually not positive.

Whether you need to remove it or not, won't really matter though. You'll need to run a new power wire for the SW11. It has line level inputs, so you can use the existing inputs for the factory sub. Or, your Alpine may have a dedicated sub output, which, if it does, would be better to use and a small job - while you've got this all apart anyway. Either route, line level from factory sub wires or using sub output from your head unit, won't effect your other speakers at all.

- DAA
 

UNSTUCK

But stuck more often.
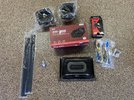
Well this was a quick one. Dave offered his old subwoofer and I jumped on it. I figured I may as well update the rest of the speakers while I'm at it. I jumped on Amazon and got the speakers, baffles, and RCA cable. I also grabbed some door sill covers and a new 4WD switch that will go in this weekend.
I was blown away at how quickly everything showed up. Dave jumped on the shipping of the sub and I got it yesterday. Everything else showed up yesterday and today.

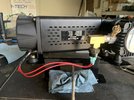
IMG_1478.JPG

With the bracket Dave made it was a simple mount up. I removed old sub box and built in amp. I wasn't sure if I would need to keep the amp or not. Turns out it was not needed to run the main speakers. So out it went. I found it interesting that the stock amp has its own circuit and runs on a 20 amp fuse. This new amp uses a 10 amp fuse and draws only 8.5 max. So I reused the stock power and turn on wires.
IMG_1479.JPG


IMG_1480.JPG

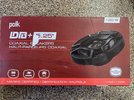
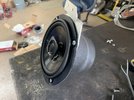
These are the speakers I went with for the overheads and the dash. The overheads were straight forward so I didn't bother with any pictures. I just needed to make a very slight notch at each of the screw holes to allow me to reuse the stock speaker grills. I don't care much for the new ones and would really like it to stay stock looking.
IMG_1481.JPG

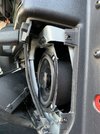
This is how the dash speakers went together. They required a bit of work, to work. These brackets are needed to mount the 5.25" speakers in the dash. This particular bracket is offset so it will point the speaker straight back towards the occupants instead of at their feet like the stock speakers do.
IMG_1488.JPG

The dash support brackets by the speakers also need to be notched so they will slip in. I didn't realize the bracket was sitting behind the mount when I drew this line. So I ended up needing to remove more than I thought.
IMG_1489.JPG

Mounted and ready to go.
IMG_1492.JPG

This is the line I drew for the driver side.
IMG_1496.JPG

The notch was big enough on my first try!!! Installed easy and now it's all put back together.
IMG_1497.JPG

I'm very impressed with how good the system sounds now. It's no concert hall, but for an old beater Jeep it's awesome!
 

UNSTUCK

But stuck more often.
I finished up this round of projects yesterday. Starting with the Rubicon style 4wd sensor. I didn’t know this but this one sensor isn’t just on or off. The resistance changes at each transfer case selection so the computer knows where it’s at and then allows certain other functions to happen. My sensor was allowing the 4wd light to come on in 2 wheel drive and it was going off in 4 wheel drive.
2A3DE1BA-8B68-44EA-841A-6F065DD03F36.jpeg
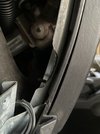
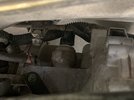
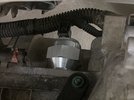
That’s the location. It’s a big sensor with a 1 1/2” socket head. I was just able to get a wrench on it without having to lower it. The 1” body lift helped for sure.

A2E92F3D-4628-40C4-9FBE-52DD707A2051.jpeg

2ACAA9DA-B5A7-4220-AA90-57869FE966D6.jpeg
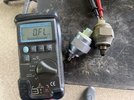
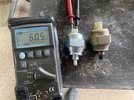
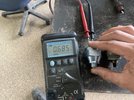
Infinite resistance on the old vs 60ohms on the new one. The resistance went up the more I pressed on the plunger maxing at at 685.
90EBF3F7-FFA6-4DE0-AFF6-62FAECFCBAFE.jpeg

396B87B5-4034-4B60-AE23-9EEC7540478B.jpeg
Installed and ready to go. Dash lights are now functioning properly again.

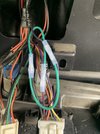
From there I moved over to doing the locker bypass mod. This allows the lockers to engage not just in 4 low. To do this you simply ground the two lockers enable wires. Pin one on the switch connector is a ground wire and pins 4 & 5 are the two enable wires.
0C9F6CF8-8318-4F2C-AA5A-60524ED666EF.jpeg

I like the fixes that only take five minutes!

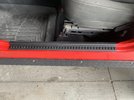
Lastly, I installed some door sill trim. Not sure how well these will hold up, but for now they look much better.
972C7772-4C86-4BF5-AD59-B48D108F20F6.jpeg

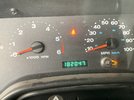
My mileage to date.
222D3B3A-F41D-46A9-89D4-46E34DB665A5.jpeg

I’m thinking about doing a tune up next. I don’t think it needs it but I really want to do a compression check to see where it’s at. So I’ll throw new plugs and stuff while I’m in there.
 

UNSTUCK

But stuck more often.
I actually wonder if it will ever come in handy for me. I don’t know if any high speed stuff around here that would even require locker engagement and I’m pretty sure I won’t be getting into any snow either.
Always nice to have options available though.
 

UNSTUCK

But stuck more often.
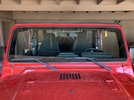
A year or so ago a nice rock hit the windshield putting chip in it. The sad thing is that the rock came from the jeeps front passenger side tire. Anyways, a couple weeks ago a bug landed on the inside of the windshield so my genius younger daughter decided to smash the bug with her foot. She got it, and also turned the chip into a crack. So now the jeep has a new windshield. It'll never be that clean again, I'm sure.

IMG_1548.JPG
 

UNSTUCK

But stuck more often.
I ran across the BIG Smittybuild air compressor a while back. It had good review and seemed like a good option. The problem with this one is it's BIG. I spend a lot of time walking around the jeep trying to figure the best place to put it. Well, it just didn't fit. Anywhere. So I put the compressor on the shelf and forgot about it while I decided what to do.
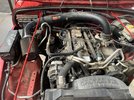
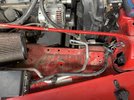
One day, while looking over it again I noticed that the intake tube could pivot back to the firewall which would open up a space where the factory air filter box sits. Playing around with it, it was perfect. The tube just fits between the firewall and the A/C lines. By adding a 45* silicone elbow the filter would just miss the fuse box. I would need to lengthen the PVC tube and the IAT sensor wiring. I pulled the trigger and went for it.

IMG_1582.JPG

There was enough holes and flat spots to start building a mounting bracket.
IMG_1583.JPG


IMG_1584.JPG

IMG_1585.JPG

IMG_1588.JPG

Four rubber mounts and then a support for the cylinder head. There is very little vibration passed on to the body. I was happy about that. The vertical tab will hold a bulkhead fitting for the hose.
IMG_E1589.JPG

Painted and ready to go.
IMG_1600.JPG

Mounting the compressor to the new mount. The Smittybuilt compressor kind of goofy. It comes with a hose with a built in air chuck and pressure gauge. The idea is that you watch the pressure rise to your pressure point and then just switch it off. That wouldn't work with it hard mounted so I rewired it and added a pressure switch. Now I can just turn it on and it will run and shut off on its own.
IMG_1601.JPG

I needed to add about 6" to the IAT sensor wires. Soldered, heatshrink and wire loom. Good as new.
IMG_1604.JPG

Almost finished. Just need to grab a fitting so I can install the hose and QD for the hose.
IMG_1605.JPG

I'll time the fill times and report back.
 

UNSTUCK

But stuck more often.
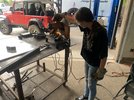
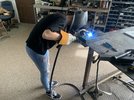
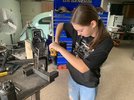
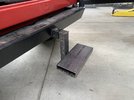
Livy didn’t get picked for homecoming royalty. I know there was some part of her (probably every girl) that wanted it so I feel bad about that. But she came home a few days ago even happier than if she did make royalty. Instead they asked her to drive royalty around in the back of the jeep in the parade. They will stand up in the back of it with the top off. She wanted a step to help them climb in and out easier so I made her build one with scrap metal I had laying around.
We started with a dry erase board and discussed the goals of the project. We drew it out and took measurements. We looked over my small, but growing scrap pile to decide if our plan would work with the material we had on hand. We had to modify the plan just a bit. Then she got to work.
We discussed the tooling needed and some safety items. The outcome was just what she wanted.

8AD28E75-3111-4E41-9214-1FA90AF07C1E.jpegCAA12D62-469D-43DD-9129-D8AFC237C22C.jpeg76152159-6B68-4940-B536-33FA6EC63D45.jpegE6074453-C645-4C24-A1E0-7D3BE7DA5598.jpegC6ED4936-4592-40C9-9DC0-91291319BB86.jpeg201E8EE9-4AF2-41D3-B5B8-55A9A0FA8766.jpeg

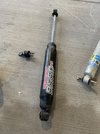
Fun afternoon with my daughter doing stuff I love! I asked her to jump up and down on it and when she did that we discovered a clunking sound under the rear. She discovered on of the new Teraflex shocks had blown out its bushing. 🙄
We got to work pulling the rears and putting the old bilstiens back in.

BF225D12-A14F-4633-BDCF-D01F3A7E1ADD.jpeg


0F8B6DD0-F05F-44A5-AEAE-E0F8015974F7.jpeg
 
Last edited:

UNSTUCK

But stuck more often.
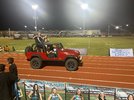
We’ll at the last second they pulled liability issues on us and made adults drive. I get it, but it’s dumb. Livy has WAY more seat time in the jeep than I do. (I need to do something about that)

This was by far the worst jeep line up I have ever been in. The dad of the orange four door in the middle of the pack (in front of us) kept trying to talk to me about how upset he was that he had to do this. He hates jeeps but his son loves them. He could be home with his A/C running full blast or at least driving around in his truck with cooled seats. I just stood there imagining punching him. Then he kept telling everyone to check out the new rock lights they installed. Interesting mounting spot right above, and shining straight down on each tire. A great one and only mod. 😂
Jeep owners today are definitely not the same as jeep owners of 10 years ago.
FD12AF37-A516-443A-99EC-F92F28B16EE7.jpeg3CE358D1-9EDA-4DD9-B91F-38A8CA405450.jpeg7FB685B7-C33C-4FFD-9FF3-3FD2609CC292.jpeg

Anyways, the step Livy built worked out great. We watched everyone else either trying to climb up bumpers or getting in through doors…. With that grumpy dad yelling at their kids not to step on the leather!!!!!! We took the back seat out so there was plenty of standing room. Our kids climbed in and actually commented on the nice step.
 

UNSTUCK

But stuck more often.
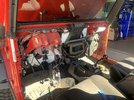
If anyone is interested, I’d like to start a support group for anyone who’s had the misfortune of replacing a heater core. 😂
I hate them. Basically an all day job that nets you no performance gains.

814CBC37-388A-4C75-ACD8-2157C68C3B53.jpeg

When you get to this point you can at least be happy that progress is being made.

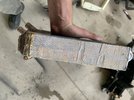
With the hvac box out and the heater core removed I found the leak.
B1C495C9-AF4A-4FD5-8984-50958A0CC247.jpeg

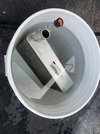
While evacuating the a/c I was surprised at how little Freon came out. With the top down all the time I didn’t notice the ac not blowing cold. I wondered about the condition of the evaporator. On inspection it looked fine. No obvious leak. I decided to dunk tank it anyways. Pressurizing it with air revealed no bubbles.

ADCF330A-2E54-4731-89FF-401C99A7A3DD.jpeg

Just for fun I checked the heater core where I got a steady flow of bubbles. Also checked the new core. No bubbles! Got it all put back together and the antifreeze smell is gone. Good times.

Mileage to date: 183525.
 

UNSTUCK

But stuck more often.
The LS hunt is on!!!! I’m currently watching auctions for full vehicles. I think the ideal donor would be a 2008+ 2500hd work truck. With a 6.0, 6l80 and whatever the manual shift t-case is, assuming I can install a slip yoke eliminator. I have my heart set on a 6.0, but am open to a 4 speed if the right deal pops up. If that’s the case I’ll keep my 241OR and adapt it.
I am watching a trailblazer SS auction right now. It’s sweet. It will go higher than I want but an ls2 would be nice. The auction fees are high and it’s in Colorado so that makes it harder.
We daily drive the jeep so I need to have everything ready ahead of time for a quick swap. That will be difficult for sure.

In the mean time my radiator leaks randomly right now. I need to swap it asap, but don’t want to buy two radiators. I wonder if I can run a cross flow ls style radiator with the jeep engine until I do the swap? Lower hose is on the wrong side but I bet I can get a hose to work. Mainly I just wonder if I can fit an electric fan in there after removing the jeep mechanical fan?
 

UNSTUCK

But stuck more often.
One other question while I’m at it, I want to keep A/C in the jeep. The low, passenger side mounting of the compressors on the LS engines might be tough. I assume it will hit the pass side upper control arm. Can I remove that arm and axle bracket and run it as a three link? Is the cast driver side upper bracket strong enough? Should I cut it off and add a bridge over the diff? I’m running a Tera long arm lift.
 

DAA

Well-Known Member
Supporting Member
If anyone is interested, I’d like to start a support group for anyone who’s had the misfortune of replacing a heater core. 😂
I hate them. Basically an all day job that nets you no performance gains.

View attachment 153834

When you get to this point you can at least be happy that progress is being made.

With the hvac box out and the heater core removed I found the leak.
View attachment 153835

While evacuating the a/c I was surprised at how little Freon came out. With the top down all the time I didn’t notice the ac not blowing cold. I wondered about the condition of the evaporator. On inspection it looked fine. No obvious leak. I decided to dunk tank it anyways. Pressurizing it with air revealed no bubbles.

View attachment 153836

Just for fun I checked the heater core where I got a steady flow of bubbles. Also checked the new core. No bubbles! Got it all put back together and the antifreeze smell is gone. Good times.

Mileage to date: 183525.

Heater core. The horror. The horror...

A buddy that used to be on here, literally traded in his TJ for a JK the same day he noticed the heater core leaking.

- DAA
 

DAA

Well-Known Member
Supporting Member
The LS hunt is on!!!! I’m currently watching auctions for full vehicles. I think the ideal donor would be a 2008+ 2500hd work truck. With a 6.0, 6l80 and whatever the manual shift t-case is, assuming I can install a slip yoke eliminator. I have my heart set on a 6.0, but am open to a 4 speed if the right deal pops up. If that’s the case I’ll keep my 241OR and adapt it.
I am watching a trailblazer SS auction right now. It’s sweet. It will go higher than I want but an ls2 would be nice. The auction fees are high and it’s in Colorado so that makes it harder.
We daily drive the jeep so I need to have everything ready ahead of time for a quick swap. That will be difficult for sure.

In the mean time my radiator leaks randomly right now. I need to swap it asap, but don’t want to buy two radiators. I wonder if I can run a cross flow ls style radiator with the jeep engine until I do the swap? Lower hose is on the wrong side but I bet I can get a hose to work. Mainly I just wonder if I can fit an electric fan in there after removing the jeep mechanical fan?

I've got a 145k used, but still good to my knowledge factory 4.0 radiator you can have for shipping. I swapped mine out for a new Mopar one just on GP. I get too far from everything too often and I'm getting too old. I replace shit before it breaks anymore...

Super interested in the LS process. Super interested. If me and my LJ both live long enough, that's where we're going to end up.

- DAA
 

UNSTUCK

But stuck more often.
I've got a 145k used, but still good to my knowledge factory 4.0 radiator you can have for shipping. I swapped mine out for a new Mopar one just on GP. I get too far from everything too often and I'm getting too old. I replace shit before it breaks anymore...

Super interested in the LS process. Super interested. If me and my LJ both live long enough, that's where we're going to end up.

- DAA
@DAA I'll take you up on that! Let me know what I owe you and if you need my address again. Thanks.
 
  • Like
Reactions: DAA

Top