- Location
- Richfield, UT.
You are using an out of date browser. It may not display this or other websites correctly.
You should upgrade or use an alternative browser.
You should upgrade or use an alternative browser.
General Tech What did you work on Today?
- Thread starter Gravy
- Start date
- Location
- West Haven, UT
Do you also have the capability of boring out to 1.5”??? If so I have a job for you 😁
I do. What exactly do you need bored?
Mike
those same hubs you re-drilled. I just need the centers bored for a 1.5" diameter shaft and the wheel pattern drilled to 6x5.5I do. What exactly do you need bored?
Mike
- Location
- West Haven, UT
those same hubs you re-drilled. I just need the centers bored for a 1.5" diameter shaft and the wheel pattern drilled to 6x5.5
Sure. As long as they haven't been welded on as the last ones had been hardened from the welding process and I had to anneal them to become machinable.
Mike
PM coming your way!Sure. As long as they haven't been welded on as the last ones had been hardened from the welding process and I had to anneal them to become machinable.
Mike
- Location
- The Land Northward (Bountiful), Utah
Rick, Does that side case not to need to be sealed since it's stator side?
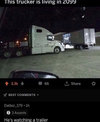
I’ll leave this hereI spend a lot of time traveling for work, and it can get boring at times... Like when the highway is closed in Wyoming for days at a time. I'll watch Netflix and surf the net on my mini ipad, but I wanted something better.
This is my Xbox Tactical Traveler version 1.0
View attachment 117883View attachment 117884View attachment 117885
- Location
- Grantsville, Utah
Speaking of my traveling Xbox, it's time to start carrying it again for inclement weather, but it's buried in one of the bedroom we blocked off with furniture when we started the motherf@%#+ng tile project.I’ll leave this here
View attachment 133502
- Location
- West Haven, UT
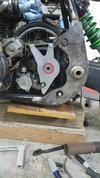
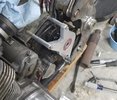
Finished, now a little paintView attachment 133494View attachment 133495View attachment 133496View attachment 133497
Excellent job.
Mike
ricsrx
Well-Known Member
The cover is somewhat sealed around the oil pump more like physical protection .and the stator wires pass under it.Rick, Does that side case not to need to be sealed since it's stator side?
I think I'm ok for what I'm using the bike for.
Do you see something I dont?
Thanks
- Location
- The Land Northward (Bountiful), Utah
I went back and looked at your first pictures, I was looking at it wrong. I can see now that it originally had a sprocket cover and I was thinking (incorrectly) that was the stator cover.The cover is somewhat sealed around the oil pump more like physical protection .and the stator wires pass under it.
I think I'm ok for what I'm using the bike for.
Do you see something I dont?
Thanks
I guess I was just wondering if you were going to reincorporate a portion of the original sprocket cover. So those stator wires were covered asthetically.
I do like that outer bearing support! Nice work!
glockman
I hate Jeep trucks
- Location
- Pleasant Grove
Did you buy the outlet box on this cart? I'm trying to catch up with the cool kids running mig/tig carts and want to copy this idea. The only ones I can think of are 3 gang boxes and look like crap.Finished up my welding cart. Made a little power box so I only need to plug one thing in, then either/both welders are ready as well as a 110v plug for grinders or whatever. No additional extension cord needed hopefully.
I used the runniest paint I've ever used, Krylon Fusion. I won't buy that again.View attachment 130769View attachment 130771View attachment 130772
No, I made it from 18ga sheet. I couldn't find anything I liked in the commercially-available junk at Lowe's.Did you buy the outlet box on this cart? I'm trying to catch up with the cool kids running mig/tig carts and want to copy this idea. The only ones I can think of are 3 gang boxes and look like crap.
I kinda wish I'd added one more 220 plug in there. I had to my cart as an "extension cord", and I had to unplug a welder to do it! The horror....
BCGPER
Starting Another Thread
- Location
- Sunny Arizona
I had an idea to laser cut some custom hood emblems for my truck project but after doing some rough draft art work it would probably be too jumbled and most wouldn't know what it said so I'll stick to these original hood emblems and custom paint the name of the truck much larger and legible elsewhere.


- Location
- West Haven, UT
I’ve had a project sitting on my workbench for way too long. A gentleman my wife works with had asked if I wanted a side job and could take a look at an ice cream making machine for him. That was a couple of months ago but I haven’t had time to look at it until this weekend.
It did allow me to finally purchase a dividing head that I’ve wanted for a while. I’m sure I won’t make enough off of this job to pay for it but it’s a start.
This is an old White Mountain ice cream maker. I haven’t seen one of these in nearly 40 years so I eagerly took this project on although I have never cut gears before so I was a little nervous.

A few teeth on this gear will need repairing.

This gear is completely trashed.

Step one was to turn down to the correct OD plus the step which runs in the housing.

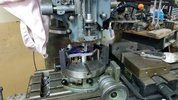
Then the setup moved to the milling machine using the new BS-0 dividing head.

Calculation made for the correct plate.

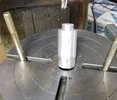
Zeroing in on the top of the shaft.

Zeroing in on the top of the cutter.

Zero the Z-axis on the DRO.

Raised the knee half of the shaft diameter less half the cutter thickness and locked the knee.


Calculated the depth of cut and making the first pass.

Last pass completed.

Cleaned and inspected. SUCCESS!!

Turned the outer end down to .500” for the gear to slide on.

Stay tuned for more work to complete this project. For the first time cutting a gear I am very pleased with the results.
Mike
It did allow me to finally purchase a dividing head that I’ve wanted for a while. I’m sure I won’t make enough off of this job to pay for it but it’s a start.
This is an old White Mountain ice cream maker. I haven’t seen one of these in nearly 40 years so I eagerly took this project on although I have never cut gears before so I was a little nervous.

A few teeth on this gear will need repairing.

This gear is completely trashed.

Step one was to turn down to the correct OD plus the step which runs in the housing.

Then the setup moved to the milling machine using the new BS-0 dividing head.

Calculation made for the correct plate.

Zeroing in on the top of the shaft.

Zeroing in on the top of the cutter.

Zero the Z-axis on the DRO.

Raised the knee half of the shaft diameter less half the cutter thickness and locked the knee.


Calculated the depth of cut and making the first pass.

Last pass completed.

Cleaned and inspected. SUCCESS!!

Turned the outer end down to .500” for the gear to slide on.

Stay tuned for more work to complete this project. For the first time cutting a gear I am very pleased with the results.
Mike
Pile of parts
Well-Known Member
- Location
- South Jordan
Can we expect ice cream at your house when this is done?
- Location
- West Haven, UT
Can we expect ice cream at your house when this is done?
I may have to test it out before the owner comes and picks it up.
- Location
- Grantsville, Utah
Love to see splining done. I haven't seen a gear cut before. Looking forward to that.

