General Tech What did you work on Today?

zmotorsports

Hardcore Gearhead
Vendor
Location
West Haven, UT
Here is a quick little project that my son and I tackled last weekend on his WJ.

The front coil springs had quite a bit of arch to them as we didn’t correct the spring buckets when we clocked the knuckles last year. As much as I hate to admit this, it was an oversight.

Usually a little arch isn’t too bad but his was severe enough that the inside of the coil was making contact with the jounce stop bucket and making some noise. It took us a little bit to locate the noise as is was so intermittent.

3fc0af2d48d4e3d3a5d4a23926ac80bd.jpg


Axle adapter for transmission jack came in handy again. Had the axle out in no time. This is one of those tools I should have built a couple of decades ago.
ab75c6e856d4ccdddd06bd076bf3487d.jpg


a99ad63a2a1dee6b952cf328cedf3794.jpg


Axle fixture worked awesome. Another tool I should have built decades ago rather than put off.
eb2452d9151a762f37fc23b0dd5ea5f0.jpg


It was great to be able to set the axle to zero and lock it solid to the table and then do our cutting and welding off of that dimension.
ca539aff29f0bfe8ee5e56d50ae609d9.jpg


29fe90423fd70089dddb4a84b522c724.jpg


2e801cba526db8583fc6bc8741f71c6b.jpg


8492cd529f77a80e675fc8dde418e51c.jpg


57f394a6d6b478db87d7f46b715a5af2.jpg


a7b6c3e0366d6a86fc1860f55d5d89d9.jpg


596ea07d5c9159f6b7b80b375bc4d706.jpg


4f4976c7d60cecd0b49a72f2c8d82a64.jpg


We could have taken a bit more time and cut everything off and started from scratch on the front bracketry but a quick cut with the plasma cutter and weld everything back together compensating by about 6.5 degrees was all that was needed and it was back on the road. No sense in dragging it out longer or making it more complicated than necessary.

Thanks for looking.

Mike
 

zmotorsports

Hardcore Gearhead
Vendor
Location
West Haven, UT
Here is a little project I worked on the past couple of nights before dropping it off to my upholstery guy yesterday to cover.

After installing wiring for several new gauges to monitor engine vitals during my FASS fuel pump installation I wanted to create a custom gauge panel to house them that would look nice in the cockpit of our coach.

Started with more CAD.
33fba46210a94f37054359eb2e3fa11a.jpg


10dc141765d3793ba8af575a0bb332f4.jpg


ed898bcf4a15f72cf38016597b440e35.jpg


Transferred the pattern to some 16-gauge P&O.
04d3f49788fd4d6eabc2ee2ef33c1f82.jpg


Fed it through my tipping die.
7f0ed8934bffc6d792d3b8812cc8ffab.jpg


Then to the shrinker.
86796e2cb1375629b2d410ac9fea6d6c.jpg


More test fitting.
972e193e7eb51b13ccf671833310c22c.jpg


Gauges mocked up to determine location and angle.
2dde2cb06577e6f0778c617eedef35a1.jpg


I wanted it completely closed off and not merely an open panel with exposed wiring. More CAD to the rescue.
9c585415f6cf0ccdf0a425ac6863f2b4.jpg


That will work.
ed2b8b5c825a1bbbc18dddfc802d1958.jpg


f8c1e202a1a60e622625fd95122eaf71.jpg


Transferred to some 18-gauge and cut out.
fc2c7aef1f9122295f34870048bc5e04.jpg


Used a couple of different diameter stock and tube to confirm the radius on each side.
ed68a45d60dfbe221fa668951cc402e9.jpg


I then made a couple of passes through the bead roller with my tank roll dies to create a rolled edge or soft edge prior to welding.
0798946d4d66933a1ce4f315e421ea09.jpg


f351ef2bbf0a4a2c91d9ae31dfa954da.jpg


9e277b5e977f13be3a5ef61386f57e68.jpg


After the welds were knocked down and some metal finishing.
ca39d285aaf022bd508496746aaf6e6a.jpg


Not exactly to Robert’s level (MP&C) but I’m happy with it.
c1cc5b70c0b9b9cf70d9c20f3109df9f.jpg


a0035fb5d728ea6987aa36953fd99cd5.jpg


392564d670adc8399d1e0d72306a1670.jpg


04024a83e00fc688001906aa0c049221.jpg


f60586045706fbb789c18db6ed68abfe.jpg


90c222b415ad5f065393b312c262bdb0.jpg


And it doesn’t even interfere with my cup holder. ;)

Thanks for looking.

Mike
 

JeeperG

Well-Known Member
Location
Riverdale
Looking good.

If I could make one suggestion if you haven't already planned on it. I mounted my battery in the trunk of my '40 Coupe years ago and then worried about access as I had all electric/remote openers for doors and trunk so I added a couple of battery lugs in an inconspicuous location that I could access easily if the battery went dead.

This is what I used and went through the chassis back near the trunk.

They worked great and in the 11 years that I showed and raced the car I only needed to use them once for an emergency. I used them more often to connect a trickle charger to the car between races and/or shows.

Just a suggestion.

Mike
Already planned in, they did something similar on the 57 wagon with a plug inside the glove box.
 

zmotorsports

Hardcore Gearhead
Vendor
Location
West Haven, UT
For sure, lots of that going on with everything that needs to be serviced at some point, lots of nutserts have been installed all over the truck as well.

One thing most people don't realize is that building one of these things it is not a one and done deal. When I was building street rods, race cars and muscle cars I found myself assembling and disassembling them at least 3X in order to make 100% certain everything fit properly and cleared before blowing back apart the last time for paint and bright work. They were time consuming as hell and then you had the whole gap fitment thing for final body work and paint prep.

Very rewarding when done but thousands of hours worth of labor, which I assume you've already discovered.:cool:

Mike
 

JeeperG

Well-Known Member
Location
Riverdale
One thing most people don't realize is that building one of these things it is not a one and done deal. When I was building street rods, race cars and muscle cars I found myself assembling and disassembling them at least 3X in order to make 100% certain everything fit properly and cleared before blowing back apart the last time for paint and bright work. They were time consuming as hell and then you had the whole gap fitment thing for final body work and paint prep.

Very rewarding when done but thousands of hours worth of labor, which I assume you've already discovered.:cool:

Mike
Absolutely, we're doing a full mock up right now with a bit more fabricating to do before we tear down, I'm fortunate for the help I have, I'd never get it done alone, adding helpful things along the way that my brother already made mistakes on in the past. We are also doing all of it including paint and upholstery which will take longer as we all have jobs but will make it all that more special to me. If it was easy everyone would be doing it.
 

cruiseroutfit

Cruizah!
Moderator
Vendor
Location
Sandy, Ut
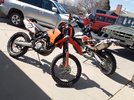
Didn't realize you picked up a 690, they're brilliant bikes!

I picked it up late last year and really just started getting some trips on it. We've been playing out in the west desert, dunes and the Swell last weekend. @Gravy did a rocking job cleaning up and running my old 450 and I took that down to the Swell and let a freinds ride that. Excited to do some more riding this summer. Time to kick back on the RME weeknight AFC rides. I'm honestly loving the 690 so much that I'm considering selling the 450 but I think AF Canyon will have me wanting the smaller/lighter bike.
 

Gravy

Ant Anstead of Dirtbikes
Supporting Member
I picked it up late last year and really just started getting some trips on it. We've been playing out in the west desert, dunes and the Swell last weekend. @Gravy did a rocking job cleaning up and running my old 450 and I took that down to the Swell and let a freinds ride that. Excited to do some more riding this summer. Time to kick back on the RME weeknight AFC rides. I'm honestly loving the 690 so much that I'm considering selling the 450 but I think AF Canyon will have me wanting the smaller/lighter bike.
I told you you'd love that 690. It's like a tiger that thinks it's a big tabby cat. So mellow but so powerful. Its like a giant dirt bike. I've done most of AF on mine but it's not as fun as a normal sized bike.
 

zmotorsports

Hardcore Gearhead
Vendor
Location
West Haven, UT
Friday night I pulled the wife’s Acura TL into the shop to replace the passenger airbag cutout switch. Her SRS light came on last week and after diagnosing to check for short or open from SRS module to switch I determined it was the switch. I ordered one last week and it arrived Thursday night so I pulled it into the shop to perform the repair.

87ad36c924ef8fa647e1cb35fcad009a.jpg


I fabricated a small hook tool to reach inside the vent and pull as none of my interior tools were shallow enough to fit between the louvers in the center vent.
ffb3bb0c71b47cfefd47e476fe20605d.jpg


Reached inside the left side of vent first and engaged the tool to the back side of the vent.
35ffe913f60a4fd94e190f11ccbd2a9d.jpg


41a83a072a3ae8cd4dc26fb0014c2d44.jpg


A slight pull and the left side clips released.
15f31048faef76e8b630db8ba9decc40.jpg


Then moved over to the right side and repeated. The vent popped right out with no damage or marks on the dash or vent.
c612610be9823d09f37fb22acc4db2fc.jpg


Replaced the switch and reassembled.

Thanks for looking.

Mike
 

zmotorsports

Hardcore Gearhead
Vendor
Location
West Haven, UT
So I’m going to try this here as I think most are tool and shop minded and maybe I won’t get verbally abused like I did on Facebook over the weekend.

I belong to the Monaco owner’s group on Facebook and there seems to have been a lot of people with air spring issues lately so I thought I would post up how “I” chose to perform the repair and maybe it would help others. I don’t think I’ll make that mistake again as I’ve discovered lately that there are a lot of idiots on the Monaco Facebook page, or maybe it’s just Facebook period, which is why I don’t participate much on that platform.

I used to say there’s no such thing as a stupid question but I’ve since changed my mind because there are a LOT of them on that particular group’s page. It seems like years ago people would do at least some research on their own and even open the owners manual before opening their mouths for help but anymore people seem to speak first before thinking. Then there’s the keyboard genius’ that know everything and post erroneous information when someone does ask a question which is worse than the person asking the question.

I realize that it’s the internet but for hell's sake I don’t know where some of these people come up with their idiotic answers and all it does is lead people more astray and cause them more confusion, frustration and stress. If these people don’t know the answers they should keep quiet and let others pass along legitimate information.

I’m tired of trying to help others with their Monaco related issues in that group. I don’t know if it’s because the prices have come down on these coaches and the pandemic of the past year has gotten every idiot out looking for a good quality RV or what it is but my hell the high volume of idiocy in that group is staggering.

I posted up pictures and an explanation of how I went about my suspension’s air spring replacement and even after explaining in detail how I supported the weight of our coach I still had people calling me an idiot or nuts or crazy because I was using automotive jackstands and floor jack to raise and support our coach. [emoji35] Too stupid to read the comments AND decipher the pictures but they know it all.

Let me try again......

The air spring replacement is not a difficult task and there’s no need to cut holes in the sides of the coach like I’ve seen some do.

Most are using blocks or “cribbing” placed between the coach’s frame rails and the suspension’s H-frame then lifting and supporting the axle as normal. Once the air springs (air bags) are unbolted you then must fight to compress the air bags enough to get the upper and lower studs out of the holes in the upper and lower mounting brackets. This works perfectly other than the efforts needed to compress the old then the new air bags for removal and installation.

I chose to go a different route. I used my tall 22-ton jackstands with the weight of the coach sitting straight down on them. Before beginning I raised the coach as high as I could with the coach’s air system and placed the jackstands just above the steer axle with positive engagement with the chassis.

Now this allowed me to only need a smaller 3-ton floor jack to raise and lower the front suspension. I raised one side slightly and removed a steer tire/wheel. Now I can sit up under the coach and have access to the air bags. I removed the mudflap and hulla skirt material that protects each air bag for better access but that only requires removal of a few tech screws on each.

Now I could reach around the H-frame and air bag to each of the fasteners and the 90-degree air fitting. I removed the air line, then the air fitting, then the 3/4” NPT to 1/4” NPT adapter and lastly grabbed my 1/2” drive fine tooth ratchet and 3/4” socket to break the two upper nuts loose (I hit them with some Aerokroil just before starting). Once the nuts were broken loose j could use my Snap-on FAR72 high torque 3/8” air ratchet to zip the nuts off the top of the air bags. I was able to do this on all but two upper buts where I had to use a ratcheting wrench due to gussets being in the way. The lower bolts were easily accessed with a 1/2” impact gun and 3/4” socket in which were easily zipped off in no time.

Once the fittings and upper & lower nuts were removed came the easy part. I simply and slowly lowered the 3-ton floor jack and the suspension pulled away from the chassis allowing the air bag to sit there with plenty of space to reach in and lift the old one out and set the new one in place. Then raised the floor jack and made sure the studs properly engaged with the holes and reassemble the nuts and air fittings then move on to the next. Easy peezy.

Now for the pictures depicting the process.

Mudflap and hulla skirt (brush) removed for better access to the old air bag.
06378bb7a2a0bcc7967c70688703cf5b.jpg


Using 1/2” fine tooth ratchet with about a 16" long cheater on it.
645c8916c576f08370b02280c63de455.jpg


Here you can see a slight gap at the top of the air bag as it fell away during fastener removal.
a0207f043efa5a30e6984dc3a48a1694.jpg


Lowered the suspension down and the air bag is completely free from the upper bracket.
8fda9d0e5a08c872d1b4964764027948.jpg


Now simply lift the air bag out.
6c51425cb6f778c580e104cbbea69d9e.jpg


They were due for replacement. I’ve been keeping an eye on them for the last couple of year. They started as just weather cracking two years ago then last year I noticed some advance deterioration on the lower roll and by the end of last year’s travel season there were small pieces of rubber flaking off. None had developed leaks yet and I’m sure they could have gone a bit longer as I’ve seen worse still in service but I’m a big proponent of replacing things prior to failure. I figured this would be much more problematic of a repair out on the road and ruin a vacation so I opted to replace them prior to this year’s travel season.
4e5649ae70f4bc4bb2cc7988bee35ae4.jpg


New one ready to install the reducer and apply anti-seize to the studs prior to installation.
c284fb5367a730ac1d57edaea5937036.jpg


New air bag easily slid into place.
1aa9af973d9f844c7aad98dbab216d68.jpg


Raised the suspension up using my small 3-ton automotive floor jack.
8ab2433bb96bf0066b8c5f421efa1f6a.jpg


Air bag fully engaged in the upper and lower mounting brackets and ready to install the nuts and tighten in place.
44c42300c41bfb367528717c79de2edc.jpg


That air bag replaced and shock reinstalled. Ready to reinstall the hulla skirt and mudflap then move on the next air bag.
69282e00c3739ced5989a99465c80033.jpg


Next air bag showing the hulla skirt before removal.
c51aefeb250228db3e0982327a497de6.jpg


Driver’s side front of steer tire didn’t require shock removal. The easiest air bag to replace.
cf66f91fd3f2d5b36dc480ae6c136711.jpg


Old air bag removed.
cf145da944c1aeb9d0972adeb190cbf1.jpg


Moved around to the passenger’s side. This one on passenger’s side in front of the steer tire was the most difficult due to several large wire looms/bundles complicating access but just took a few minutes longer.
5343aab30d35586fa311c0af9723b78f.jpg


Passenger’s side just behind steer tire replaced.
f46aac3ff6aefabbbedc9ff9bd1cf200.jpg


Ready to reinstall passenger’s side mudflap and hulla skirt then tire& wheel and the front is complete.
27d9499bac84de2bf57997606c7f8a4f.jpg


Forty percent of the air bags completed.
954e3472b7e3768b208760392dfd76e8.jpg


Rear still to go.
04724b77fed26d1628a5bb6e484ff87f.jpg


Thanks for looking.

Mike
 

UNSTUCK

But stuck more often.
I've done many, many airbags on semi trailers. I do it the same way. Lift and support the frame then raise and lower the axle. I've even done the entire job with a forklift on the back of the trailer. Loosen all the hardware, raise the trailer with the forklift let the bags fall out and replace. Set it back down.

Still happy I've never done the facebook thing.
 

zmotorsports

Hardcore Gearhead
Vendor
Location
West Haven, UT
I've done many, many airbags on semi trailers. I do it the same way. Lift and support the frame then raise and lower the axle. I've even done the entire job with a forklift on the back of the trailer. Loosen all the hardware, raise the trailer with the forklift let the bags fall out and replace. Set it back down.

Still happy I've never done the facebook thing.

That is exactly how I've done them on our OTR trucks and trailers as well but not the norm in the RV world for some reason. To me it just makes more sense to use the weight of the suspension to pull the air spring down and easier to lift out and reinstall but blocking between the suspension and the frame then lifting the whole suspension and coach is the norm in the RV world.

Accessibility on these coaches is more the issue than anything compared to an OTR truck where they are pretty much out in the open. These things are buried up under the fender skirting and tough to get to. That is why I thought I would show others that they don't need to make it as difficult as it initially seems. Some guys were even cutting holes in the sides of their coaches and adding fuel or water fill doors to cover the hole up afterwards. There is no way I would cut a hole in the side of my coach but this idiotic solution has been repeated by more and more idiots that it was actually becoming the accepted repair procedure.:rolleyes:

Mike
 
Top