You are using an out of date browser. It may not display this or other websites correctly.
You should upgrade or use an alternative browser.
You should upgrade or use an alternative browser.
General Tech What did you work on Today?
- Thread starter Gravy
- Start date
_Auzzy_
Web Wheeling Extraordinaire
- Location
- Richfield Utah
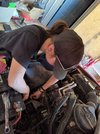
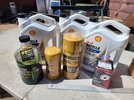
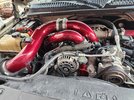
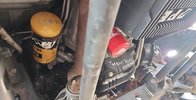
Gave my dirtyboy a much needed service
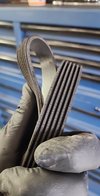
Found the belt was also in need of replacement
So while at it I pulled my oil fill tube and cleaned the rust off it and gave her a nice coloring and one of my shackles for the rear
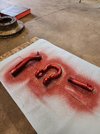
Beautiful again ❤️
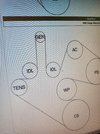
And made myself a belt diagram, not as perverted as GM's but it will do
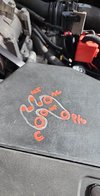
Then left myself some love notes

Found the belt was also in need of replacement

So while at it I pulled my oil fill tube and cleaned the rust off it and gave her a nice coloring and one of my shackles for the rear

Beautiful again ❤️

And made myself a belt diagram, not as perverted as GM's but it will do


Then left myself some love notes

- Location
- Grantsville, Utah
- Location
- Stinkwater
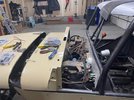
Ok, that's hawt.I needed to add a couple electrical accessories to my buggy. The builder made it very easy to access all of the wiring by mounting the cowl with 4 bolts. Pull those bolts and move the body panels forward, and it’s all open.
View attachment 158483
- Location
- Sandy, Ut
- Location
- Grantsville, Utah
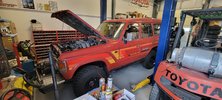
Glorious paint. 😍Pulling this old girl out or the shop after a month long t-case seal change that turned into a T/C overhaul, oil change and tons of cleanup
View attachment 158484
- Location
- Sandy, Ut
DesertRam
Active Member
- Location
- Southern New Mexico
- Location
- West Haven, UT
Worked on the Camaro Saturday performing a paint correction. I'm about 5 hours into it so far and have the front clip completed, all three steps.
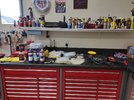
Supplies at the ready.
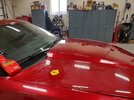
Step 1 is to clay bar the surface to avoid grinding impurities into the paint.
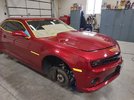
I then go one step further and mask off areas I don't want compound slung onto. Textured plastic especially gets taped/covered.
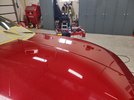
Step one completed on the hood and step two on the driver's side already showing vast improvement as the fine micro-scratches are disappearing and the swirl marks are residing.
The front bumper cover had quite a few micro-scratches so I had to get a bit aggressive but they all came out.
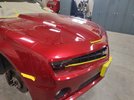
Step one on the bumper cover reveals the swirl marks left behind by the course polish.
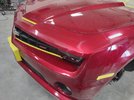
Step two completed and moving on to the final step in my 3-step process, the machine glaze using a fine foam pad. This is where the results really pay off.
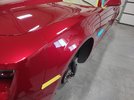
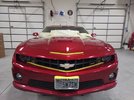
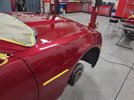
All I have completed so far is the front clip but it already doesn't even look like the same car. A few more nights and she should be ready for a detail wash and her new wheels.
Thanks for looking.
Mike
Supplies at the ready.

Step 1 is to clay bar the surface to avoid grinding impurities into the paint.

I then go one step further and mask off areas I don't want compound slung onto. Textured plastic especially gets taped/covered.

Step one completed on the hood and step two on the driver's side already showing vast improvement as the fine micro-scratches are disappearing and the swirl marks are residing.

The front bumper cover had quite a few micro-scratches so I had to get a bit aggressive but they all came out.

Step one on the bumper cover reveals the swirl marks left behind by the course polish.

Step two completed and moving on to the final step in my 3-step process, the machine glaze using a fine foam pad. This is where the results really pay off.


All I have completed so far is the front clip but it already doesn't even look like the same car. A few more nights and she should be ready for a detail wash and her new wheels.
Thanks for looking.
Mike
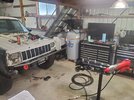
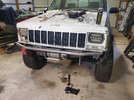
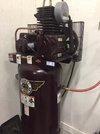
Finally getting to play with some new tools, got the compressor mounted and started on the MJ front bumper with my new JD2 Model 32 w/ Swag air/hydro, I'm very happy with the setup. I also picked up a couple JD2 bendicator protractors and a Swag off plane bend bracket which are pretty sweet. I need to figure out an air dryer system for the compressor and route lines around the shop at some point.


- Location
- Sandy, Ut
Finally getting to play with some new tools, got the compressor mounted and started on the MJ front bumper with my new JD2 Model 32 w/ Swag air/hydro, I'm very happy with the setup. I also picked up a couple JD2 bendicator protractors and a Swag off plane bend bracket which are pretty sweet. I need to figure out an air dryer system for the compressor and route lines around the shop at some point.
View attachment 158573
View attachment 158574
Talk to me about that staircase. Looks 'shallow' which I love and need something similar in my home shop.
- Location
- West Haven, UT
Finally getting to play with some new tools, got the compressor mounted and started on the MJ front bumper with my new JD2 Model 32 w/ Swag air/hydro, I'm very happy with the setup. I also picked up a couple JD2 bendicator protractors and a Swag off plane bend bracket which are pretty sweet. I need to figure out an air dryer system for the compressor and route lines around the shop at some point.
View attachment 158573
View attachment 158574
I have the older Model 2 that I added hydraulics to within a few years of purchasing the bender and love it. Works well but there are times I wish I had the larger diameter pins for that extra peace of mind when bending thicker walled tubing.
As for air dryer system, here in Northern Utah you don't need anything crazy like a powered dryer setup. I have a simple bowl with water drain on it but that comes after a larger set of condenser coils. For condensing coils I am using an old repurposed transmission cooler from a previous motorcoach that I cleaned and repaired. It is mounted to the back of the compressor cage and plumbed in-line just before the water separator and works fantastic. No issue with water being introduced into the air system but on things like my media blasting cabinet I also installed one of these inexpensive water filters which does seem to help on long uses when blasting a lot of parts. I also use them on my paint guns when painting but no other air tools as nothing else has been needed.
Bumper is coming along nicely by the way....nice lines to it and like the tucked winch. 👍
Have you seen the new Swag bender? The pins are giant and the arms are all 3/4" instead of 1/2". Pretty sweet looking.Works well but there are times I wish I had the larger diameter pins for that extra peace of mind when bending thicker walled tubing.
I'm the same as @zmotorsports I have a large condensaot on the back of my Ingersoll and a basic regulator with water filter. I've never noticed any moisture except for prolonged blow gun use spraying the entire garage out, very little comes out when I drain the tank either.
@zmotorsports and @1969honda are your condensers between the compressor head and the tank, or on the outlet of the tank? I'm guessing after the tank, otherwise you'd really need a water separator also before the tank....but it would take advantage of the hottest air being cooled.
Mine goes compressor --> condensor--> tank--> outlet. With the small air regulator and water separator/filter dryer I get minimal moisture if drained regularly like it should. If I leave town and come home after a month or so and the compressor has been used by my boys/wife it's a different story.
Just need to do a little fine tuning on the panels and they can come out for upholstery, also haven't made the door panels yet. Should be able to get next door soon and finish sanding the bed and get that put back on.
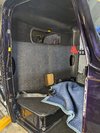
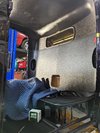
You can see the scrap piece of leather hanging in there, going to be lots of red visible.
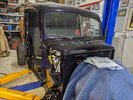
We'll start on the wiring process soon, I have an Artec industries battery mount up under the passenger fender


You can see the scrap piece of leather hanging in there, going to be lots of red visible.

We'll start on the wiring process soon, I have an Artec industries battery mount up under the passenger fender

- Location
- West Haven, UT
Have you seen the new Swag bender? The pins are giant and the arms are all 3/4" instead of 1/2". Pretty sweet looking.
I have not seen the Swag bender. I know my Model 2 has 7/8" pins and the newer Model 32 has 1-1/4" pins. That's a substantial amount but not enough to make me sell my Model 2 with all of my dies and move to another bender. To be honest, most of the tubing I work with is .095" and thinner wall in 4130 chromoly so the Model 2 works perfectly. When building the suspension links for my son's WJ using 1.75" diameter .250" wall tubing was the only time I really wished I had the larger pins as I slightly bent one of mine. Nothing a little persuasion in the hydraulic press didn't resolve but at that time I had wished for larger pins but that was the only time in all these years. Other than that it has performed flawlessly.
Mine goes compressor --> condensor--> tank--> outlet. With the small air regulator and water separator/filter dryer I get minimal moisture if drained regularly like it should. If I leave town and come home after a month or so and the compressor has been used by my boys/wife it's a different story.
Mine is routed in the same manner. Out of the head, to the "auxiliary" condenser, back into the tank, out of the tank through a ball valve and about 5' of hose to a water separator mounted on the wall with a drain. I open the drain weekly, each Saturday morning, and seldom get anything but a light mist out of it. I have a ball valve with a small hose on the bottom of the tank as well and I keep a gallon jug next to the compressor that I dump the air from the tank into once a month and only get a small amount there as well. It takes me quite a while to fill the gallon jug before disposing.
Here you can see the ball valve and hose from the tank and it is heading to the water separator mounted on the back wall of the RV/storage bay.
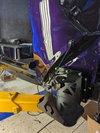
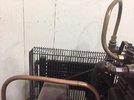
Here is the plumbing that I added coming from the head (discharge side of compressor) to the auxiliary condenser mounted to the back of the squirrel cage. I also added the pressure relief here in a cast "T".
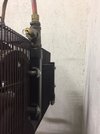
Here you can see the new copper line coming out of the auxiliary condenser to the tank.
Hope the pics are helpful.
Mike
- Location
- Grantsville, Utah
Very helpful. Thank you.I have not seen the Swag bender. I know my Model 2 has 7/8" pins and the newer Model 32 has 1-1/4" pins. That's a substantial amount but not enough to make me sell my Model 2 with all of my dies and move to another bender. To be honest, most of the tubing I work with is .095" and thinner wall in 4130 chromoly so the Model 2 works perfectly. When building the suspension links for my son's WJ using 1.75" diameter .250" wall tubing was the only time I really wished I had the larger pins as I slightly bent one of mine. Nothing a little persuasion in the hydraulic press didn't resolve but at that time I had wished for larger pins but that was the only time in all these years. Other than that it has performed flawlessly.
Mine is routed in the same manner. Out of the head, to the "auxiliary" condenser, back into the tank, out of the tank through a ball valve and about 5' of hose to a water separator mounted on the wall with a drain. I open the drain weekly, each Saturday morning, and seldom get anything but a light mist out of it. I have a ball valve with a small hose on the bottom of the tank as well and I keep a gallon jug next to the compressor that I dump the air from the tank into once a month and only get a small amount there as well. It takes me quite a while to fill the gallon jug before disposing.
Here you can see the ball valve and hose from the tank and it is heading to the water separator mounted on the back wall of the RV/storage bay.
View attachment 158597
Here is the plumbing that I added coming from the head (discharge side of compressor) to the auxiliary condenser mounted to the back of the squirrel cage. I also added the pressure relief here in a cast "T".
View attachment 158598
Here you can see the new copper line coming out of the auxiliary condenser to the tank.
View attachment 158599
Hope the pics are helpful.
Mike
Talk to me about that staircase. Looks 'shallow' which I love and need something similar in my home shop.
Sorry but I don't have too many details for you, it was part of the shop when I bought the place and I have no idea where it came from, it's 24" wide at a 45deg incline. It is great for a shop, big enough to get stuff up and down but doesn't take up too much room.
@zmotorsports and @1969honda thanks for the insight, that's helpful. My plan was just to run a regulator/filter/dryer combo unit on the outlet side of the compressor (I'm open to recommendations?), how necessary do you think the auxiliary condenser type setup is in our area? My primary reason for drying is painting and at some point plasma cutting.

