General Tech What did you work on Today?

Zombie

Random Dead Guy
Location
Sandy Utah
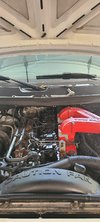
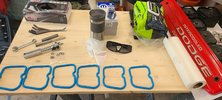
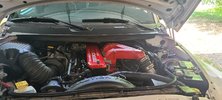
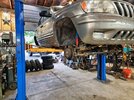
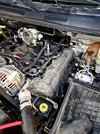
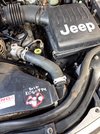
My Saturday was spend replacing valve cover gaskets, adjusting valve lash, an oil change, and just a little bit of vanity.
20230520_125125.jpg
20230520_131824.jpg
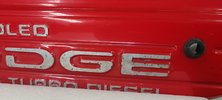
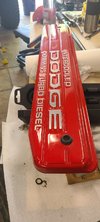
The beauty cover had been painted by the original owner of the truck, but it had been neglected in recent years and the exposed aluminum was pretty pitted and tarnished.
20230520_131829.jpg
Stepped through a few grits on a little block, and then polished out with some brasso on a felt dremel wheel, then poliched the painted surfaces and waxed.... Yeah, it's vanity, but with a painted cover this nice, it didn't feel like a waste of time....

20230520_145206.jpg
20230520_151333.jpg
And all buttoned up. I swear it runs just a bit quieter now, but it could be my imagination.
 

jeeper

I live my life 1 dumpster at a time
Location
So Jo, Ut
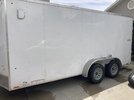
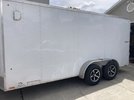
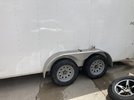
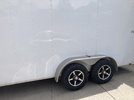
One of my trailers needed new rubbers. I still had the wheels left over from my camper trailer project, so I thought it would be fun to put those on this enclosed trailer. I ordered a set of new tires online, and mounted them up in my garage. I went for a size larger, and a heavier weight rating.
I have always been a little bit shy about getting this trailer into some of the spots we go because it sits so low. The new tires gave me 1 inch more clearance. Not a lot, but I will take it.


IMG_4215.jpegIMG_4217.jpegIMG_4216.jpegIMG_4218.jpeg
 

Tonkaman

Well-Known Member
Location
West Jordan
One of my trailers needed new rubbers. I still had the wheels left over from my camper trailer project, so I thought it would be fun to put those on this enclosed trailer. I ordered a set of new tires online, and mounted them up in my garage. I went for a size larger, and a heavier weight rating.
I have always been a little bit shy about getting this trailer into some of the spots we go because it sits so low. The new tires gave me 1 inch more clearance. Not a lot, but I will take it.


View attachment 160268View attachment 160269View attachment 160270View attachment 160271
I’d give anything for an extra inch
 

cruiseroutfit

Cruizah!
Moderator
Vendor
Location
Sandy, Ut
After borking this new tire a few weeks ago, I had a few people tell me that GlueTread works quite well. I ordered an off-road sidewall repair kit from them to see if it works well enough to keep this tire around as a spare.

View attachment 160207

Borked tire.

View attachment 160205View attachment 160206

Sanded smooth-ish.

View attachment 160208

Stickied

View attachment 160209

They suggest you bevel the edges of the patches to make them glide smoother over catchy stuff.

Beveled and cleaned.

View attachment 160210View attachment 160211

The glue is some wicked fast and strong super-glue. Don’t pick your nose.

View attachment 160212

It's standard Cyanoacrylate glue with an included accelerator. The owners of the Gluetread company gave a handful of kits to us after sitting through a tire repair training I do at shows and manufacture training. We do a hands-on plug class, emergency tire valve (Colby) and rubber valve replacement and talk about sidewall repair. We'll likely start doing some as demos with their kit.

We used some similar products in Greenland on the big 44" Arctic Truck tires... they all held :D
 

_Auzzy_

Web Wheeling Extraordinaire
Location
Richfield Utah
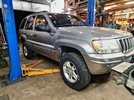
All kinds of fun today. Got the cheapochurro on the road!! Started off with tires, Then some engine work, then some suspension and bam

Hauling tires away and clean up

20230526_201927.jpg

Replaced leaking valve cover gasket on the driver side. It was the worse side, still gotta do the passenger side but it looks like a nightmare. Also replaced the TPS due to a random idle. Would go up n down etc. then ran an extra ground to the throttle body, theory behind it is that it smooths out the sensors. Did a Stillen ground kit on my titan years ago after seeing a video showing how the affected areas were sensitivity/ increment wise before and after install. the sensors showed a smoother increase in numbers with the ground kit versus without. also replaced the main alternator cable after i saw the end had a bit of corrosion forming. jumped it up from a 8G to a 4G with some nice OFC high count cable i had laying around.

20230527_182343.jpg

Next I replaced the belt with one of the ones given to me and then replaced the tensioner pulley as well. Also did some arts n crafts, belt diagram and colored the jeep cause a.d.d.d.d.d.d....

20230527_192748.jpg


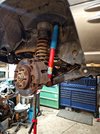
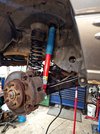
Next was suspension! All front control arms and coils. Front coils were rotted and sagged out. Lower arms had worn out bushings but thanks to Detroit axle for the cheap win on the arms and random company on coils 😂🤘 rear upper link got shipped separately sadly and won't be here till Tuesday.


20230527_193450.jpg

20230527_210018.jpg

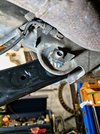
Found the passenger side lower arms upper body side bolt had wallered out the inside a little so random tab kicking around made for the perfect weld in fix.
20230527_210029.jpg

Sitting pretty on her new shoes. Took it for a rip up the block and she's tight and scoots awesome! Besides the exhaust leak it feels mechanically sound


20230527_225507.jpg


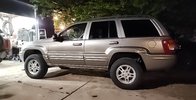
Did notice the tail lights don't come on with the headlights though. But the turn signals and brakes work. Seems to be a common issue so I'll get that figured in the morning. But for now here it is

received_217864861015962.jpeg


Oh and my official total cost on this is now $1948.83 👌
 
Last edited:

cruiseroutfit

Cruizah!
Moderator
Vendor
Location
Sandy, Ut
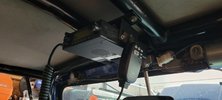
2M in the FJ40. It's an ooooollld Icom IC-2100H that I've loaned our for Canguro chase rigs in the past. Over the years all our chase crew members have invested in their own radios so this one was collecting dust. I finally mounted it in the Mongrel so I've got a dedicated ham and external antenna. Sure beats the handheld. Even from the cover of my house garage, I can cleanly hit the 146.620 repeater with great TX/TX sound.

20230528_155544.jpg
 

_Auzzy_

Web Wheeling Extraordinaire
Location
Richfield Utah
2M in the FJ40. It's an ooooollld Icom IC-2100H that I've loaned our for Canguro chase rigs in the past. Over the years all our chase crew members have invested in their own radios so this one was collecting dust. I finally mounted it in the Mongrel so I've got a dedicated ham and external antenna. Sure beats the handheld. Even from the cover of my house garage, I can cleanly hit the 146.620 repeater with great TX/TX sound.

View attachment 160348


Love having a radio but man do I hate it when I pick up the weirdos who seem to think they're a radio dj
 
Last edited:

ebryson

Active Member
Location
Bountiful, Utah
Teaching myself how to weld today, with a little help from @mbryson. Got a cool practice welding kit from somewhere awhile ago and decided today was the day to try it out. Here are some of my samples with a little Hobart Handler 100. I wouldn't say I'm good, but I definitely feel like they'd hold. Did a little destructive testing on the bottom one to make sure the welds held and they did which made me feel a bit more accomplished.
20230529_133049.jpg
 

J-mobzz

Well-Known Member
Put some street tires on my Razor- 2.5x10 front and 2.75x10 rear. Then I hit 37 mph on it. It felt worlds better than 33 mph on the off-road tires. This thing is a fun distraction from other projects cough buggy cough
View attachment 159659
What model razor is this? I rode a modded one this weekend and now I’m in the thick of figuring out what I need to build one.
 

N-Smooth

Smooth Gang Founding Member
Location
UT
What model razor is this? I rode a modded one this weekend and now I’m in the thick of figuring out what I need to build one.
That one is a SX500 but the MX500, SX500 and MX650 are all essentially the same bike and a good starting point. You can be crazy and drop like $2k on all the parts from Electro and Co or do it in phases and save cash through DIY. I don’t know that I’ll ever do a “full” build on mine but I could spend a few hundred more on a tuneable controller for sure. My neighbor just did one and it’s killer.
 

zmotorsports

Hardcore Gearhead
Vendor
Location
West Haven, UT
Been a busy week or so in the shop between getting a few personal projects completed as well as some side jobs.

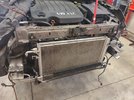
Following the Jeep JK track bar repair I had a 2010 Buick LaCrosse needing a radiator.

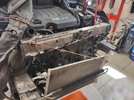
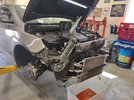
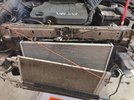
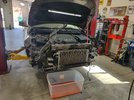
The entire front of the car had to come off to gain access to the radiator. Bumper cover, headlights, crash bar and all associated trim had to be removed after draining the coolant.
buick1.jpg

buick2.jpg

Then the small trans. cooler and A/C condenser had to be disconnected from the radiator and moved just enough to gain access to the radiator. After the fan assembly was removed and leaned inward, the radiator could come out the front of the core support.
buick3.jpg

Old radiator out and switching clips and connectors over to the new one.
buick4.jpg

Ready for reassembly to begin after a little cleanup.
buick5.jpg

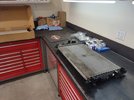
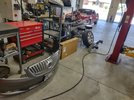
I sure am enjoying the mobile cart/shelf that I bought earlier this year. It is working out great for stacking parts during a large project such as this.
buick6.jpg

New radiator wiggled into position.
buick7.jpg

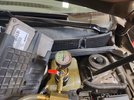
Once the hoses were reconnected and the cooling system sealed up I pulled a vacuum to ensure there were no leaks. I do this before final assembly in the event there is a leak that needs to be address as it is better to find it at this stage vs. when everything is put back together.
buick8.jpg

Held a vacuum for about 30+ minutes so the system is nice and tight.
buick9.jpg

Cooling stack reassembled and ready to accept the crash bar, headlights and bumper cover.
buick10.jpg


Thanks for looking.

Mike
 

zmotorsports

Hardcore Gearhead
Vendor
Location
West Haven, UT
After finishing up the Buick radiator I moved on to my Jeep.

With 150k miles now on the original alternator I thought I'd replace it as a preventive measure. I generally rebuild my alternators and starters, however, the shop I used to purchase my parts from has now closed since the owner passed recently. I knew the quality of parts they bought and used in their own rebuilds so my confidence in the parts was high. However, with so much garbage available these days I didn't want to risk it so I ended up purchasing a new OEM alternator. I will carry the old one in the coach as a backup but with 150k miles I felt like it was a good time as I generally see these Chrysler alternators fail in the 130k-140k mile range and even sooner in the Jeeps because people stack on so many accessories and the charging systems get abused. Mine was still functioning perfectly but I will feel better knowing it won't leave me when we're 40+ miles off the pavement in the back country.


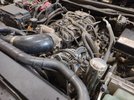
Original alternator removed after loosening belt tension and removing intake duct.
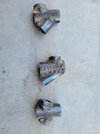
alt1.jpg

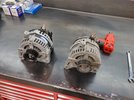
New and old for comparing part #'s and clocking to ensure everything is correct.
alt2.jpg

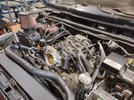
New alternator installed and buttoning the engine bay back up. All that is remaining is to install the engine cover after a test start.
alt3.jpg


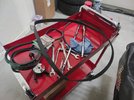
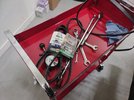
The next night I tackled a job on the coach that has been on the "to do" list. The serpentine belt and the A/C V-belt have some age on them and as preventive maintenance I figured it would be easier in the shop to replace them than on the side of the road.

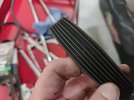
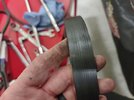
They are actually still in really decent condition however.
coach1.jpg

coach2.jpg

Very slight amount of glazing but still overall good condition and could have continued to be run without too much worry.
coach3.jpg

coach4.jpg

Serpentine belt installed first and then the A/C V-belt installed and the tension set.
coach5.jpg


Thanks for looking.

Mike
 

zmotorsports

Hardcore Gearhead
Vendor
Location
West Haven, UT
Now up to last night where I knocked off another "to do" item off the coach list.

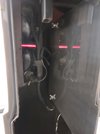
Last summer I noticed that the wiring harness for the taillights in our 2003 Monaco Dynasty were looking a bit rough and I noticed that the bulbs were fitting quite loose in the sockets and were causing issues with sometimes not working. I am somewhat anal and OCD about running lights not working properly when I see them on other's vehicles so as soon as I noticed the issues I investigated and determined the sockets were getting worn but also the housings were becoming distorted slightly due to the heat in the engine bay. Also the gaskets between the taillight housings and lenses had failed and allowed dirt and exhaust soot to coat the inside of the lights which dimished the light output.

Last fall I ordered new taillight housings from a 1973-1987 GM truck along with new socket/pigtail assemblies and gaskets. They have been sitting on the shelf since last fall and I finally made time to replace them and tidy up the wiring harness.

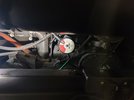
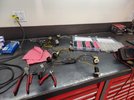
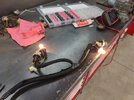
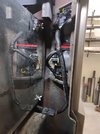
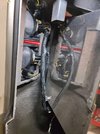
The passenger's side was the worse probably due to the exhaust running under the right rear corner of the coach. The original harness was removed and the deteriorated and crumbling convoluted wire loom was removed. Here I already replaced the socket assemblies with the new ones using bare connectors and heat shrink to minimize the size of the wire loom and to help conceal it as best as possible.
coach10.jpg

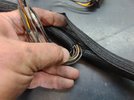
Rather than use the same convoluted casing I chose to use some woven casing that should be a bit more resilient to heat and provide a nicer looking and longer life repair. Here I cut a small notch out of the inside to allow the wires to exit and a smaller section of woven casing to join as a branch.
coach11.jpg

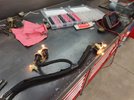
Passenger side harness completed and bench test using my PowerProbe to power up the running light circuit.
coach12.jpg

And the brake/turn signal circuit.
coach13.jpg

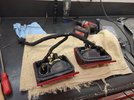
Moving to the driver's side it was much the same way but the convoluted casing was in a bit better condition than the passenger's side.
coach14.jpg

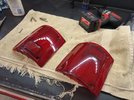
Also because I can't leave anything alone, I noticed that the lenses were a bit dull so I grabbed my 3" cordless Milwaukee polisher and some plastic polish to brighten up the lenses before reassembly. Lense on the left has been polished with the right yet to be done.
coach15.jpg

Driver's side assembled and ready to be installed in the rear end cap of the coach.
coach16.jpg

Passenger's side wiring harness looks so much better and the bulb fitment is back to OE.
coach17.jpg

Same with the driver's side.
coach18.jpg

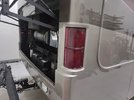
Fully assembled and ready to close up the engine bay.
coach19.jpg


Thanks for looking.

Mike
 
Top