General Tech What did you work on Today?

Gravy

Ant Anstead of Dirtbikes
Supporting Member
This one entitled "how to rebuild a $15 dollar thing in 15 minutes with $500 worth of tools."
(Or a mental sanity work break outside.)

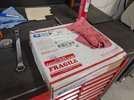
Behold ye olde crappy dolly and a pallet.
20230921_180613.jpg

Behold ye new dolly crafted with a pallet & a fancy carpet sample.
20230926_133405.jpg

Then fix the fridge.
20230926_084844.jpg

Ok back to real work.
 
Last edited:

jeeper

I live my life 1 dumpster at a time
Location
So Jo, Ut
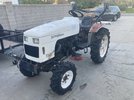
My son wanted to work on the tractor, so we did.
We took the bucket off.
IMG_5213.jpeg

The bucket needs a lot of work and testing before it would ever be functional, and I wanted to use the 3 point on the tractor soon. I can do the work on the bucket without it being on the tractor.

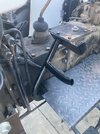
Next thing was to add a lower pedal to the clutch. With the stock pedal, you had to have your knee in your chest before it released. Now my heal can stay on the floor board and pivot like it should. Originally I was going to cut and weld the original pedal lower.. but thought the kids might want the higher pedal if they drive.

IMG_5212.jpeg
 

Hickey

Burn-barrel enthusiast
Supporting Member
My son wanted to work on the tractor, so we did.
We took the bucket off.
View attachment 164393

The bucket needs a lot of work and testing before it would ever be functional, and I wanted to use the 3 point on the tractor soon. I can do the work on the bucket without it being on the tractor.

Next thing was to add a lower pedal to the clutch. With the stock pedal, you had to have your knee in your chest before it released. Now my heal can stay on the floor board and pivot like it should. Originally I was going to cut and weld the original pedal lower.. but thought the kids might want the higher pedal if they drive.

View attachment 164396
Whatcha got goin on the 3-point? You may need some front ballast.
 

jeeper

I live my life 1 dumpster at a time
Location
So Jo, Ut
Whatcha got goin on the 3-point? You may need some front ballast.

I don't know yet for sure. Going to try to build my own box blade / scraper. I would love to find a brush hog... But I'm not really in the spend money mood on it yet.
I've got some pretty heavy i-beams and rail spikes.. so I think i'll make a drag with rippers if possible.

I wanted to test the 3-point lift, so I backed under a trailer and lifted the back end up... so maybe 1,000 ish lbs. No wheelie on the tractor for that.. but I'm sure it wouldn't take too much more.
 

Hickey

Burn-barrel enthusiast
Supporting Member
I don't know yet for sure. Going to try to build my own box blade / scraper. I would love to find a brush hog... But I'm not really in the spend money mood on it yet.
I've got some pretty heavy i-beams and rail spikes.. so I think i'll make a drag with rippers if possible.

I wanted to test the 3-point lift, so I backed under a trailer and lifted the back end up... so maybe 1,000 ish lbs. No wheelie on the tractor for that.. but I'm sure it wouldn't take too much more.
Build a brush hog out of an old axle.
 

STAG

Well-Known Member
Finally fired up the new TIG for a few welds. It’s a nice welder, but I do miss the amount of adjustment my last TIG had. Mainly the ability to adjust gas postflow time. Would really be helpful on those hotter welds or stainless to be able to shield the weld and the redhot tungsten a little bit longer.
 

zmotorsports

Hardcore Gearhead
Vendor
Location
West Haven, UT
I had a project for my brother that has been sitting in my shop for a month or so and thought I'd get it done and back to him. He is restoring another tractor from our family farm and he has been unsuccessful locating a new lower radiator casting. He did an awesome job restoring the old Farmall Model H a few years ago and this one is being a bit more challenging as the parts aren't as readily available as they were for the "H" tractor.

The tractor my brother is now restoring is a 1938 Farmall F-12 and was the one of the first tractors in Weber County after my grandfather purchased the farm in 1934 and moved here from Superior, Wyoming. My dad purchased the tractor when he was quite young to not only help on the farm and begin to retire the work horses but he also did some side work or "custom work" for neighboring farmers as my dad called it. After working all day on his farm he would plow a field or disc as a side job for extra money. It shouldn't be a surprise that I've been so keen on doing side work my entire life as I think I know where I got it. :bounce:

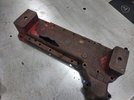
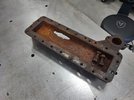
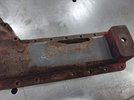
The lower radiator housing is no longer available and my brother has been unable to find one in better shape than what he has so he asked if I could take a look at it and see if it was something I could repair. He first asked if I could build up the hole to repair it but after closer inspection it was so thin that I didn't think that would work.

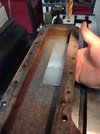
The material is so thin I would need to take it back out to approx. 7 inches by 2 inches to get into thick enoug material that I could feel comfortable TIG brazing.
farmall1.jpg


farmall2.jpg


I ran a wire brush around the area where I thought I would be cutting to.
farmall3.jpg


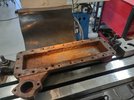
Next I clamped the casting to the mill table and squared it up to the quill.
farmall4.jpg


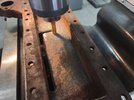
I used a .500" roughing end mill and began cutting until I was able to get into nearly full thickness material.
farmall5.jpg


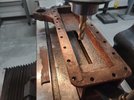
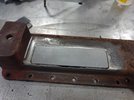
The opening ended up being 2"x 7" exactly.
farmall6.jpg


I cut a piece of .187" thick P&O to message into place.
farmall7.jpg


With a nice tight fitment I beveled the edges of both the new steel and the casting to allow a trough for the silicon bronze rod to lie in.
farmall8.jpg


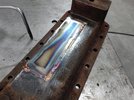
Next I TIG brazed using the silicon bronze rod and wet it into the trough created by the bevel. It turned out fair but not great as the casting was pretty bad and the impurities just kept floating to the top even though I wasn't getting the parent material molten.
farmall9.jpg


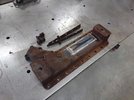
Job completed and ready to be picked up.
farmall10.jpg


Thanks for looking.
 

zmotorsports

Hardcore Gearhead
Vendor
Location
West Haven, UT
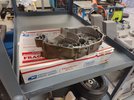
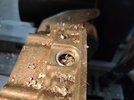
This engine case was shipped to me from Texas and has been sitting on my shelf awaiting repair for a couple of weeks now.
case1.jpg


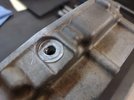
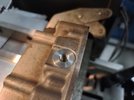
The threads are buggered up as well as a small crack at the sealing surface. My plan was to make an insert that would barely sit inside the recess and allow me to weld it in and address the crack while the insert would allow new threads to be cut. The owner didn't provide a new drain bolt in the box so after reaching out to find out what size it was supposed to be I learned I needed to tap for a 10mm x 1.5 drain plug.
case2.jpg


Setting it up on the mill table and clamping it tightly to a large angle plate.
case3.jpg


I started with a 3/8" end mill to center the hole and zero out the DRO.
case4.jpg


Next I moved to a .625" end mill and machined to depth then finishing it off with a .875" recess to get down below the crack and allow the insert to sit in tightly and slightly recessed.
case5.jpg


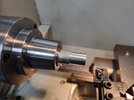
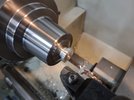
Now to move to the lathe and machine the insert from a piece of 1" 6061 aluminum bar stock. First took it down to .875" overall diameter.
case6.jpg


I then stepped it down to .625" diameter .650" deep to sit into the machined bore. Then I flipped it around to face the flange, drill the insert and tap for 10mm x 1.5 threads.
case7.jpg


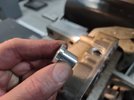
Insert completed.
case8.jpg


Test fit and marked for the drain slots inside the case.
case9.jpg


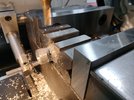
Clamped in V-blocks in the mill vise to machine the notches which will match the drain slots.
case10.jpg


Stay tuned for the last pictures of the case repair.
 

zmotorsports

Hardcore Gearhead
Vendor
Location
West Haven, UT
Continuing on with the motorcycle case repair.

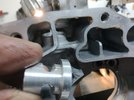
The notches cut in the insert and ready for cleaning and final insertion into the case.
case11.jpg


Cleaned and ready for welding. Here you can see the drain notches matching up with the insert.
case12.jpg


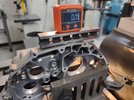
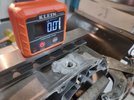
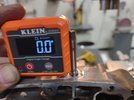
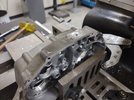
After welding the insert into the case I clamped it back to the mill table to spotface the sealing surface for the drain plug seal. I zero'd out the case again using a 1" parallel across a couple of ribs.
case13.jpg


Then just to be certain the ribs were perpendicular to the drain plug I cleaned the threads with a bottoming tap and checked to ensure the case was clamped in the correct orientation to the ribs and in relation to the quill. Perfect.
case14.jpg


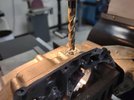
I centered the case using a pin gauge then zero'd the DRO and used a .875" two flute end mill I spot faced the sealing surface.
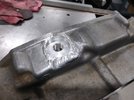
case15.jpg


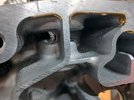
Done. The welds didn't turn out as nice as I would have liked but unfortunately this is a common theme with aluminum castings.
case16.jpg


Boxed up and ready to ship back to the owner.
case17.jpg


Thanks for looking.
 

zmotorsports

Hardcore Gearhead
Vendor
Location
West Haven, UT
Nice save! Many would have not been able to fix that. Let alone as cleanly
Thank you. He has searched for quite a while to find a replacement. They are no longer available even as NOS or aftermarket. Hard to believe, the tractor is only 85 years old. :rofl: However, even the few used ones he was finding were in as bad if not worst shape than what he had. When he asked me if I thought I could save it I wasn't sure I could but felt like giving it a try. It turned out okay for what I had to work with I think.
 

JeeperG

Well-Known Member
Location
Riverdale
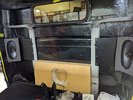
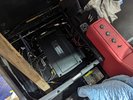
Was looking at to do items on the truck today and before everything gets hidden and or covered/cleaned up. I kept the original seat riser in the truck, we built some hinged seat pans that the seats bolt to, gives me access underneath pretty easily, under the passenger side I'll be hiding a Bluetooth receiver and this 5 channel kicker amp that'll be powering the 4x10s in the cab corners, 8" sub between the seats and a 6.5 inch on each kick panel. Should be plenty of sound for that little cab.
The switches on the console control the exhaust cutouts, gear vendor, high beams and park brake, there is also a USB plug and cigarette lighter plug on the back of it.
PXL_20230930_195547559.jpg
Need to panel bond a box on top of the cab to hold a dome light and support the headliner. You won't see those 4x10s maybe the sub a little.
PXL_20230930_195435891.jpg
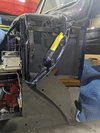
Some rubberized undercoating applied to cab where front fenders bolt on.
PXL_20230930_190109874.jpg
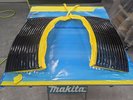
Also got some touch ups done after the last block session, had to fix the grille a smidge.
PXL_20230930_214356240.jpg
 
Top