Badass!Got a side gig welding up 4 big planter boxes for a home remodel/landscaping job up in Park City. The largest one is 25'x3'x2.5' and weighs about 2,000 lbs...
View attachment 168338
View attachment 168339
View attachment 168340
View attachment 168341
The client wants it to look completely seamless after the rust takes over hence it being one continuous 25' box.... unfortunately the crane company couldn't get close enough to comfortably lift it without blocking off a city road. So now I get to cut this box in half, and re-weld it back together on site where it is installed so that an excavator can lift each side... 🙄
You are using an out of date browser. It may not display this or other websites correctly.
You should upgrade or use an alternative browser.
You should upgrade or use an alternative browser.
General Tech What did you work on Today?
- Thread starter Gravy
- Start date
Tonkaman
Well-Known Member
- Location
- West Jordan
I bought a Harken Hoist. You could copy it and piece one together easily though.I so need to build one of these hangers. where are the instructions or do I just do youtube?
- Location
- West Haven, UT
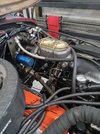
Finished the hydroboost conversion on the scrambler. Brakes feel great. The booster is from a 2000ish junkyard F250. Master cylinder is a 1 1/8" bore and has an internal spacer that allowed me to match the exact fitment from the original Ford master cylinder. The firewall mount took a little time to put together to match the jeep's pedal to the booster rod for proper placement. Everything clears the hood. A new power steering pump (dual return saginaw) and a cooler also freshened up the steering. The brakes are predictable and definitely stronger than the Durango booster/master combo on it previously. The jeep should be ready for EJS

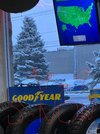
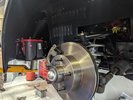
Put some new shoes on the old truck, hard to get decent pics in the cramped shop and it's like taking a bunch of mirror selfies. Still need to tinker with suspension and steering a bit.
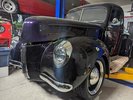
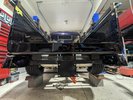
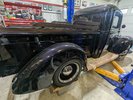
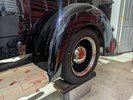
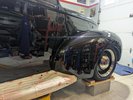
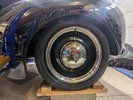
Also found someone already makes a hinge/bracket to mount a sniper screen so it folds up under the dash, this looks like the best location.
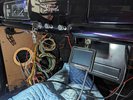


Also found someone already makes a hinge/bracket to mount a sniper screen so it folds up under the dash, this looks like the best location.

- Location
- Grantsville, Utah
Put some new ball joints in the YJ today and ran into an interesting problem. The joints on the driver side inner C were loose. Google says it happens on the TJ/YJ/XJ Dana 30 from time to time. Yes, you can buy knurled joints. I did, and so did the last person who replaced them. No one really seems to have success with the Moog oversized joints, so I welded these in.
Just kidding.
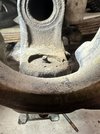
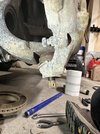
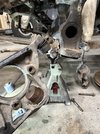
The new joint was just as loose. I could push it in and pull it out with one hand. If it were a ring and pinion, it would have a good amount of backlash. 😬
I did think about welding the joints in, but the innernets offered a better solution. Hammers.
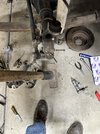
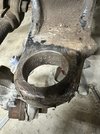
I smacked the C with the sledge hammer to distort the hole. This was enough to keep the joint from sliding in, but I wanted more grip, so I peened the inside surface of the upper and lower holes with a punch. This worked awesome and was pretty hard to press the new joints in.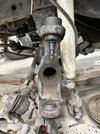
Just kidding.


The new joint was just as loose. I could push it in and pull it out with one hand. If it were a ring and pinion, it would have a good amount of backlash. 😬
I did think about welding the joints in, but the innernets offered a better solution. Hammers.


I smacked the C with the sledge hammer to distort the hole. This was enough to keep the joint from sliding in, but I wanted more grip, so I peened the inside surface of the upper and lower holes with a punch. This worked awesome and was pretty hard to press the new joints in.

- Location
- Grantsville, Utah
This peening was actually real easy. That metal is softer than I expected.I welded an upper balljoint in on a d30. It’s fiiiiine
- Location
- West Haven, UT
Put some new ball joints in the YJ today and ran into an interesting problem. The joints on the driver side inner C were loose. Google says it happens on the TJ/YJ/XJ Dana 30 from time to time. Yes, you can buy knurled joints. I did, and so did the last person who replaced them. No one really seems to have success with the Moog oversized joints, so I welded these in.
Just kidding.
The new joint was just as loose. I could push it in and pull it out with one hand. If it were a ring and pinion, it would have a good amount of backlash. 😬
I did think about welding the joints in, but the innernets offered a better solution. Hammers.
View attachment 168411
I smacked the C with the sledge hammer to distort the hole. This was enough to keep the joint from sliding in, but I wanted more grip, so I peened the inside surface of the upper and lower holes with a punch. This worked awesome and was pretty hard to press the new joints in.
Jeremy, I used the peening method for many, many years in the Industrial Maintenance industry when I had a bearing or bushing bore that was a little more loose fitting than I liked and the component either wasn't on hand or we had to get the asset up and running quicker than we could wait for the part. It worked well for quite a while until the component had to be replaced. I think you'll be good for quite some time with that fix.
- Location
- Grantsville, Utah
Thanks Mike. I’m pretty confident it’s gonna be difficult to remove if it ever has to be done. A different front axle will ultimately be going in.Jeremy, I used the peening method for many, many years in the Industrial Maintenance industry when I had a bearing or bushing bore that was a little more loose fitting than I liked and the component either wasn't on hand or we had to get the asset up and running quicker than we could wait for the part. It worked well for quite a while until the component had to be replaced. I think you'll be good for quite some time with that fix.
- Location
- Stinkwater
Haven't had front dome lights for a bit now, and these screwy little things are the culprit.
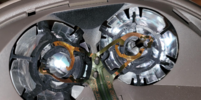
The bulb socket inserts into those ports and those copper ring thingies are supposed to close the circuit with the bulb contacts. But they can't do that when they're twenty years old and burnt and shredded.
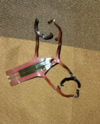
I thought about making a uterus joke, but I'm too classy for that. This little guy is not available by himself, OEM or aftermarket. You gotta buy a whole ceiling console, and either pay through both nostrils to get one from Ford, or pay through one nostril on EBay and take your chances on somebody else's wrecked little copper strip thingy. I thought about trying to repair it but it looks pretty fiddly.
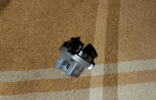
And a cracked socket wasn't helping matters - kinda hard to source these new too, and I wasn't sure that even if I got the copper strip ring thingie fixed that this socket would hold a bulb.
So.
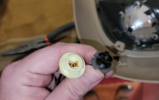
This is a bayonet socket from the electrical parts aisle at Oreillys. It's real close to the actual bulb socket, except with wires. More on that inna bit.
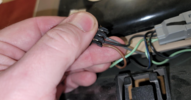
This is the connector that that cheesy little copper strip plugs into. I've already forgotten which is which, but one of those is the left light and one is right and the other is the common ground.
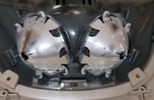
This is the backside of the reflectors.
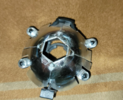
This is one of those reflectors, after being subjected to my l33t modding skills to accept the parts store bayonet socket thingy.
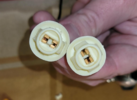
More l33t modding skillz. Original on the right. It's a pretty soft plastic, this was just a little work with an exacto blade.
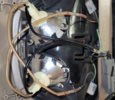
All wired up and put back together. The original setup had the bulbs facing the reflectors from the front. There wasn't room for these new bayonet sockets to fit that way, and l33t modding skillz only go so far, so now they're flipped around. It works fine, can't tell the difference once the it's back in the truck. If I ever need to change one I'll have to drop the whole ceiling console again, but they're LED now so hopefully that won't happen too often.
Thanks for coming to my Ted Talk.

The bulb socket inserts into those ports and those copper ring thingies are supposed to close the circuit with the bulb contacts. But they can't do that when they're twenty years old and burnt and shredded.

I thought about making a uterus joke, but I'm too classy for that. This little guy is not available by himself, OEM or aftermarket. You gotta buy a whole ceiling console, and either pay through both nostrils to get one from Ford, or pay through one nostril on EBay and take your chances on somebody else's wrecked little copper strip thingy. I thought about trying to repair it but it looks pretty fiddly.

And a cracked socket wasn't helping matters - kinda hard to source these new too, and I wasn't sure that even if I got the copper strip ring thingie fixed that this socket would hold a bulb.
So.

This is a bayonet socket from the electrical parts aisle at Oreillys. It's real close to the actual bulb socket, except with wires. More on that inna bit.

This is the connector that that cheesy little copper strip plugs into. I've already forgotten which is which, but one of those is the left light and one is right and the other is the common ground.

This is the backside of the reflectors.

This is one of those reflectors, after being subjected to my l33t modding skills to accept the parts store bayonet socket thingy.

More l33t modding skillz. Original on the right. It's a pretty soft plastic, this was just a little work with an exacto blade.

All wired up and put back together. The original setup had the bulbs facing the reflectors from the front. There wasn't room for these new bayonet sockets to fit that way, and l33t modding skillz only go so far, so now they're flipped around. It works fine, can't tell the difference once the it's back in the truck. If I ever need to change one I'll have to drop the whole ceiling console again, but they're LED now so hopefully that won't happen too often.
Thanks for coming to my Ted Talk.
- Location
- Bountiful, land of rocks
- Location
- West Bountiful, UT
Today has been a thrill so far.
- Woke up to a dead water heater
- Shoveled snow
- Changed the oil in the Jeep
- Bought and put in a new water heater
- Laundry
Can't wait to see what tomorrow will bring...
- DAA
- Woke up to a dead water heater
- Shoveled snow
- Changed the oil in the Jeep
- Bought and put in a new water heater
- Laundry
Can't wait to see what tomorrow will bring...
- DAA
Throw on some sauce, maybe some parmesan?
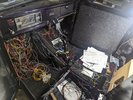
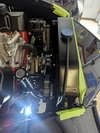
Mounted the radiator and pusher fan
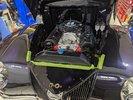
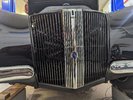
You can see how tight things are getting
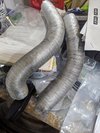
Mocked up some hose shapes and went driving around to auto parts stores looking for pre molded hoses that are closest to the shape we need. I think we found some?
Tossed a battery in, this is up under my passenger front fender.

Mounted the radiator and pusher fan


You can see how tight things are getting

Mocked up some hose shapes and went driving around to auto parts stores looking for pre molded hoses that are closest to the shape we need. I think we found some?

Tossed a battery in, this is up under my passenger front fender.

- Location
- Bountiful, land of rocks
I'll definitely get something put together, if I get something small enough I can keep it in the glovebox.You should. Get you one of those hardbound notebooks and enter info in there.View attachment 168807
Pile of parts
Well-Known Member
- Location
- South Jordan
Years and years ago, Stacy David from Gearz put together a project book for logging part numbers. I suppose a guy could create a file in his Google docs on his phone. I always mean to so auto parts replacement on the "Jeep" would be easier.You should get you one of those hardbound notebooks and enter info in there.View attachment 168807
- Location
- Bountiful, land of rocks
Years and years ago, Stacy David from Gearz put together a project book for logging part numbers. I suppose a guy could create a file in his Google docs on his phone. I always mean to so auto parts replacement on the "Jeep" would be easier.
I have a Word document somewhere for mine
anderson750
I'm working on it Rose
- Location
- Price, Utah
Making the list is one thing…….finding it when you need it it is a whole different deal.I have a Word document somewhere for mine

