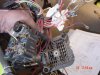
Fans are wired, except for the toggles. I need to buy some diodes. Tach and heater are wired. Backup switch installed on tranny and wired. I need to make a plate for the toggle switches and install it tomorrow. It's really weird to take the time to do stuff right, but it feels kind of good.
There are relays for the following:
- Puller fans and oil cooler fan (run + diode or toggle)
- pusher fans and aux cooler fan (thermo: run+diode or toggle)
- subwoofer amp (acc) (or toggle?)
- driving lights (toggle)
- rock lights (toggle)
- backup light (reverse or toggle)
- CB/Ham (toggle) (I may have to add filters to this circuit)
- Air Compressor (toggle + pressure switch)
I might include the stereo with the amp and add a toggle so that the key is not required to listen to tunes.
As I was leaving, Ian crawled up in the back and started thinking about the rear seat brackets. The hinges are on order from Josh at LHM Jeep, but the side brackets are no longer made. We were thinking of making our own when I got the high drama phone call and had to leave.
I hope there's room to route the exhaust. It almost looks like they will have to come under the oilpan, combine, go down the pass side, cross behind the t-case and exit on the driver side. Right now it looks like I'll put an Aero muffler on it, not sure where I'll have it done. It'd be nice to get it inspected at the same time.
That reminds me...gotta do the ebrake cable too. Rats! That's gonna suck.
Gonna use some PTO tomorrow and get it a little closer.
Priority: Bleed brakes, install seatbelts, finish priority wiring, temp gauge, thermostat. Scope out ebrake needs.

 DSC03720.jpg43.3 KB · Views: 6
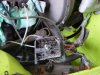 DSC03721.jpg26.5 KB · Views: 5
 DSC03722.jpg16 KB · Views: 7
 DSC03723.jpg27.7 KB · Views: 11
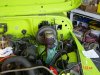 DSC03724.jpg28.7 KB · Views: 9
 DSC03725.jpg27.6 KB · Views: 16
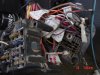 DSC03726.jpg25.5 KB · Views: 7
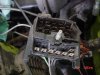 DSC03727.jpg38.9 KB · Views: 7
 DSC03728.jpg27.1 KB · Views: 15
 DSC03732.jpg19.9 KB · Views: 8