You are using an out of date browser. It may not display this or other websites correctly.
You should upgrade or use an alternative browser.
You should upgrade or use an alternative browser.
Jeep Speed Goat TJ, the anti-build thread
- Thread starter Greg
- Start date
- Location
- Grand Junction, CO
Is the paint rustoleum hammered dark bronze? It’s silver-y. That’s the color I’ve used forever.
🤷♂️
Evolved
Less-Known Member
- Location
- Your Mothers Dwelling
I bought some Rustoleum Hammered Silver and it's about 6 shades lighter than the current cage paint. I didn't see a darker color when I was shopping, but I know there is one. I sprayed much of the front tube work and while I like the silver, I don't really want to paint ALL the tube work right now. Going to try find the darker Hammered and hope it's a closer match.
Dude… I am so sorry if I gave you bad info. I thought for sure that’s what I used.
- Location
- Grand Junction, CO
It's all good, part of the process... nothing says someone else didn't paint the cage after you! 🤣Dude… I am so sorry if I gave you bad info. I thought for sure that’s what I used.
You did say Hammered Grey. That's a much different color than Hammered Silver that Greg used.Dude… I am so sorry if I gave you bad info. I thought for sure that’s what I used.
- Location
- Grand Junction, CO
You did say Hammered Grey. That's a much different color than Hammered Silver that Greg used.
Yep, I bought this paint at Lowes and it was the only Hammered they had on the shelf. Not blaming anyone for my paint mismatch issues, just trying to figure out the right match and actually find it.
If the Silver ends up as a primer for the Gray, I'm fine with that.
I've been disappointed in Lowe's selection of spray paint lately. Seems like they're slacking. Home Depot has better options, but no stores are as convenient for me. Can't win.Yep, I bought this paint at Lowes and it was the only Hammered they had on the shelf. Not blaming anyone for my paint mismatch issues, just trying to figure out the right match and actually find it.
If the Silver ends up as a primer for the Gray, I'm fine with that.
- Location
- Grantsville, Utah
FWIW my chassis is hammered black, so it’s definitely not that color. 😀
- Location
- Grantsville, Utah
The hammered black has been super easy to find, though.
Spork
Tin Foil Hat Equipped
- Location
- Saratoga Springs, UT
Ace Hardware had every color of hammered paint when I was picking, if you have one close by might be worth a visit.
- Location
- Grand Junction, CO
Ace Hardware had every color of hammered paint when I was picking, if you have one close by might be worth a visit.
I struck out at Home Depot, they had EVERY color but Rustoleum Hammered Grey... but Ace Hardware had what I needed!
Bought 4 cans, tested it out and it's a match! Glad to put this hiccup behind me... lol.
- Location
- Grand Junction, CO
Been grinding away, mostly finishing up the front axle build. Drilled & tapped axle housing for bulkhead fitting air line, gears & locker are installed, tossed hubs & rotors on to measure toe & build tube tie rods. Once welded up, the threads got a little funky.... I need to chase them with a 7/8" tap but nobody local has one. Painted the tie rods & knuckle spacers with Steel-It.... that stuff is amazing. Spendy, but sprays and coats so well!


Had to fix some brake lines, the rear brake line runs down the top of the upper link tube and was at risk of getting pinched at full bump. I bent up a new piece of brake line to move the tube more to the side (it has tabs welded on the link, can't just rotate it down).

I tossed the front axle under the TJ, bolted up the shocks & links and set it at full bump.


Next up, some adjustments to clear steering & track bar bracket, bolt brakes back on & bleed system, connect air line for front locker, tighten & torque all nuts & bolts (links, steering, etc), connect steering lines & bleed system, build new exhaust, figure out fuel pressure issue.
With the exhaust, I was going to try building a 2 into 1 like it had before. The manifolds dump at the rear and previously the exhaust on the drivers side made a sharp 130* turn and ran around the front of the oil pan. You could see how the driveshaft had hit the exhaust previously, so it wasn't ideal. It's even tighter around the front of the engine now at full bump, so I was going to try squeeze the drivers side exhaust down between the driveshaft and engine, then run it across between the oil pan and transmission.... but that's way too tight.
I decided the best route will be to run dual exhaust, right along the frame rail and past the Atlas, using 2.5" pipe to 3" Magnaflow mufflers and having them dump just past the rear 4 link crossmember.
It's tight on the drivers side, but possible. I don't have enough 2.5" exhaust and needed to order a 2nd Magnaflow muffler, so I ordered those parts last night. Planning to possibly coat the exhaust with ceramic coating & also header wrap to keep the heat down and away from other critical parts. Building the collecter on the drivers side will be a test of patience, there will be a few bends to clear the starter, link bracket & then line it up to the muffler.


Had to fix some brake lines, the rear brake line runs down the top of the upper link tube and was at risk of getting pinched at full bump. I bent up a new piece of brake line to move the tube more to the side (it has tabs welded on the link, can't just rotate it down).

I tossed the front axle under the TJ, bolted up the shocks & links and set it at full bump.


Next up, some adjustments to clear steering & track bar bracket, bolt brakes back on & bleed system, connect air line for front locker, tighten & torque all nuts & bolts (links, steering, etc), connect steering lines & bleed system, build new exhaust, figure out fuel pressure issue.
With the exhaust, I was going to try building a 2 into 1 like it had before. The manifolds dump at the rear and previously the exhaust on the drivers side made a sharp 130* turn and ran around the front of the oil pan. You could see how the driveshaft had hit the exhaust previously, so it wasn't ideal. It's even tighter around the front of the engine now at full bump, so I was going to try squeeze the drivers side exhaust down between the driveshaft and engine, then run it across between the oil pan and transmission.... but that's way too tight.
I decided the best route will be to run dual exhaust, right along the frame rail and past the Atlas, using 2.5" pipe to 3" Magnaflow mufflers and having them dump just past the rear 4 link crossmember.
It's tight on the drivers side, but possible. I don't have enough 2.5" exhaust and needed to order a 2nd Magnaflow muffler, so I ordered those parts last night. Planning to possibly coat the exhaust with ceramic coating & also header wrap to keep the heat down and away from other critical parts. Building the collecter on the drivers side will be a test of patience, there will be a few bends to clear the starter, link bracket & then line it up to the muffler.
- Location
- Grand Junction, CO
- Location
- Grand Junction, CO
I like how your style is starting to come out in this build now. Looking good!
Thanks Shane!
It's been a lot of work to 'make it mine', but I'm really liking the changes and outcome! More work and setbacks than expected, but totally worth it.
RockChucker
Well-Known Member
- Location
- Highland
I wasn’t impressed with the fiberglass wrap on my exhaust. Still cooked my passengers feet to death. Left the fiberglass and added this stuff. Not cheap. But dang does it work good.
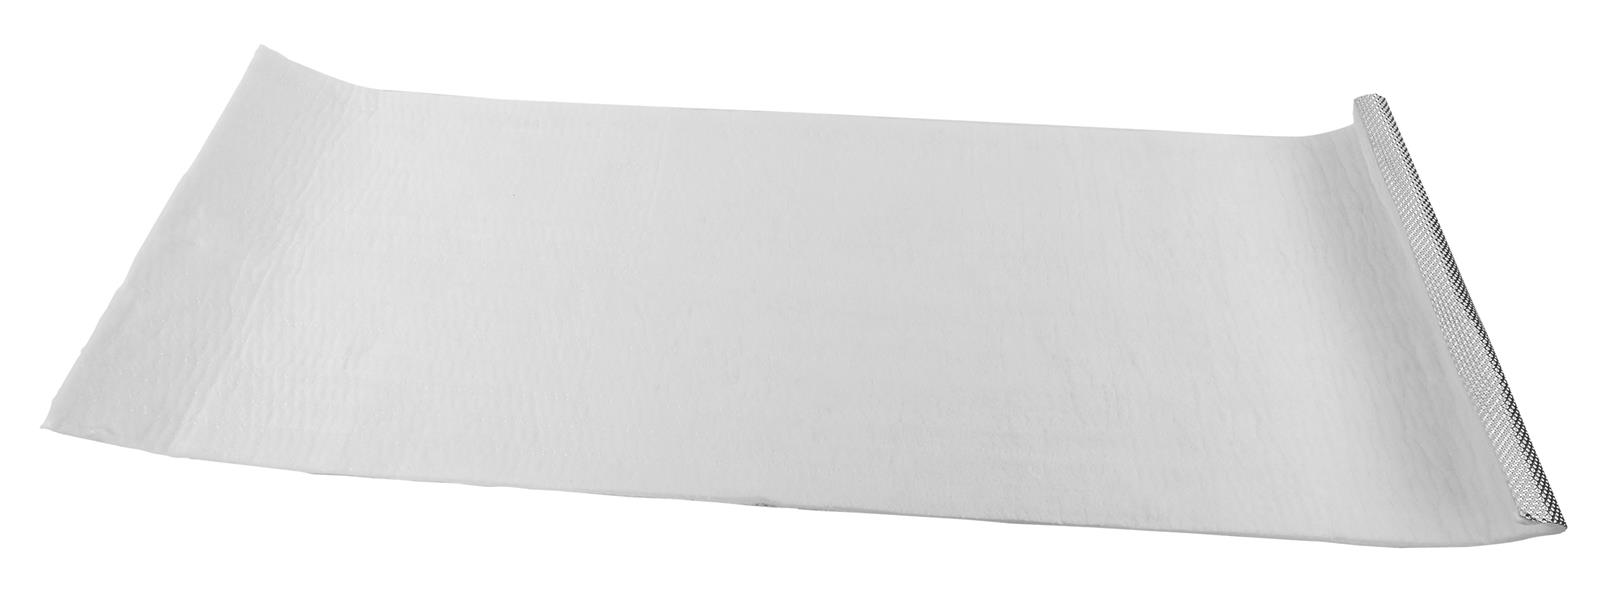
 www.summitracing.com
Pic of my tail pipe/resonator I did as well. This stuff shields my entire exhaust, well the top half of the pipe from my y pipe to the tailpipe. Big difference.
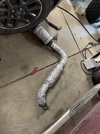

Heatshield Products 175111 Heatshield Products Armor Exhaust Heat Shields | Summit Racing
Free Shipping - Heatshield Products Armor Exhaust Heat Shields with qualifying orders of $109. Shop Exhaust Heat Shields at Summit Racing.

- Location
- Grand Junction, CO
I wasn’t impressed with the fiberglass wrap on my exhaust. Still cooked my passengers feet to death. Left the fiberglass and added this stuff. Not cheap. But dang does it work good.
Pic of my tail pipe/resonator I did as well. This stuff shields my entire exhaust, well the top half of the pipe from my y pipe to the tailpipe. Big difference.
Heatshield Products 175111 Heatshield Products Armor Exhaust Heat Shields | Summit Racing
Free Shipping - Heatshield Products Armor Exhaust Heat Shields with qualifying orders of $109. Shop Exhaust Heat Shields at Summit Racing.www.summitracing.com
View attachment 159795
My local powder coat shop can do a ceramic coat, I'd love to have my pipes coated then covered in that material. Good to know!
And damn..... it's $$$$. 😳
Pile of parts
Well-Known Member
- Location
- South Jordan
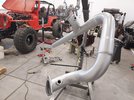
I wish I would have know you were building exhaust. I have about half of one of those kits left over from building mine when I put the 5.3 in. I bought a cheap kit off of ebay/Amazon. It wasn't even aluminized so I painted it with high heat primer and "aluminum" paint. The primer seems to be holding up to the heat. The paint rubs off like dust. I needed the exhaust to be tight to the engine and wrap around the front of the oil pan. I did 2.5", two into one on the driver's side. One trip to Sand Hollow and no sign of links or driveline hitting the exhaust.
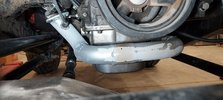
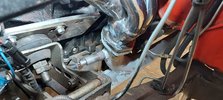


- Location
- Grand Junction, CO
I wish I would have know you were building exhaust. I have about half of one of those kits left over from building mine when I put the 5.3 in. I bought a cheap kit off of ebay/Amazon. It wasn't even aluminized so I painted it with high heat primer and "aluminum" paint. The primer seems to be holding up to the heat. The paint rubs off like dust. I needed the exhaust to be tight to the engine and wrap around the front of the oil pan. I did 2.5", two into one on the driver's side. One trip to Sand Hollow and no sign of links or driveline hitting the exhaust.
View attachment 159811View attachment 159812View attachment 159813
It's all good, I bought a kit that I'll probably use 10% of... 😆 Yours looks like it came out well!

