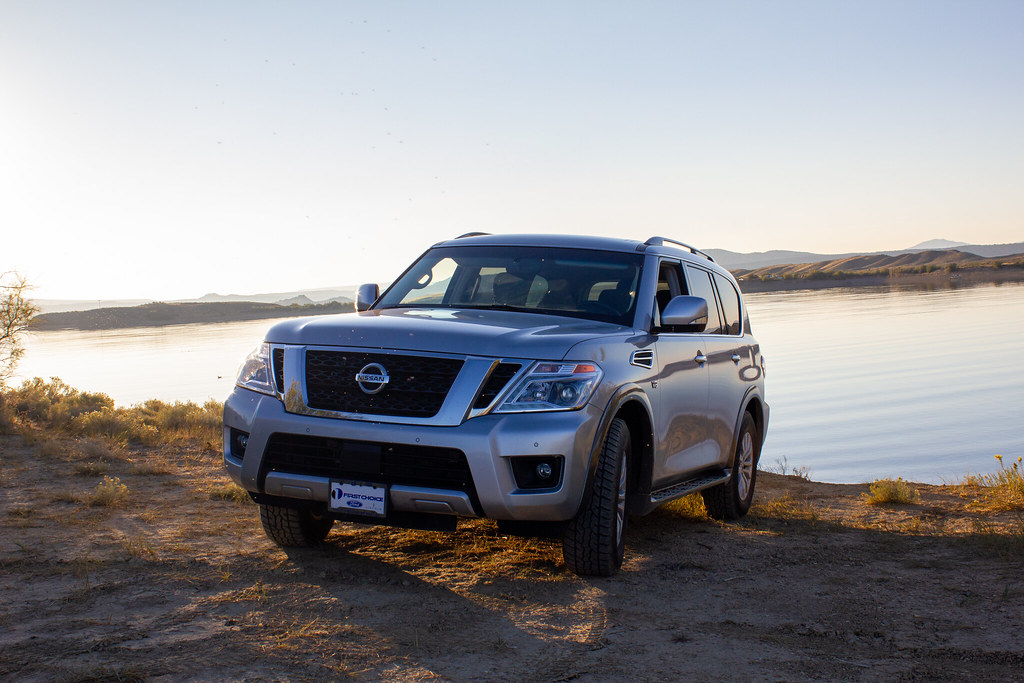
Stephen's 2017 Nissan Patrol err… Armada

Stephen's 2017 Nissan Patrol err… Armada

Engine: Nissan VK56VD 5.6L V8

Transmission: Stock 7-Speed Automatic

Transfer Case: Stock

Front Axle: Stock

Rear Axle: Stock

Suspension:
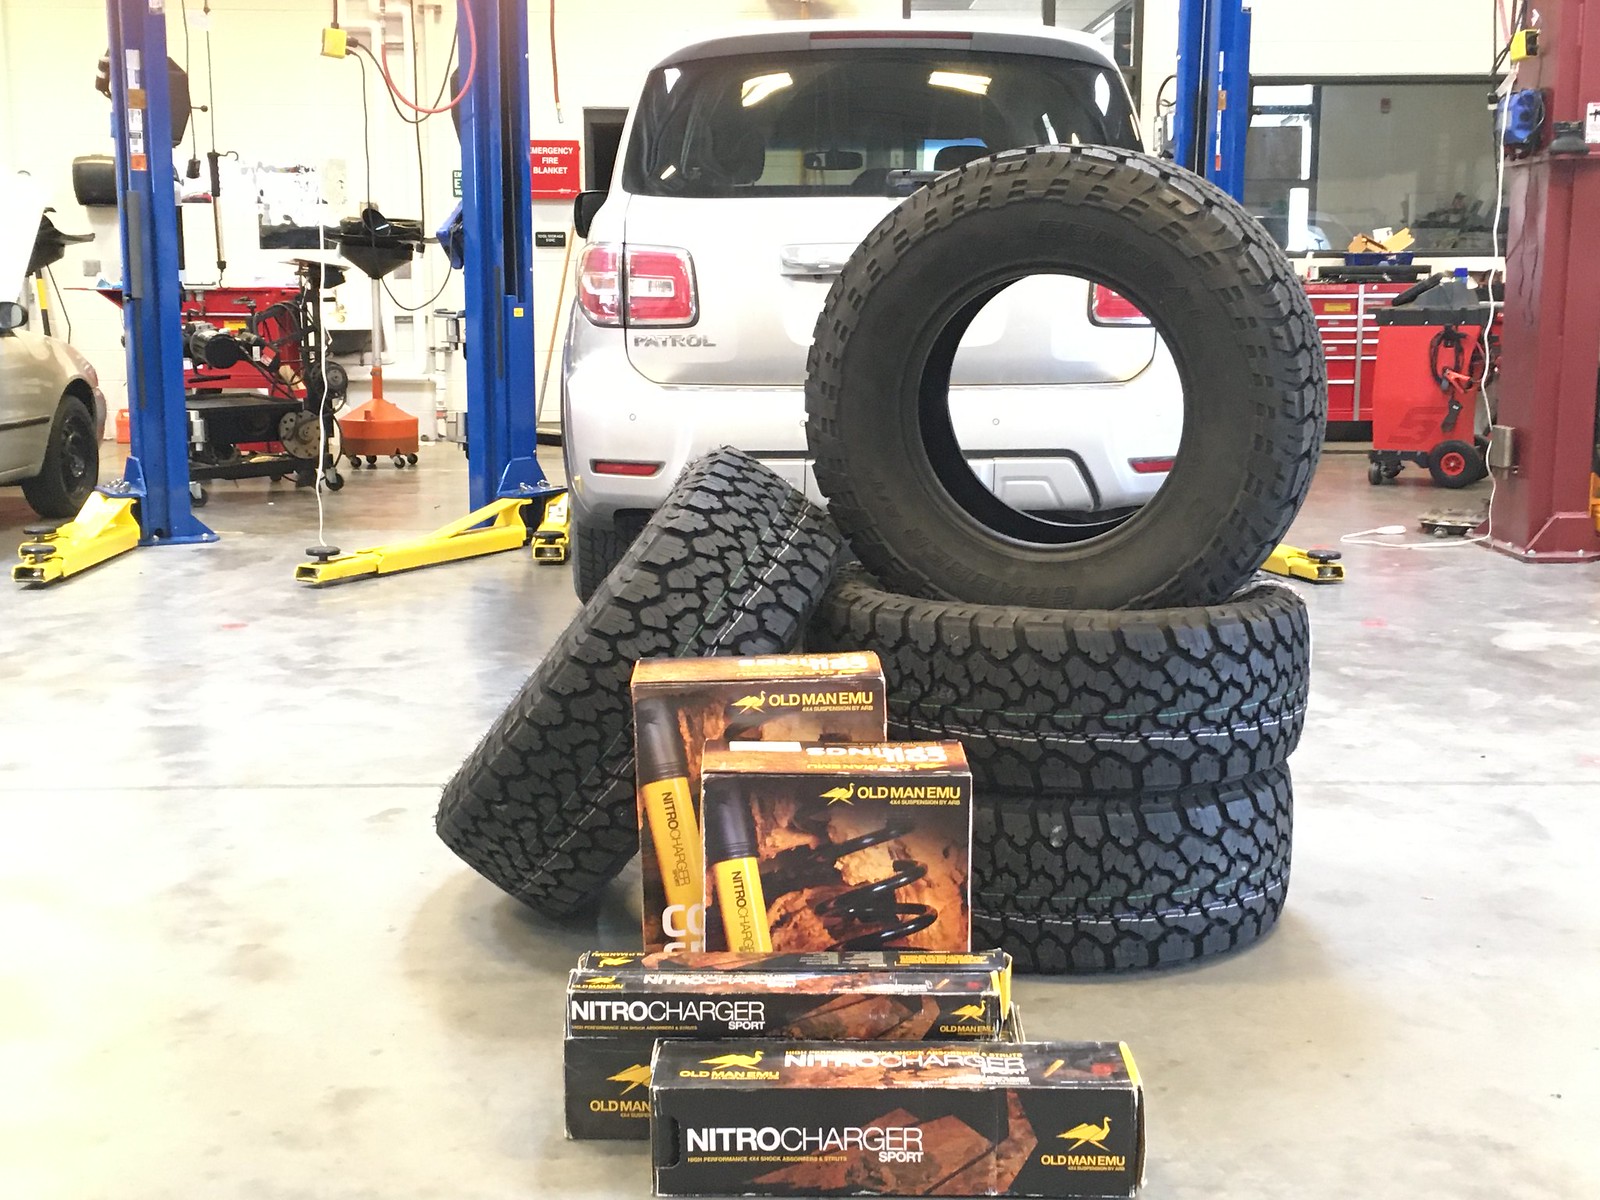
Front: Alldogs Offroad Y62-F-M springs, OME 90015 struts, SPC 25560 upper control arms
Rear: Alldogs Offroad Y62-R-M Springs, OME 60084 shocks

Steering: Stock

Wheels and Tires: 35"x12.50 R18 General Grabber ATx's

Communication:
HAM: ICOM ID-4100A
GMRS: Midland MXT-275

50339992772_aa61145a76_b.jpg


50339837486_bd9a31a3cd_b.jpg


50339148293_f38e96a87c_b.jpg

______________________________________________________________________

I've loved my Trooper over the last eight and a half years, but I just got the itch about a month ago to get something new. Even with all the work and upgrades I've done to the Trooper, its still a 26-year old vehicle at heart. I wanted something newer and yes, more comfortable. So yesterday I pulled the trigger on this Armada. These have been on my radar since Nissan started basing them on the global Patrol platform in 2017. Yes, the Infiniti QX56/80 have been based on the Patrol since 2011; but those are just ugly.
Now an Armada is 80% Patrol. In Nissan's infinite wisdom, they deleted the factory locker, tuned the suspension to be more road biased, and didn't include the "Rock, Sand, and Mud" transmission modes. And the good ol'Federal impact standards mean the bumpers are totally different. All that said, the Armada is still a very competent off-road vehicle. And its freaking huge. Globally, the Patrol is a direct competitor to the 200-Series Land Cruiser, but the Patrol is actually slightly larger than that. So for me, who generally enjoys small vehicles like Samurai's and Miata's; its like driving a bus! But boy; its a bus with guts! That 390hp (equivalent to ~6 Samurais, in case you're wondering) and 401 lb-ft of torque MOVES.
So what are my plans with this barge? Well, its more or less going to replace the Trooper as my backcountry adventure vehicle. I'm still teasing out exactly what I want to do and where to get it from. As mentioned, since this isn't fully a Patrol, the aftermarket is a bit scattered. Some Patrol stuff bolts right on, some (like bumpers) do not. And the Armada specific aftermarket seems to just be spinning up. A number of companies have products that are in development right now.
In broad strokes, though, a mild lift (2"-3"), better all-terrain tires, ARB air locker in the rear, rock rails, front and rear bumpers (when they're available), and some interior stuff to make camp life a bit more luxe.
And yes, @bryson, part of the motivation in getting an Armada was because its different from a Land Cruiser. I just can't help myself.
 
Last edited:

jeeper

I live my life 1 dumpster at a time
Location
So Jo, Ut
OK, I got the lift and tires installed yesterday. Sit's ~4" taller than stock.:

51121537492_e4ac8eca26_h.jpg


I have installed probably dozens of lifts on vehicles over the years and this was the biggest PITA I've ever encountered. It wasn't necessarily that it was complicated, but that it fought us the whole way. You have to compress the shit out of the rear springs to get them into the buckets, then you have to basically dismantle the entire front end to get the struts into place. Just a lot of wrenching.

But there is an issue, and I'm hoping the fine people of RME will be able to help with a solution. The rear end is WAY out of alignment. Primarily the toe. We fought and fought with it on the alignment rack and couldn't get in anywhere near spec. As such, it drives very weird. I'm on the hunt for aftermarket camber bolts that might give us some more room for adjustment. But, if anyone knows of a super stellar alignment shop that specializes in modified independent suspension, I'd love to hear about them.

Other than that, it rides better than expected. I was really worried it would be a tank, but its still pretty smooth. I got the medium spring rate front coils in anticipation of a bumper and winch (hopefully this summer!) so that'll weigh the front down a bit, which it probably needs. And most importantly, it looks much beefier!

That looks great!

After having worked on 3 different Nissan's, I swore never to do it again. It was always more complicated than it needed to be. newer VW's are a close second.
 

UNSTUCK

But stuck more often.
That sounds great, and I get it in theory, but it’s way over my skill level. Would one of you fine gentlemen be willing to take a crack at it?
I was just over at Carl's house. He's not busy at all! :D


If you lengthen the coil bucket arm so that you can align that wheel at ride height, what happens during compression? Now the arm is too long compared to the trailing arm next to it and it will cause your alignment to be off again. So you may end up with some goofy bump steer, but at least on the rack you will be in spec. Just a guess.
 
Last edited:

Stephen

Who Dares Wins
Moderator
I was just over at Carl's house. He's not busy at all! :D
Carl's usually just on his rocking chair on the porch cradling his shotgun and yelling at kids to get off his lawn. :D


If you lengthen the coil bucket arm so that you can align that wheel at ride height, what happens during compression? Now the arm is too long compared to the trailing arm next to it and it will cause your alignment to be off again. So you may end up with some goofy bump steer, but at least on the rack you will be in spec. Just a guess.
Thats a valid thought. But even at full compression, I don't think the OME springs will get anywhere near as compressed as the factory ones. So I'd think that maybe it'd still be good? Dunno.
 

Trate D

Well-Known Member
I would rather have the alignment corrected at ride height during street use.

You will start seeing wear very soon during street driving with rear toe out. Off road during suspension travel this number genuinely fluctuates anyways. Also given loose rock/dirt conditions it will also have more forgiveness during times the toe may be pushed or pulled out of spec during off-road use.

The offset bushings are a good option since no one state side seems to make anything for it. I checked specialty products, moog, and others and no one has any bushings, extended range cams or anything. Also the “lengthening” the arm by re-drilling the outer hole discussed above would work also if there is sufficient material.
 
Last edited:

J-mobzz

Well-Known Member
Wish I could help. I’m traveling for a few weeks and I really need to finish some of my one projects. If you want to go this route and Carl doesn’t want to tackle it I can connect you with a few very quality Motorsports fabricators that may be willing to take it on.
 

Stephen

Who Dares Wins
Moderator
Ordered a set of the eccentric bushings from Australia since no US distributor stocked them. Looks like they'll be here in a week or two.
In the mean time, I'll fiddle with the factory adjustments some more to see how close I can get it in. If that and the bushings don't help, then I guess its onto fabbing something up.

I also have some new SPC front UCA coming that I'll install on Friday. The front's alignment was in spec, barely. These SPC UCA's will allow for another 3* of camber and caster adjustment as well as a bit more droop from the suspension.
 

I Lean

Mbryson's hairdresser
Vendor
Location
Utah
I can help, it's just a matter of figuring out when. I'm pretty busy these days. Ideally you could just bring me the spring buckets and a measurement....

While you're fiddling with your alignment, see if you can figure out the range of adjustment the eccentric bolt gives you--and how much change that makes in your numbers. That will tell you how much longer the arm needs to be.
 

Stephen

Who Dares Wins
Moderator
Update:

I was able to get the rear toe in spec by using a set of aftermarket SPC 87520 camber adjustment bolts. These are designed for the front camber adjustment, so I had to cut about half an inch more thread into them and then shorten them so they'd clearance everything. But they worked like a champ! Still had to sacrifice some rear camber to get the rear toe full in spec, but I'll take some negative camber over wonky toe any day!

Also replaced all the front camber adjustment bolts with the same 87520's (there are four on the front). To allow for maximum droop of the front suspension I replaced the front upper control arms with a set of SPC 25560's and notched the upper strut tower to clear the UCA. The new UCA also gave me way more caster and camber adjustment.

After all that, it rides and drives MUCH better! The only "unexpected" thing now is that the front sway bar touches the inside of the rim at full lock. So longer end links are on their way to fix that issue. I may also swap out the rear camber adjustment bolts with a set of those 87520's to see if I can get the rear fully in spec there.
 
Last edited:

Stephen

Who Dares Wins
Moderator
This is the process for installing the lift. I did not take a ton of pictures because I was busy wrenching and swearing, but I will do my best to explain how I did it. If people have insight on how to do this smarter, easier; please pipe up. I could not find any instructions or build threads out there that documented the whole process before I started, just bits of information here and there that I pieced together. I’m hoping that this will help the next guy that comes along.


51139093000_4e24eb4e3c_h.jpg


First, the parts list (All Old Man Emu parts were purchased from Cruiser Outfitters):

Front:

Springs: OME 2978

Struts: OME 90015 x2

Upper Control Arms: SPC 25560

Sway Bar: PRG Replacement End Links and Bushing Kit

Camber/Toe Adjustment Bolts: SPC 87520 (two kits, one per side)


Rear

Springs: OME 2986

Shocks OME 60084 x2

Camber/Toe Adjustment Bolts: SPC 87520 (modified, explained below) AND a 14mm x 2.0 thread die.

_________________________________

Rear Suspension:

First, obviously, jack up and support the vehicle on the frame then remove the rear tire of the side you will be working on. You will want to leave the other three tires on and touching the ground (This is because you need the weight of the vehicle to help you get the new spring into place).

Then disconnect the air compressor. You can either just cap the weather pack and air lines or remove the compressor and associated hardware all together, your choice.

Next remove the air line from the shock. You do this by pushing the red ring towards the shock body with a flathead screwdriver, then pulling the air line out. This will cause a rush of air as the shock deflates.

51139439620_4e035008eb_h.jpg


Remove the top and bottom bolts from the shock and remove it from the vehicle.

51139445005_7f4c50a79a_h.jpg


Now, unclip the ABS wire from the spring bucket as well as the air suspension height sensor. Support the underside of the spring bucket with a floor jack and remove the inner bolt from the bucket (#2 in the diagram). You do this for two reason, this is also the toe adjustment bolt which you will be replacing with a modified SPC 87520 and because when you are putting the new spring in, this is the straightest angle to get it into place.:

51123449106_3e9f9babab_h.jpg


Slowly lower the jack until the spring is free and pull it out.

51122861157_a4272efbf5_h.jpg


At this point, you should take the set of SPC 87520 camber bolts that you have for the rear toe adjustment and using the thread die, cut another ~1/2” of thread onto the bolt. Then, leaving the die on the bolt, shorten the bolt by a corresponding 1/2", file the nose down so its tapered a bit, and back the die out to clean up the threads.

This is where shiz gets real! The OME 2986 spring is about 4.5” longer than the stock spring (results will vary here depending on how worn your springs are) and has 2mm thicker bar. There is no way that we could find to get the new spring into place without compressing it about 3”. At this point, I feel obligated to say that is you are in any way uncomfortable with compressing a coil spring that much, I don’t blame you. Take the vehicle to a shop and have them install the lift.

51138762729_eb12bed03d_h.jpg


We had a center pull style spring compressor (like this), though we had to modify it to be long enough by using a threaded bolt off of a pull hammer. We installed it with the spring sitting in the bucket and a flat steel plate under the bucket. Then we cranked on that sucker until it fit, like I said about 3” of compression was needed.

51137311737_f42a884f43_h.jpg


Once you can line the spring up with the upper bucket, put a floor jack underneath and slowly jack it up until you can put in the new toe alignment bolt. (You will start to lift the whole vehicle when you do this. That is why you need the other three wheels on the ground so you are using the weight of the vehicle to your advantage). Tighten that up and remove the jack and spring compressor.

Then install the new shock, which is just the reverse of removing it.

51139092940_387125c755_h.jpg


Put the wheel back on, and with the tire still in the air use the toe and camber adjustments to eyeball the wheel as straight as you can. Then tighten all the bolts up to spec.

Repeat on the other side.


Front Suspension:

Jack up the front end, support the vehicle on the frame and remove the wheels.

You will first need to remove the old strut assemblies. This is simply taking out the bottom bolt and the three nuts on the top. Once everything is loose, it should just pull out.

Now, dismantle the old strut, pull the top plate off, and then using that with the OME parts, assemble the new strut. You’ll need a way to compress the spring to do this, again you can rent compressors or you can just have a shop build them for you.

Next, you basically have to dismantle the rest of the front end. You’ll need to remove the steering knuckle (I hung the knuckle from the frame so I didn’t disconnect any brake lines):

51138739588_362cecb17b_b.jpg


The sway bar:

51138747768_3a7a56ad42_h.jpg


And the upper and lower control arms:

51137844727_2dacbdd1ab_b.jpg


Once you have done that, take your new SPC 25560 upper control arms and mock them up in place. Let the arm hit the upper strut tower and mark where it hits and then using your preferred tool, notch the tower so the UCA has maximum range of motion.

0xm9Wbvh.png


ZSeqzGdh.png


(Photo’s courtesy of leeleatherwood because his are way sharper than the ones I took.)


Remove the mocked up UCA.

Reinstall the lower control arm using the new SPC 87520 camber bolts. Leave the LCA loose for when you install the new strut.

Put the new strut into the upper strut tower and loosely reinstall the nuts. Then pull down on the LCA so you can fit the lower eye of the strut into place and install the bolt. Snug both the upper nuts and lower bolt.

51138205773_c95c71ecba_h.jpg


Next install the new upper control arm. Follow the instructions from SPC for installing the ball joint. I installed mine as far back in the UCA as I could with them pointing forward, allowing for +0.5* greater camber and caster adjustment. Leave the UCA loose until you reinstall the steering knuckle.

Reinstall the steering knuckle and tighten everything to spec.

Put a floor jack under the LCA and use that to help align the steering knuckle with the upper ball joint. Once that is connected, then reconnect the tie rod and tighten both to spec.

Reinstall the wheels and put the vehicle on the ground. Now, replace the end links and bushings on the sway bar with the new ones and reinstall it on the vehicle.

Jack vehicle back up, eyeball the camber and toe as best you can and tighten everything to spec.

Now, get it aligned! You will have to sacrifice some rear camber to get the toe in spec, but that’s OK.

And you’re done!


Spare Tire:

I’ve read in a couple places that you can’t fit a 35” tire in the factory spare location, this is incorrect. You can indeed fit a 35” tire there easily.

51137986201_63b1c67d2c_h.jpg


51137986241_6131315698_h.jpg
 

Stephen

Who Dares Wins
Moderator
Now that it's stopped raining, here are some post lift parking lot photo's:

51143196079_0865fb343c_h.jpg


Note the front is sitting higher than the rear, this is because I put on the medium rate springs in anticipation of putting a DASH Predator Bar and winch on this summer. That additional weight should weigh it down enough to even everything out.

51143521995_ca983c3b9c_h.jpg


51142420311_fa517592b7_h.jpg


51142632178_666b37fc2d_h.jpg


Here you can see the positive camber I had to use to get the toe straight. There are some camber bushings you can get from OnTrack 4x4 in Australia that can fix this, but I'm thinking I'll try another set of the SPC 87520 camber bolts and see if that'll help.
 
Last edited:

I Lean

Mbryson's hairdresser
Vendor
Location
Utah
Now that it's stopped raining, here are some post lift parking lot photo's:

51143196079_0865fb343c_h.jpg


Note the front is sitting higher than the rear, this is because I put on the medium rate springs in anticipation of putting a DASH Predator Bar and winch on this summer. That additional weight should weigh it down enough to even everything out.

51143521995_ca983c3b9c_h.jpg


51142420311_fa517592b7_h.jpg


51142632178_666b37fc2d_h.jpg


Here you can see the negative camber I had to use to get the toe straight. There are some camber bushings you can get from OnTrack 4x4 in Australia that can fix this, but I'm thinking I'll try another set of the SPC 87520 camber bolts and see if that'll help.
That would be positive camber, not negative.
 

N-Smooth

Smooth Gang Founding Member
Location
UT
Where at in WJ is that. I should go stalk him.
Just looking at the pic, I think he probably did the Calmini subframe drop in the rear.
Ivory Homes off 5600 W and 7400 S. I can PM you his address if you're really interested. Most motorsports peeps don't mind being stalked, especially if you show up with the same rig :rofl:

He owns a Chic Fil Yay around here. Not sure if that's what he drives or if it's somebody else that lives there but yeah
 

Stephen

Who Dares Wins
Moderator
Have had a busy work/life schedule over the past few months but finally had some time yesterday to take the Armada out on a post lift shakedown cruise. Everything worked great, rode surprisingly well on the washboard roads. I really thought that after replacing the air shocks in the rear it would be a much rougher ride, but it was still quite supple. Had a couple spots where I got a wheel off the ground (no pictures, sorry) and the traction control is still working great. I was a bit worried that the added weight of 35's would affect that negatively, glad it didn't.

I do have a slight, intermittent click/pop coming from the left front. Couldn't see anything obvious but I need to do some diagnosis on that, but it hasn't affected the drivability at all.

51247051203_bbc58c084e_h.jpg


51247903705_64369d9157_h.jpg


51247903600_a37167971a_h.jpg


51247028763_2a23d7bd28_h.jpg


Still need to get my camber sorted. Hopefully the SuperPro eccentric bushings solve that, should be able to get those installed in the next week or so.
 
Top