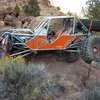
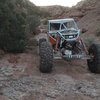
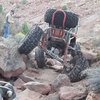
General Tech The Mango Bastard - A Rockwell Buggy story

_Auzzy_

Web Wheeling Extraordinaire
Location
Richfield Utah
How was the task of wrapping a panel? Any advice?

It was actually super easy, had my dad help me with it. I kept it pulled tight while he spritzed it with Windex and used a squeegee to apply it. I also used a vinyl adhesive promoter on the panel after I cleaned the hell out of them.
 

_Auzzy_

Web Wheeling Extraordinaire
Location
Richfield Utah
Small update. So took that pulley and bracket I posted earlier and got it all mounted and now the power steering pump has like 75% wrap and no more sqeauling!

Next is these little things in prep for trail hero -

First was fix the vacuum situation. Got it fixed by adding a second port on the driver side valve cover and adding two one way valves, baffling inside, and a giant -12an fitting welded to the cover as well then a hose ran off it to a filter under the dash with a one way valve too for roll over protection
IMG_20190917_160103.jpg

Next was fix the damn exhaust after being smashed for like the fifteenth time

IMG_20190917_180035.jpg

IMG_20190917_180053.jpg

IMG_20190917_190724.jpg

What was causing the dents was the limiting strap which is now needing replaced (it's ordered)

IMG_20190917_190731.jpg


And now we also have radios/headsets going in our group so here's a mount Cory made and I modified to go on my cage. Baofeng uv-5R radios with rugged radios headsets makes for an awesome affordable setup. I also ordered some small antennas to go on the outside of the rigs to help with reception over distances and then I also ordered a bigger battery that has a USB charging cable I can just leave plugged in while cruising

IMG_20190917_195009.jpg

IMG_20190917_195020.jpg

Then I fixed a valve cover leak and then ran the covers over Cory's new massive belt sander and took it for a cruise up and down main for fun, doing some crab walking etc

received_1076043435934158.jpeg
 

_Auzzy_

Web Wheeling Extraordinaire
Location
Richfield Utah
So it's begun y'all ?? let the horsepower commence

Parts list:
Motorvation custom TBI chip
Edelbrock intake manifold 3764
Edelbrock heads 60499
Edelbrock gasket set
Summit K1300 cam and HD billet timing gear set
CompCams hardened pushrods and roller rockers
ARP head studs
ARP rocker studs
ARP header bolts
ARP intake manifold bolts
Morso valve cover studs
Jegs adjustable fuel pressure regulator

First was getting the shop cleaned after all our A-hole buddies went through and the mess Cory has made with putting in his sweet new house ?❤️

IMG_20191104_132039.jpg


Now to whip the buggy in and strip the beast, no images of that, but if your curious just go back a few pages. Anywho got the heads and intake off and weighed.

IMG_20191104_174544.jpg
IMG_20191104_174739.jpg

And just for curiosity and to see what Cory was crying about here's what the Edelbrock 60499 head weigh

IMG_20191104_180207.jpg

So this all started because I found a build thread on a K5 forum about a guy who had a built 85 K5 that he swapped a 91 SS 454 into after he had built it with all Edelbrock stuff, cam etc then that truck got totalled etc etc so anyways his final Dyno numbers was 385 rwph and 429ftlbs torque! Since I found that I always wondered what mine would be like with that kind of power. It scoots pretty good for it's size but I've always loved power house machines. First I wondered what kind of heads and intake etc i could do, but after some serious research I came to find that nothing would work with about a butt load of machining on old heads that people want a small fortune for aka the old car style 454 heads like off Corvettes etc. Thats why I came to the conclusion of Edelbrock 60499 tbi specific heads and their 3764 intake manifold accompanied with a good cam and tuning. Review searching is how I found the k5 forum and got a hold of the guy I had build my TBI ECM chip, T.J at Motorvation and from there well yeah already explained it.

Anywho here's some snaps of the heads side by side. The ports, valves, combustion Chambers etc is just 100 times better and how GM should have built these.

IMG_20191104_180307.jpg
IMG_20191104_180326.jpg
IMG_20191104_180331.jpg
IMG_20191104_180339.jpg
IMG_20191104_180357.jpg
 

_Auzzy_

Web Wheeling Extraordinaire
Location
Richfield Utah
Aight heres strip and assembled shots

Here's the bare block, all cylinders look good, no marks, no weird colors etc, frickin mint

IMG_20191104_191256.jpg

Once again here's our GM Harmonic balancer puller. To use it first your just run the bolt in against the balancer bolt head, once it's bottomed out i found a socket that fit perfect inside the pulley and pulled it completely off

IMG_20191104_191249.jpg

Next was pulling the old cam, to my own stupidity I built my lower bar right in front of the cam so I had to cut it out and thankfully the chassis didn't spring out all nuts. Cory's new sawzall made easy work of that.

After that pulled cam and such I got the new one lubed up and slid in ?

IMG_20191104_231356.jpg

Next was the summit gear set in. Originally gonna use ARP cam bolts but the 12points didn't work with the lock tabs. Which by the way if anyone does. Cam or timing gears anytime soon I recommend getting the CompCams lock tab kit. Mine on the old cam were barely tight, not saying I expected them to be hella tight considering their torque is only 24ftlbs but still they weren't tight. Super cheap insurance is what I'm getting at.

IMG_20191104_233213.jpg

Next was getting the heads on, ARP studs torqued and such.

IMG_20191105_011110.jpg
IMG_20191105_011116.jpg

Then today while I was b.s.ing etc Cory made me this badass stainless alternator support piece cause the new heads all use 7/16 bolts and my old heads and brackets are made for 3/8. One side is a 7/16 stud and the other end is threaded for 3/8

IMG_20191105_195805.jpg

Then I finally soaked the summit lifters with rotella 10-30 with Edelbrock zinc additive since it's a flat tappet cam and after an hour ish of soaking and multiple pumping I slid them in.

IMG_20191105_210722.jpg

Next was getting the CompCams hardened rods and rockers in and adjusted. Got my ass kicked for a few here, the new rockers are super touchy to adjustment, even a 1/8 over turn past good and the valves started to touch pistons. After alot of that crap it's finally set and pure bling ?

IMG_20191105_213130.jpg
IMG_20191105_214358.jpg
 
Last edited:

_Auzzy_

Web Wheeling Extraordinaire
Location
Richfield Utah
Got the intake manifold used off eBay for $125 a few weeks ago, Las owner had a temp probe in the water passages under the throttle body for some reason. Cory buzzed it shut for me then I grinded it off and then polished it for fun. Weighs 32-33,lbs less than the OEM one.

IMG_20191106_155626.jpg
IMG_20191106_163745.jpg
IMG_20191106_172602.jpg
IMG_20191106_191235.jpg

Then I made a new EGR block off plate out of aluminum and Cory polished it too

IMG_20191106_192001.jpg

Now a big concern of mine was how tall the new manifold was and how I really didn't want to make a new engine cage. After awhile of searching I finally found this base on Amazon which with my 4" filter will give me right close to 1/2" of clearance thank God. Plus I really like how it hides the throttle body ?
IMG_20191106_192013.jpg
 

_Auzzy_

Web Wheeling Extraordinaire
Location
Richfield Utah
IMG_20191111_170502.jpg

Aight so got it going ?? low end leaves something to be desired but that's probably do to tuning needed on my end first before I hit up Motorvation for a new chip. But the rest is night and day, good lope to the cam, mid to 3/4 throttle is just awesome! (Limited my throttle to that cause I can't be trusted)


received_627052417829321.png

Had a little fun before I officially put it together though, gave the covers a good buffing and sanding

IMG_20191106_214329.jpg

Fixed a few wires and heat shielded them.

IMG_20191106_200334.jpg

And finally there some Oreillys "cerakote" on the headers and wrapped them plus the exhaust system. Now the floor boards don't get as hot

IMG_20191107_033613.jpg
received_488657541733876.jpeg

Only real hiccups I had was the rockers being a total pain to adjust, my "nice" Taylor wires failing/falling apart and some other misc crap. But none of that compared to the rookie move I pulled. Got the tip of my middle finger broken and the finger nail ripped off by my serpentine belt and the two fingers on each side smashed as well ? would show pics but pretty sure there's rules against such imagery. Anywho don't put sensitive digits where they don't go! Safety brief for the weekend!
 

Ashcat

Active Member
Location
Wisco
Was the serp equipment spinning when you stuck your digits in there?

Nice score on the manifold. I love when a deal comes up at the right time. I prefer most parts to be new but I also think it’s neat to have parts with a history and little bit of a story to go with them.
 

_Auzzy_

Web Wheeling Extraordinaire
Location
Richfield Utah
Was the serp equipment spinning when you stuck your digits in there?

Nice score on the manifold. I love when a deal comes up at the right time. I prefer most parts to be new but I also think it’s neat to have parts with a history and little bit of a story to go with them.

It may or may not have been... mostly may.
 
Top