General Tech What did you work on Today?

NYCEGUY01

Well-Known Member
Location
Willard, UT
So........
I know this truck its getting new springs, shocks, brake lines and what not so the axles are basically all the way out either way.
Do you normally remove the axle from the truck to do gears/ diffs etc ?
It seems like it is a TON easier to do the gear setup on your table and fixture, Is it worth the extra effort to fully remove the axle so you can set it on your table.
Just curious I guess..

And, as this whole project is about the wheels...lol Its getting close... I cant wait to see it sitting on the new tires....
 

zmotorsports

Hardcore Gearhead
Vendor
Location
West Haven, UT
So........
I know this truck its getting new springs, shocks, brake lines and what not so the axles are basically all the way out either way.
Do you normally remove the axle from the truck to do gears/ diffs etc ?
It seems like it is a TON easier to do the gear setup on your table and fixture, Is it worth the extra effort to fully remove the axle so you can set it on your table.
Just curious I guess..

And, as this whole project is about the wheels...lol Its getting close... I cant wait to see it sitting on the new tires....

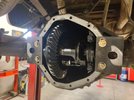
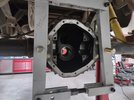
JJ, the decision to pull an axle, for me anyways, is complex and includes multiple factors. Yes, yours was an easy decision to make because it was getting new leaf springs but also because if you look at the factory holes where the case spreader is attached, one was located directly under the passenger side spring perch. This would have negated the ability to use a case spreader if it was done in the vehicle. I am very much a proponent of using case spreaders to insure proper carrier bearing preload and therefore in my opinion the only way to get the proper bearing preload and do this job correctly was to remove the axle.

On many of the Jeeps that I've been re-gearing for example, they use more outboard mounted coil springs and coil spring buckets do not interfere with the locations of the factory holes for the case spreader so in a Jeep I may or may not pull the axle to perform a re-gear. I have done them both ways but more factors will come in to play. If I am only doing gears and the Jeep has a lift which gets the differential down away from the frame enough to allow clearance for my case spreader then I may just leave the axle in the Jeep and perform the work. This is generally the case because usually a re-gear is being done because of larger tires and larger tires require some lift.

Now if I am being hired to also perform some welding on the axle I will usually remove the axle from the Jeep because I feel I can get a better weld without the interferences of the Jeeps body and chassis being in the way. The only welding on an axle I may not pull the axle to perform is when I am repairing and/or modifying the track bar mount, and it seems like I have been doing a lot of these lately. If I am removing the OEM bracket, which I highly recommend, and adding something more beefy like an Artec Industries or Synergy then I generally pull the axle and get it on the fabrication table where I can make 100% certain the welds are penetrated properly and prepped properly.


I will say that the reason I decided to build both my transmission jack axle adapter and my fixturing jigs that I bolt to my fabrication table was due to the amount of axle work I began doing and how hard it was to sell the job on dropping the axle. This was quite an extra expense due to the time involved. This is also why most shops perform nearly all axle work in the vehicle but I felt like a better overall finished product could be had by performing the axle work on the bench vs. in the vehicle. This is why I dedicated about a week of my time to fabricate the fixtures and adapters to reduce the time required to remove and install axles and pass that along to the people I found myself doing work for. Now that time has been reduced to only a couple of hours difference total which when doing a lot of work and a total bill of around $1600 to $2000 or more, most people don't hesitate when I ask about adding another $150-$200 to perform the work to a higher level of quality, something they may not get at another shop.

There are however, still some people that ONLY shop by price and in those situations I am not unhappy when they go somewhere else. When I had my speed shop I lost jobs because I was not the cheapest but also I had very loyal clients that come to me with cost having no factor in the decision. Some of those loyal clients from my speed shop days are now still seeking me out to do work for them once they found out I am doing some side jobs again. I know I am not the most expensive wrench around but I also know I am not the cheapest. I have always tried to perform my work to a higher standard and not let the standard set the quality of my workmanship.

Sorry for the long explanation and to some extent tooting my own horn, however, it really depends on the vehicle and what work exactly I am being asked to perform whether I pull the axle or leave it in the vehicle for the work.

Thanks

Mike
 

Gravy

Ant Anstead of Dirtbikes
Supporting Member
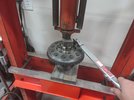
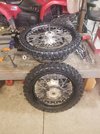
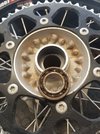
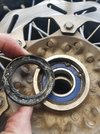
The last couple days have been busy busy prepping my kid's PW50 for the upcoming season.
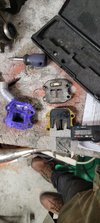
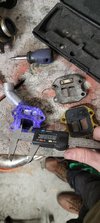
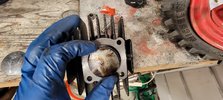
Did an oil injection delete -I had to fabricate my own block off plate...
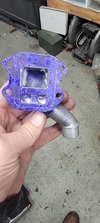
I put a new clutch in. Did a new Reed valve block where I Port matched the intake to the new bigger Reed valve block and smooth out all the casting lines inside.
20211216_163708.jpg
20211216_163720.jpg
20211216_164844.jpg

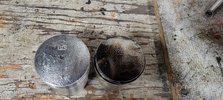
Did a new cylinder, piston and head.
20211216_212941.jpg
20211216_213005.jpg
 

NYCEGUY01

Well-Known Member
Location
Willard, UT
And yes, JJ, the original project was about the wheels. Looks like scope creep got ahold of ya. :D

Mike
Clearly....
There is currently a stack of boxes here as tall as me along with a NV4500 and a 4l80e I cant decide between.
That built 5.3 LS is just sitting on a stand here as well although I keep thinking about another aluminum headed small block to keep it all old school...
Out back are all the extra parts I stole off parts trucks that I recently scrapped...
Ill prob drive it as is for the most part until spring but then its getting another big round of upgrades.....
 

Gravy

Ant Anstead of Dirtbikes
Supporting Member
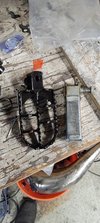
I never understood why Yamaha used these little square pegs covered in rubber. So he got this upgrade too.
20211217_103932.jpg

I got the little thing pressure washed, detailed and put back together. Apparently there are 2 molex connectors and 2 bullet connector that each have the same color coded wires on either side. So I was swapping coils and ignition boxes and everything I could think of including inspecting every inch of wiring loom and cleaning every connection with no succes and lots of frustration!
Swapped some connectors, and BAM fired first kick on the new motor.

Had the kid run around the block and did a plug chop and jetting looks good so far.
 

zmotorsports

Hardcore Gearhead
Vendor
Location
West Haven, UT
I have a confession to make.......

I broke my own cardinal rule when disassembling projects. :mad2:

I will ALWAYS make a list of parts as I am tearing a project down so I know I have the parts when the project is going back together. I don't get nearly the shop time I want these days so I schedule my projects and time as efficiently as possible and nothing irritates me more than when I have a project going back together only to find out a small very specific bolt, shim, washer or something more major is holding up the project because of poor execution of my plan. I follow a very strict Seven "P" policy. Proper Prior Planning Prevents Piss Poor Performance. Well, I poorly executed this one.

As I was tearing down the square body K10 a couple of weeks ago I made sure to write down such as grease seals for the front hubs as I was certain they would need to be replaced and bearings repacked. As I was tearing down the front spindles and bearings I noted a couple of the hub nuts had some burrs where the previous owner must have used a punch to tighten the nut rather than the proper four wheel drive nut socket. This is not acceptable but also not uncommon but I generally can walk over to the belt sander and touch up the edges on the belt and be good to go.

Well as I started cleaning parts on Friday evening to reassemble the front axle knuckles I saw that the spindles were in very poor condition and had the inner bearings spin on the spindle. This caused one to have a nasty groove worn into it and the other side wasn't far behind. Also the nuts were in much worse condition once I got them cleaned in the solvent tank. I could have kicked my own ass Friday night.

Luckily I called JJ, the owner, who has been great to do work for as he had expected some "surprises" on a 45+ year old truck. He was quick to locate and order new spindles and bearing kits. I guess I lucked out and hadn't really wasted any much time because the parts were readily available and should be here any time and I still had the rear axle to work on so it wasn't a total game stopper but still pissed me off that I broke my own rule.

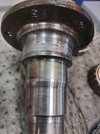
This was the passenger side spindle that was the better of the two.
k10f1.jpg

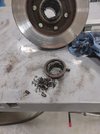
Driver's side bearing as I was removing the seal and bearing. Glad this failed in the shop rather than on the road. I think the cage was barely holding the rollers in the bearing.
k10f2.jpg

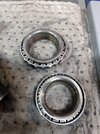
Passenger's side bearings show some signs of spinning on the spindle and the cages are damaged slightly.
k10f3.jpg

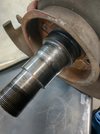
Driver's side spindle. Deep groove where the bearing had been spinning on the spindle for quite some time.
k10f4.jpg

Now on to the rear axle.

Mike
 

zmotorsports

Hardcore Gearhead
Vendor
Location
West Haven, UT
Last night I was able to get the rest of the GM 12-bolt rear axle disassembled and cleaned in preparation for reassembly.

Had to drill a couple additional holes to the case spreader adapter plates that I fabricated a couple of months ago when I worked on that Ford F-150.
k101.jpg

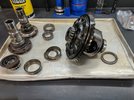
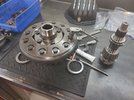
Carrier assembly removed and on the work bench.
k102.jpg

Housing cleaned, old pinion races removed and new races driven into place.
k103.jpg

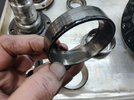
When I removed the pinion yoke I noted the nut was loose and then noticed the outer pinion race showing quite a bit of wear due to debris. The oil was in very poor condition that came out of this axle and this bearing reflects the lack of maintenance.
k104.jpg

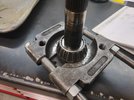
Preparing to press the inner pinion bearing off the pinion with a bearing splitter then over to the hydraulic press.
k105.jpg

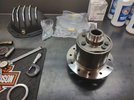
New differential cover in the background and new Eaton TrueTrac in the foreground ready for installation.
k106.jpg

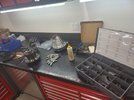
Parts cleaned, measured and ready to start assembling.
k107.jpg


Thanks for looking.

Mike
 

zmotorsports

Hardcore Gearhead
Vendor
Location
West Haven, UT
More progress on the square body last night.

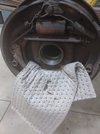
Started by removing and replacing the rear outer bearings and seals.

k101.jpg

k102.jpg

k103.jpg

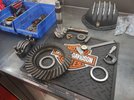
Then I proceeded to clean and thoroughly inspect all of the components for the ring and pinion installation as well as the new Eaton TrueTrac limited slip differential. I prepped by cleaning and taking a stone to the mating surfaces of the TrueTrac and the ring gear to ensure no raised burrs would impede installation. Then grabbed the shim drawer and prepared for the initial test fit.
k104.jpg

Ring gear pressed on to the carrier and bolts with red Loctite applied being threaded into place. Set up bearings test fit on to pinion.
k105.jpg

Ring gear bolts torqued to spec.
k106.jpg

Thanks for looking.

Mike
 

zmotorsports

Hardcore Gearhead
Vendor
Location
West Haven, UT
I think you caught those wheel bearings just before they damaged the hub. Once they lock up enough to spin in the hub even a small amount the hub is finished.

You may have just been able to put a little grease in that one and been just fine though. :rofl:
 

jeeper

I live my life 1 dumpster at a time
Location
So Jo, Ut

Vonski

nothing to see here...
Location
Payson, Utah
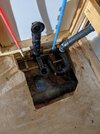
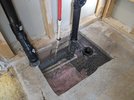
Got some of my wall support pieces tacked and test-fit, which obviously support the T/clean-out and maintains the horizontal section’s upward slope. Also supports the weight of the 8’ of triple-wall chimney pipe still to come, which isn’t light.
 

Attachments

  • 6915B58C-33CB-4EF6-AC63-B90F57E42822.jpeg
    6915B58C-33CB-4EF6-AC63-B90F57E42822.jpeg
    497.8 KB · Views: 20
  • AB8BA463-6E3C-4DFD-9B1C-7010B2967001.jpeg
    AB8BA463-6E3C-4DFD-9B1C-7010B2967001.jpeg
    342.6 KB · Views: 18
  • FFC06B92-1809-4723-BF35-803AEC17013D.jpeg
    FFC06B92-1809-4723-BF35-803AEC17013D.jpeg
    412.6 KB · Views: 20
  • DAAC7E73-6E51-4804-9C9F-BF42D4380B20.jpeg
    DAAC7E73-6E51-4804-9C9F-BF42D4380B20.jpeg
    355 KB · Views: 21
Top