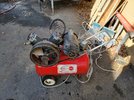
While I am waiting for the next job to come into the shop I thought I would take a couple of nights and knock off a couple personal items from my list.
Last year I had aligned the headstock on my lathe. It took the better part of an evening in the shop but I finally got it nearly spot on. A few weeks ago I was machining a shaft for a neighbor's loader/skid and thought the part had a bit of a taper in it after some measurements. I wasn't sure if it was due to the shaft being so hard that it was deflecting from the cutting tool OR did my headstock come out of alignment again. Headstocks as a rule generally don't just come out of adjustment and when they do it is usually due to being crashed or moved. I had done neither but wanted to satisfy my curiosity.
On Monday night I grabbed my test piece and ran a few passes taking a few thousandths off each pass and it was spot on from where it was last year. It was .0001" off in about 6 inches with the smaller end being furthest away from the headstock. Spec's show it should be no more than .0004" in 4" so I am extremely pleased with that.
Since I had already made chips on my nice clean shop floor I thought I would lead in to my next small project that I have wanted to do since last fall.
As most of you know I hate, despise and even loathe noises in my vehicles. I go to great measures to rid them of any such noises. I have made several modifications to my Mac's Black Box over the years in order to deal with the weight that I carry in it. If I would just alleviate some of the weight such as my bottle jack/jack stand and some of my tools I am sure I could lose about a hundred pounds and probably get rid of this particular noise but I am not willing to be without certain things when I am traveling into the back country off-road. After the last couple of mods to the toolbox it has become nearly silent.......Nearly. Last fall after my last modification I thought I had finally achieved perfection but shortly after fabricating and adding the small glides to the rear edge of the box in which the drawer slides up on to for supporting the weight, I noticed a very, very slight "creak" when I either accelerate or stop abruptly. I found out that even though the box's weight is now fully supported by UHMW glides at the front of the drawer and aluminum glides at the rear which takes the transportation weight off of the drawer tracks it makes a very slight noise as the weight transfers fore or aft during driving. The drawer's latch is center and top of the drawer but the bottom moves ever so slightly in/out as the weight transfers. This is what I would like to address.
At first I thought about using a toggle clamp on one of the sides but there simply isn't enough room. My next thought was a couple of aluminum blocks with a pin through them to keep the drawer fixed in position during travel.
I thought I would machine two small aluminum blocks. One which will be located at the center bottom of the drawer and then another one just below it attached to the framework of the box. Then a quick release pin would hold the two together and therefore eliminate the slight movement at the bottom of the drawer. I dug through my aluminum drop drawers and found a piece that I thought would work for both.
After a couple of measurements I came up with a size and design, then transferred it to a piece of cardboard for my CAD drawing.
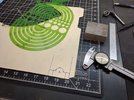
Transferring my pattern to the aluminum block.
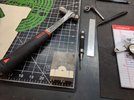
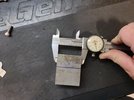
Probably a little overkill but while I am at it I figured I would work to exact measurements for practice. Here I am squaring the block to size.
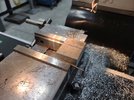
Dead nuts right on the money @ 2".
Next I located where I wanted the 1/4" quick release pin to be located.
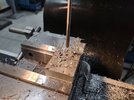
After reaming I test fit the pin. Perfect fitment.
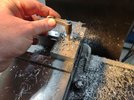
I then used a 3/8" end mill to come in to the radius.
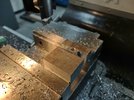
The other half of the block will need to be .7" thick. This will be the part that resides on the lower framework of the box. The block that mounts to the drawer itself will be a full 1" thick. This will allow the quick release pin to protrude below the bottom block just enough for the retention balls on the pin to fully release and therefore lock into the bores.
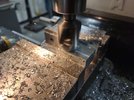
I left about .010" of thickness in which I will remove once both parts are separated and I can flip them over and remove from the other side.
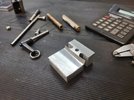
Laying out the template on the lower block piece.
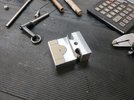
More to follow:

