General Tech What did you work on Today?

Magerdgr

Have gun, will travel
Broke my z bar in the ‘68 so I figured since I had to pull it out it was a good time to swap the stock exhaust manifolds and weak 1.5” exhaust for my headers and 3” Purple Hornies. Still gotta run the tail pipes, but it sounds considerably healthier. 👍🏻
 

Pike2350

Registered User
Location
Salt Lake City
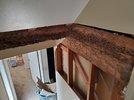
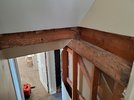
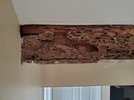
I spent part of the day exploring the extent of the carpenter ants. Turns out, my suspicion was correct and the joist was their highway. It went all the eay to the middle load bearing beam. Their rest stop was just outside the bathrrom wall over the stairs. Luckily, the beam and post are still solid. The doubled up joist behind this one is solid enough....only slight damage on the bottom. It juat crumbled when I touched anything.
 

Attachments

  • 20220212_132635.jpg
    20220212_132635.jpg
    306.5 KB · Views: 34
  • 20220212_145803.jpg
    20220212_145803.jpg
    239.9 KB · Views: 34
  • 20220212_125815.jpg
    20220212_125815.jpg
    271.4 KB · Views: 35

Pike2350

Registered User
Location
Salt Lake City
I spent part of the day exploring the extent of the carpenter ants.
I was wrong. They are not carpenter ants. Instead they are termites...and there are ztill some active apparently. I have seen 6 or so continuing to walk in a certain path. Little bastards. Now I have to get professional service in to see how much thos will cost me and how much of a delay I have.
 

Attachments

  • Attach0_20220215_185308.jpg
    Attach0_20220215_185308.jpg
    124.2 KB · Views: 35

Mouse

Trying to wheel
Supporting Member
Location
West Haven, UT
I didn’t realize we had termites in our climate
I had some untreated posts in our garden a couple years ago (for green beans and peas); when I pulled them out the below-ground section were full of termites. I was a bit surprised to see them as well. I called a pest control guy and he said unless we have any signs on the foundation of the house, no preventive measures were needed for the house. We moved here from Florida - you had to keep up on termite prevention there for sure
 

TRD270

Emptying Pockets Again
Supporting Member
Location
SaSaSandy
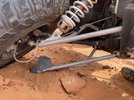
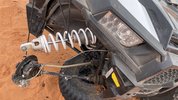
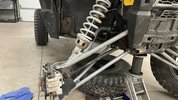
Golf carts... It blows my mind how thin of material they use on those stock a arms.
I put a set of superlift arms on a general over the summer and I bet they weighed triple over stock.
To be fair this was not the sxs fault 😂

Also believe removing both ball joints from the housing not the way shown in the service manual may have had something to do with the a-arm failing
 

zmotorsports

Hardcore Gearhead
Vendor
Location
West Haven, UT
So I got squirreled the other night. :eek:


I was starting on a personal project and as I started measuring to make some cuts on my Baileigh BS-210 horizontal bandsaw I remember how cheezy the work stop was on this saw. The saw overall is awesome and I love it. However, each time I use the saw I keep telling myself I need to do something about that lame ass plastic work stop that really cheapens the appearance of the saw.

Here is what I mean.
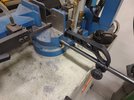
saw1.jpg

I dug through my scrap and found some pieces to make a more stout work stop.
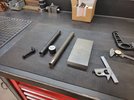
stop1.jpg

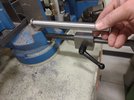
Scribed out layout lines to cut to. My measurements I was shooting for were 2" by 1.625".
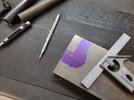
stop3.jpg

It is good to know your equipment and what their capabilities and rigidity are. I know with my vertical bandsaw with a .035" wide blade that it is very accurate and if I cut to the outside of the line it will net me approx. .025"-.030" for cleanup and that the cut line will be straight and true without gouges.

stop4.jpg

This cut was .027" over the target. Perfect for a couple of clean-up cuts.
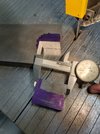
stop6.jpg

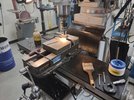
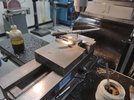
I could have easily just walked over to the disc sander and knocked the burrs and saw marks off and been fine with a little oversize. However, I wanted to play on the lathe and mill a bit more and get in a little more practice hitting my dimensions spot on. This allowed me about a .010" or so clean-up cut on each side in the mill.
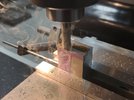
stop10.jpg

That netted me the perfect dimensions. The block now measures exactly 1.625" by 2".
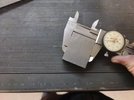
stop12.jpg

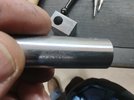
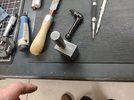
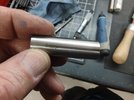
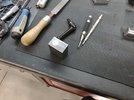
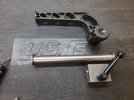
I cut a length of .750" 4130 chromoloy tubing that I had lying around and machined a couple of over-sized plugs for each end to serve as the hard stops. The pressed into the tube and will get welded in later during the welding process. I also found a locking handle that will work perfectly as the clamping mechanism.
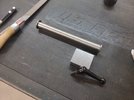
stop13.jpg

Stay tuned for more pictures.....
 

zmotorsports

Hardcore Gearhead
Vendor
Location
West Haven, UT
Continuing on with the work stop.


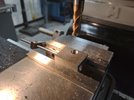
With the perfectly sized block clamped in the mill vise I set up a work stop for repeatability when I remove the block. This way I can reinsert it back into the vise in the exact same place and not need to re-index in on the part. Measuring tools at the ready as I don't use my boring bar as often as I would like so I decided I had better make some practice cuts before getting near my target of .625".
saw6.jpg

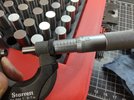
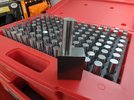
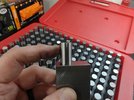
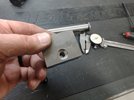
I used the snap gauges (telescoping gauges) to measure the bore. When using transfer style of measuring instruments I like to hit a 2 out of 3 times on the same dimension to feel confident in the measurement. This comes down to duplicating the feel and drag on the part in the bore. I also thought I would verify by using gauge pins. This measured .5877".
saw8.jpg

A .588" gauge pin would not fit.
saw9.jpg

Here is a .587" gauge pin that......
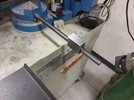
saw10.jpg

slides straight through with very little assistance. This also tells me the bore is straight and not at an angle or taper.
saw11.jpg

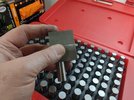
I then set my next target at .623" which would give me .002" for a final pass to clean up the bore. Here is a .626" gauge pin.
saw15.jpg

That will not fit in the bore.
saw16.jpg

And a .625" gauge pin.
saw17.jpg

Slides right in. Target achieved.
saw18.jpg

Test fit on the saw.
saw20.jpg


One more set of pictures to follow.....
 

zmotorsports

Hardcore Gearhead
Vendor
Location
West Haven, UT
Here are the final pictures of the project so far.
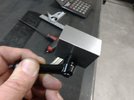
After determining the location of the clamping handle I drilled the hole then counterbored a hole large enough for the handle's base to be recessed into the block by .125".
saw21.jpg

Then tapped the lower part of the hole to 5/16"-18 thread.
saw22.jpg

Block drilled, tapped and counterbored and ready for deburring.
saw23.jpg

Test fit of the locking handle. Fits perfectly.
saw24.jpg

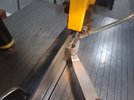
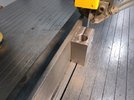
I don't have a slitting saw large enough to reach through the block to the bore so I set up a temporary fence on my vertical bandsaw and cut a slit in the block.
saw25.jpg

Easy peezy.
saw26.jpg

After running a small file along the cut line in the bore I to clean up the cut as well along the outside I performed another test fit.
saw27.jpg

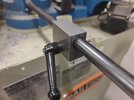
This is how the placement will be for the new work stop. I think I am going to make it a little closer to the bottom than the original to be able to use it on thinner stock.
saw28.jpg

Original vs. new work stop.
saw29.jpg


Thanks for looking.

Mike
 

N-Smooth

Smooth Gang Founding Member
Location
UT
I yanked Britney's parole and banished her to the backyard under a tarp where she can think about how she's been such a bad girl.

View attachment 146225

Now it's time to work on the other Jeeps and prepare for the HITR trip coming up.
You need some shop space back there. I assume you have like 7 acres since you're in G-Town and that's the only reason to live in G-Town :grimacing: :rofl:
 
Top