You are using an out of date browser. It may not display this or other websites correctly.
You should upgrade or use an alternative browser.
You should upgrade or use an alternative browser.
General Tech What did you work on Today?
- Thread starter Gravy
- Start date
NYCEGUY01
Well-Known Member
- Location
- Willard, UT
Dakota Digital cluster.Is that the stock gauge cluster or a Camaro? I would love a good looking factory tach in my 83 k5....
I did a factory squarebody tach in my stepside and it looks pretty good as well, For a bunch less money..
- Location
- West Haven, UT
In between other paying jobs I was able to finish up my work stop for my Baileigh BS-210 bandsaw.
Where I last left off I was thinking about using a piece of plate or bar stock to make the standoff for the stop from the block. However, after looking at it further I didn't care for either of those options. I decided to stay with some .750" 4130 chromoly tubing that was already sitting on my fabrication table. I only needed about a .875" long section so before cutting to length I thought the best practice would be to notch the tube at the desired angle, then cut the flat at the same angle.
I played with a couple of different angles but settled on 30-degrees. I made sure my mill vise was dead nuts level.
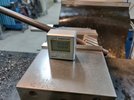
Then moved to set the tubing at thirty degrees for notching.
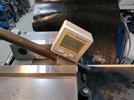
I used my hole saw that I recently machined solid mandrels/arbors for which made for a nice rigid setup in the mill with no wandering of the saw at all.
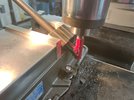
Mocked up on the bandsaw.
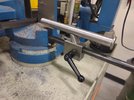
TIG welded the standoff to the horizontal stop.
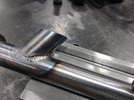
Test fit.
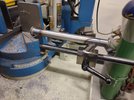
I made my work stop reversible compared to the original so I could extend cut pieces out a bit further.
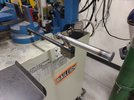
I decided to grab the cold bluing and apply to the work stop.
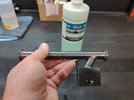
Completed.
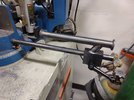
Final touch was to install a color matched handle. Since I had to order some material from McMaster Carr last week for an upcoming project I added a blue indexable handle to match the saw.
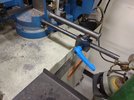
Thanks for looking.
Mike
Where I last left off I was thinking about using a piece of plate or bar stock to make the standoff for the stop from the block. However, after looking at it further I didn't care for either of those options. I decided to stay with some .750" 4130 chromoly tubing that was already sitting on my fabrication table. I only needed about a .875" long section so before cutting to length I thought the best practice would be to notch the tube at the desired angle, then cut the flat at the same angle.
I played with a couple of different angles but settled on 30-degrees. I made sure my mill vise was dead nuts level.

Then moved to set the tubing at thirty degrees for notching.

I used my hole saw that I recently machined solid mandrels/arbors for which made for a nice rigid setup in the mill with no wandering of the saw at all.

Mocked up on the bandsaw.

TIG welded the standoff to the horizontal stop.

Test fit.

I made my work stop reversible compared to the original so I could extend cut pieces out a bit further.

I decided to grab the cold bluing and apply to the work stop.

Completed.

Final touch was to install a color matched handle. Since I had to order some material from McMaster Carr last week for an upcoming project I added a blue indexable handle to match the saw.

Thanks for looking.
Mike
- Location
- West Haven, UT
Since I already had metal chips and shavings all over the lathe and mill I thought I'd knock out another small project on my want list.
When I use my rotary table on the mill, I usually remove the vise so I have some made up T-bolts that I made eight years ago when I purchased the mill. However, during a recent smaller project I didn't need to remove the vise and therefore I thought I'd make up another pair of T-bolts.
I grabbed a 5" length of 1" stock from my drop drawer and began taking it down to size.
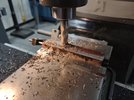
After getting the two major dimensions to size I began cutting the steps for the T-nuts. I plunged them as I moved along the length of the bar by staying .010" from my final dimensions in both axis to allow for a clean up pass to bring me to the final dimensions.
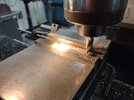
T-bar stock ready to cut off a couple of 1.1" lengths for the T-nuts.
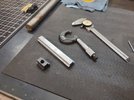
Cut the heads off a couple of 1/2" grade 8 bolts then thought I'd practice some single point threading on the other end. I needed 1/2"-13 threads.
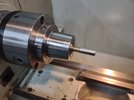
Threads done.
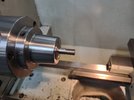
Nut fits on nicely.
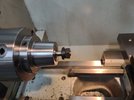
Parts ready for drilling and tapping of the T-nuts.
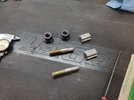
Setup the two T-nuts in the mill vise. The left T-nut is up against the work stop.
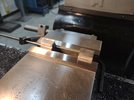
Once one is drilled and chamfered, I swapped them around to do the other rather than re-index on the next part. Using a work stop makes for quick component swaps when repeating processes.
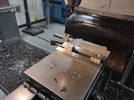
Parts cleaned and ready for the final step, welding.
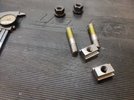
More to follow......
When I use my rotary table on the mill, I usually remove the vise so I have some made up T-bolts that I made eight years ago when I purchased the mill. However, during a recent smaller project I didn't need to remove the vise and therefore I thought I'd make up another pair of T-bolts.
I grabbed a 5" length of 1" stock from my drop drawer and began taking it down to size.

After getting the two major dimensions to size I began cutting the steps for the T-nuts. I plunged them as I moved along the length of the bar by staying .010" from my final dimensions in both axis to allow for a clean up pass to bring me to the final dimensions.

T-bar stock ready to cut off a couple of 1.1" lengths for the T-nuts.

Cut the heads off a couple of 1/2" grade 8 bolts then thought I'd practice some single point threading on the other end. I needed 1/2"-13 threads.

Threads done.

Nut fits on nicely.

Parts ready for drilling and tapping of the T-nuts.

Setup the two T-nuts in the mill vise. The left T-nut is up against the work stop.

Once one is drilled and chamfered, I swapped them around to do the other rather than re-index on the next part. Using a work stop makes for quick component swaps when repeating processes.

Parts cleaned and ready for the final step, welding.

More to follow......
- Location
- West Haven, UT
Studs ran down to flush. Studs chamfered and drilled/tapped holes chamfered to allow the weld bead to sit down into the joint and should only require very little clean up after welding.
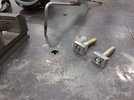
Welding completed.
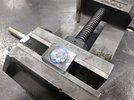
I next went back to the lathe and knocked out a couple of .200" thick washers from high carbon 1045 steel stock. I keep a couple of old high carbon shafts around for things like this that I can take chunks off of.
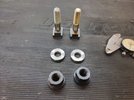
Lastly, I thought I'd give them a dunk in some cold bluing. I keep a few various sizes of cut-down containers readily available for tasks like this.
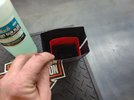
I chose the smallest container which would just be enough to get all of the parts in and least amount of cold bluing.
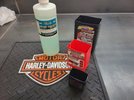
While the parts were sitting in the bluing I took about 10 minutes or so to clean up the lathe mill and shop floor from my last couple weeks of machining. After removing the components from the bluing I gave them a wipe down and then applied a little 3-in-1 oil to them to soak in.
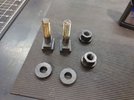
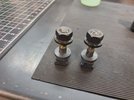
T-bolts done and ready for use next time I need to mount my rotary table to the mill table. These ones actually turned out better than my last pair. I may have to swap them around next time my vise comes off the mill.
Thanks for looking.
Mike

Welding completed.

I next went back to the lathe and knocked out a couple of .200" thick washers from high carbon 1045 steel stock. I keep a couple of old high carbon shafts around for things like this that I can take chunks off of.

Lastly, I thought I'd give them a dunk in some cold bluing. I keep a few various sizes of cut-down containers readily available for tasks like this.

I chose the smallest container which would just be enough to get all of the parts in and least amount of cold bluing.

While the parts were sitting in the bluing I took about 10 minutes or so to clean up the lathe mill and shop floor from my last couple weeks of machining. After removing the components from the bluing I gave them a wipe down and then applied a little 3-in-1 oil to them to soak in.


T-bolts done and ready for use next time I need to mount my rotary table to the mill table. These ones actually turned out better than my last pair. I may have to swap them around next time my vise comes off the mill.
Thanks for looking.
Mike
DaveB
Long Jeep Fan
- Location
- Holladay, Utah
- Location
- Grantsville, Utah
Pile of parts
Well-Known Member
- Location
- South Jordan
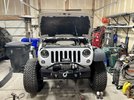
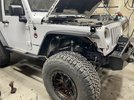
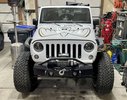
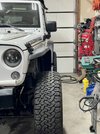
Those look way better than the flenders!With Britney out of the garage, I finally took the time to install the MCE flares that I ordered over a year ago.
View attachment 146519View attachment 146520View attachment 146522View attachment 146521
- Location
- Sandy, Ut
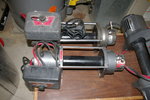
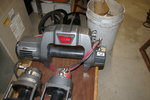
I wrapped up repair on three Warn winches, the 8000s needed solenoids and the 9.5ti was Kurt's old winch that needed the bridge replaced. It turned out well enough that I am toying with putting it on my Scrambler and selling the 8274.View attachment 146517View attachment 146518
Glad you got it working!
Vonski
nothing to see here...
- Location
- Payson, Utah
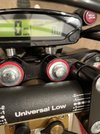
This is part “what did you work on today” and part PSA (I figure more will probably see it here than in the Moto/ATV/UTV forum). Anyway, I finally got around to replacing the digital display unit on my ‘19 Husky TE, after it got water trapped inside and went haywire. Even though this bike only has around 50 hours, it could easily have 500 by now, and I’m starting back at zero on hours/miles. 😳 Just something to think about if buying a used bike. Sure, many bikes don’t have displays at all. Just know that the ones with displays don’t necessarily reflect the bike’s full history.
Attachments
anderson750
I'm working on it Rose
- Location
- Price, Utah
As detailed as you are I am surprised you don’t keep a written log of your maintenance history. This is one thing I do and I send it with the new owner.
Vonski
nothing to see here...
- Location
- Payson, Utah
Yeah, I keep a log and all receipts/docs to pass along. I know at what point my display failed and take the miles/hours from that point into consideration. The point being that I could theoretically withhold this info from a potential buyer, and sell after putting just a small amount of miles/hours on the bike from this new starting point, and that should be a bit concerning. A $200 display could seriously increase the value of a used bike in the case of a fraudulent seller (assuming the bike was cared for cosmetically).As detailed as you are I am surprised you don’t keep a written log of your maintenance history. This is one thing I do and I send it with the new owner.
- Location
- Richfield, UT.
- Location
- Grand Junction, CO
Nice background on the computer... 
- Location
- Richfield, UT.
ID Bronco
Registered User
- Location
- Idaho Falls, ID
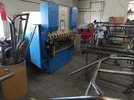
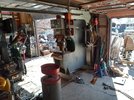
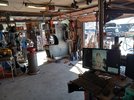
How do you power all those tools in that shop? What an awesome score
- Location
- Richfield, UT.
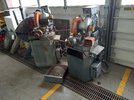
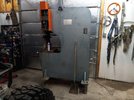
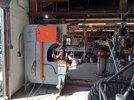
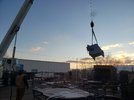
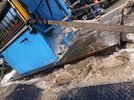
I have a big rotary phase converter in my shop running my mill, lathe, and belt sander. I put that amada where my Ironworker was wich conveniently has 3 phase already ran to the wall. We will prolly put a vfd on the cnc brake at the cage shop. We put a 250$ vfd on my Ironworker when I took it down there.How do you power all those tools in that shop? What an awesome score
Last edited:
- Location
- Richfield, UT.
🤫🤐Bigger question is where did you score the sweet deals?

