- Location
- The Village of Kay
You are using an out of date browser. It may not display this or other websites correctly.
You should upgrade or use an alternative browser.
You should upgrade or use an alternative browser.
General Tech What did you work on Today?
- Thread starter Gravy
- Start date
These are supposed to not leak, EVERYONE keeps questioning that so I'm going to try it without and IF they do I'd only use remflex. I don't think any other gasket would work on these anyway.I ran across a set of big block header gaskets in the toolbox yesterday. Yell if/when you need them?
Tonkaman
Well-Known Member
- Location
- West Jordan
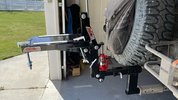
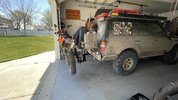
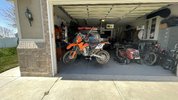
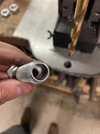
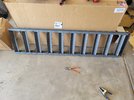
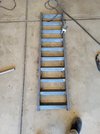
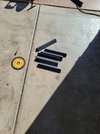
I’d keep the 10” if it’s working for you. It doesn’t take much for the bike to tag the ground while Offroad.Assembled a moto carrier I bought. I got the 10" drop for my tall cruiser and I likely only need the 6" drop. I'll call tomorrow and see if I can exchange the 10" for a 6".
I dig this carrier. Allows me to load the bike by myself very easily.
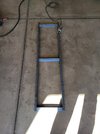
View attachment 147988
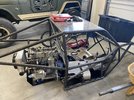
View attachment 147989
View attachment 147990
How is the flex with it weighted? I really like those haulers 👍
- Location
- The Village of Kay
The 10" gets really close to the ground. The 6" drop will get the bike higher off the ground. The first pic was only while I assembled the carrier and had the drop upside down.I’d keep the 10” if it’s working for you. It doesn’t take much for the bike to tag the ground while Offroad.
How is the flex with it weighted? I really like those haulers 👍
Tonkaman
Well-Known Member
- Location
- West Jordan
Oh yeah, duh! 🙄 definitely keep it as high as possibleThe 10" gets really close to the ground. The 6" drop will get the bike higher off the ground. The first pic was only while I assembled the carrier and had the drop upside down.
kmboren
Recovering XJ owner anonymous
- Location
- Southern Utah
- Location
- The Land Northward (Bountiful), Utah
Kevin, I built a set like that 10 years ago (with 1/4" square tube side even and I thought "man these are indestructible" then last year I rented a mini Ex and ruined the centers in 1 day LoL
kmboren
Recovering XJ owner anonymous
- Location
- Southern Utah
My old ones bent because of a tractor also. It will be the new owner of the trailer to bend them. It is C channel with angle iron. Just 3/16 but strong enough for most cars/jeeps just not tractors.Kevin, I built a set like that 10 years ago (with 1/4" square tube side even and I thought "man these are indestructible" then last year I rented a mini Ex and ruined the centers in 1 day LoL
- Location
- West Haven, UT
I've been absent for a while getting some work done in the shop on personal vehicles so I can get back to side jobs again. I've been so busy all winter I thought I had plenty of time and then BAM!!!! spring is here and I'm crunched for time on mine and my son's vehicles.
My son has been wanting to prep and paint his chassis under his 2002 2500HD LB7 for about a year or so now so we finally tackled that. Spent a few nights scuffing and wire brushing the rust off the chassis and getting it ready to accept the POR15.
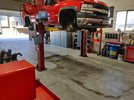
After backing it out of the shop, using the cleaner/degreaser and then pressure washing it before applying the Metal Prep and then washing it again and allowing to dry we pulled it back onto the lift and spread out some drop cloth to try and protect my shop floor at least a little bit.
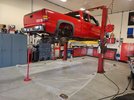
Frame ready for coating.
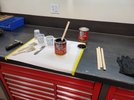
POR15 stirred and ready to start applying.
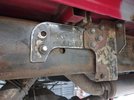
Area above the spare tire after removing the tire for application.
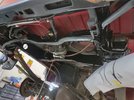
Chassis covered with 2 coats of POR15.
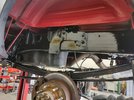
After the POR15 cured we scuffed and used sprayable bed liner to cover the underside of all of the wheelwells.
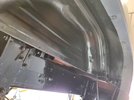
That looks much more gooder.
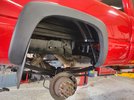
Glad I put the plastic sheeting down. I have a love/hate relationship with POR15. I love the way it works but I hate the time it takes to prep it and I hate getting it all over myself which takes weeks for it to come off.
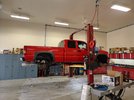
Summer tires/wheels installed and looks great for the nice weather.
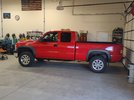
That covers the cosmetics of the chassis and next on to the meat and potatoes of what he wanted to get done on his truck.
My son has been wanting to prep and paint his chassis under his 2002 2500HD LB7 for about a year or so now so we finally tackled that. Spent a few nights scuffing and wire brushing the rust off the chassis and getting it ready to accept the POR15.

After backing it out of the shop, using the cleaner/degreaser and then pressure washing it before applying the Metal Prep and then washing it again and allowing to dry we pulled it back onto the lift and spread out some drop cloth to try and protect my shop floor at least a little bit.

Frame ready for coating.

POR15 stirred and ready to start applying.

Area above the spare tire after removing the tire for application.

Chassis covered with 2 coats of POR15.

After the POR15 cured we scuffed and used sprayable bed liner to cover the underside of all of the wheelwells.

That looks much more gooder.

Glad I put the plastic sheeting down. I have a love/hate relationship with POR15. I love the way it works but I hate the time it takes to prep it and I hate getting it all over myself which takes weeks for it to come off.

Summer tires/wheels installed and looks great for the nice weather.

That covers the cosmetics of the chassis and next on to the meat and potatoes of what he wanted to get done on his truck.
- Location
- West Haven, UT
My son has had a FASS fuel pump system sitting on the bench for several months now but wanted to get the chassis painted before installing the FASS system.
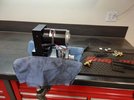
Pump/manifold assembly clamped in the vise to install fittings. I highly recommend clamping these in a vise when working on them to avoid damaging the pickup tube for the water separation system where the filter is installed.
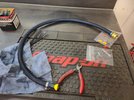
We chose to go one step further and apply some abrasion resistant coating to all of the fuel line that comes in the FASS kit. I must say the quality of the fuel line in their kits is fantastic. I've done a few of these installs now and have been quite impressed.
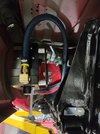
Wired up to the junction block for positive and engine block/bracket for negative.
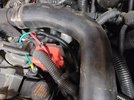
We didn't want to screw into the firewall to mount the relay and I despise having relays bouncing around unsecured under the hood so I knocked out a quick mounting bracket.
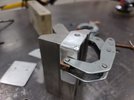
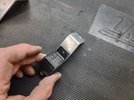
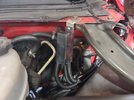
With 280k miles on his LB7 that should help prolong it a bit more, especially with new injectors and CP3 pump that we recently installed.
Thanks for looking.
Mike
Pump/manifold assembly clamped in the vise to install fittings. I highly recommend clamping these in a vise when working on them to avoid damaging the pickup tube for the water separation system where the filter is installed.

We chose to go one step further and apply some abrasion resistant coating to all of the fuel line that comes in the FASS kit. I must say the quality of the fuel line in their kits is fantastic. I've done a few of these installs now and have been quite impressed.


Wired up to the junction block for positive and engine block/bracket for negative.

We didn't want to screw into the firewall to mount the relay and I despise having relays bouncing around unsecured under the hood so I knocked out a quick mounting bracket.


With 280k miles on his LB7 that should help prolong it a bit more, especially with new injectors and CP3 pump that we recently installed.
Thanks for looking.
Mike
- Location
- West Haven, UT
While I was in the middle of my son's LB7 project, I let him hammer away at it and I worked on a quick project that came through the shop door for a local guy who asked me to do a small machining project for a Snap-on ratchet. I LOVE these small machining and/or welding jobs that come through the door and wish I could get more of these.
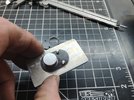
He wanted to convert a long handle 1/4" drive ratchet to a 3/8" drive but not just replace the head. In order to keep the smaller 1/4" head and use the 3/8" inner components the face plate needs to be opened up to accept the 3/8" drive.
The face plate is tapered ever so slightly so merely clamping it in the mill vise wouldn't provide me the support I needed so I opted to make a mounting fixture in which to screw the faceplate to and then clamp that in the vise and machine from there.
Here I'm measuring and formatting a plan.
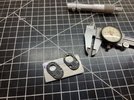
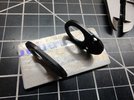
Taking measurements for targets.
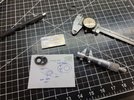
Faceplate mounted on fixture and ready to drill then bore the plate.
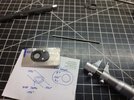
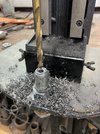
Locating the center, drilling and preparing to go to the boring head.
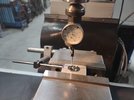
Boring out to the final size using my 2" Criterion boring head.
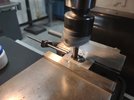
Face plate bored and the step machined for the quad-ring. Step needed to be .040" deep.
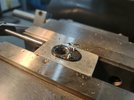
More measuring and once I got close enough using measuring tools, I then went to more accurate means and used gauge pins to sneak up on the final size.
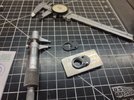
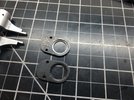
Old one in the foreground and the newly machined 1/4" to 3/8" face plate in the background.
Thanks for looking.
Mike
He wanted to convert a long handle 1/4" drive ratchet to a 3/8" drive but not just replace the head. In order to keep the smaller 1/4" head and use the 3/8" inner components the face plate needs to be opened up to accept the 3/8" drive.
The face plate is tapered ever so slightly so merely clamping it in the mill vise wouldn't provide me the support I needed so I opted to make a mounting fixture in which to screw the faceplate to and then clamp that in the vise and machine from there.
Here I'm measuring and formatting a plan.


Taking measurements for targets.

Faceplate mounted on fixture and ready to drill then bore the plate.

Locating the center, drilling and preparing to go to the boring head.

Boring out to the final size using my 2" Criterion boring head.

Face plate bored and the step machined for the quad-ring. Step needed to be .040" deep.

More measuring and once I got close enough using measuring tools, I then went to more accurate means and used gauge pins to sneak up on the final size.


Old one in the foreground and the newly machined 1/4" to 3/8" face plate in the background.

Thanks for looking.
Mike
- Location
- West Haven, UT
My attention then turned to our coach for a couple of items that I wanted to complete before the RV'ing season began this year.
I waffled on replacing my batteries last year as they were 7 years old but they still tested fine so I ran them through all of 2021 and being 8 years old at the end of 2021, I didn't think they go 9 years so I replaced them. While doing so I noticed that a few of the cables had corrosion starting to wick up the cable so I build new cables, coated the tray with corrosion protection and installed four new house batteries and two new chassis batteries. The house batteries were 8 years old and the chassis were 7 years old. I usually don't replace all in the same year to spread the expense out but these have lasted so well and not knowing if there would be availability issues this year I just decided to replace all of them and travel with peace of mind.
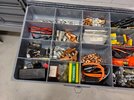
Dug through my collection of battery terminals and found the 4/0 by 5/16" lugs.
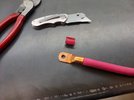
Cutting the insulation off just enough to allow full engagement of the battery lug.
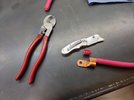
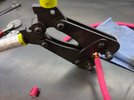
Crimping the lug on securely for a solid connection.
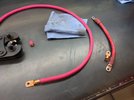
After duplicating the old cables by length I added the heat shrink.
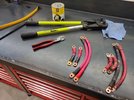
Coated the battery tray with NOCO battery corrosion protective spray which turns into a gel coating.
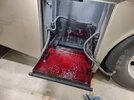
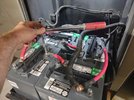
Installing the new battery cables in the correct orientation and torqueing to spec.
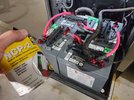
Battery terminals coated with NOCO gel. I prefer the brush on coating for terminals to avoid having overspray all over the batteries and compartment.
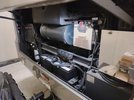
New chassis batteries installed as well.
Thanks for looking.
Mike
I waffled on replacing my batteries last year as they were 7 years old but they still tested fine so I ran them through all of 2021 and being 8 years old at the end of 2021, I didn't think they go 9 years so I replaced them. While doing so I noticed that a few of the cables had corrosion starting to wick up the cable so I build new cables, coated the tray with corrosion protection and installed four new house batteries and two new chassis batteries. The house batteries were 8 years old and the chassis were 7 years old. I usually don't replace all in the same year to spread the expense out but these have lasted so well and not knowing if there would be availability issues this year I just decided to replace all of them and travel with peace of mind.
Dug through my collection of battery terminals and found the 4/0 by 5/16" lugs.

Cutting the insulation off just enough to allow full engagement of the battery lug.


Crimping the lug on securely for a solid connection.


After duplicating the old cables by length I added the heat shrink.

Coated the battery tray with NOCO battery corrosion protective spray which turns into a gel coating.

Installing the new battery cables in the correct orientation and torqueing to spec.

Battery terminals coated with NOCO gel. I prefer the brush on coating for terminals to avoid having overspray all over the batteries and compartment.

New chassis batteries installed as well.

Thanks for looking.
Mike
- Location
- West Haven, UT
The last item on the coach for the pre-season list was to replace the original skylight over the shower.
There was nothing wrong with mine and it was still somewhat flexible/pliable even being 20 years old this year. There seems to have been a lot of people with cracked and/or broken sky lights in their coaches this past year based on threads on an RV forum that I visit so I figured I would be proactive so as to not ruin a vacation due to a broken skylight.
Mine was not leaking and was properly sealed from the factory but still, I figured there was a better way to mount the new skylight. I have never been a fan of putting screws through the plastic/lexan skylights and allowing all of those stresses and forces to be in such a narrow field. I thought if I could build a picture frame to go around the perimeter of the skylight and then sandwich the fiberglass roof material, inner clear bubble, outer smoked skylight and then the aluminum frame with butyl caulking between each layer it would be a much more uniform and even application of tension and should last another 20 years. Yes, I probably over-thought this and could have just replaced it in the same manner as the factory but I guess I tend to go a little overkill on things.
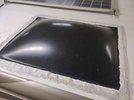
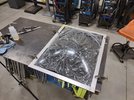
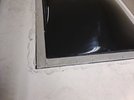
Here is the original before commencing the project. Other than being a bit chalked out, the skylight was still somewhat pliable and I probably could have gone another year or two. Monaco did a very good job of ensuring it wouldn't leak.
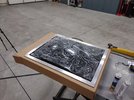
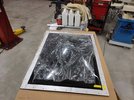
New smoked skylight and mocking up the aluminum frame to gather measurements.
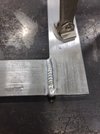
Once aluminum was cut, I beveled the edges and left about 1/16" land remaining for full penetration.
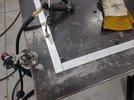
After the frame work was completed I clamped it to the new skylight in order to transfer the screw hole locations to the aluminum frame. This way I didn't need to weaken the new lexan skylight any more by drilling additional holes.
Test fitting one last time.
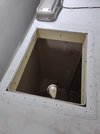
Original skylight removed, all old butyl putty and lap sealant removed. Prior to reassembly I wiped the entire perimeter down with mineral spirits.
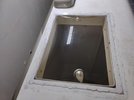
I applied a healthy bead of butyl caulking down around the perimeter and then installed the clear inner bubble. This is used for insulating purposes and creates a couple inches of dead air between the inner and outer bubbles.
I then applied a little thinner bead of butyl caulking, installed the smoked outer skylight, then another thin bead of butyl caulking and then the aluminum frame work and used #8 by 1-1/4" stainless steel tech screws which bit down good and solid to the original roof and sub-structure.
Finally I applied a dose of Dicor self-leveling lap sealant around the perimeter and the screw heads avoiding to get any on the lexan material.
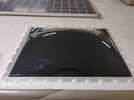
That pretty much concludes the skylight installation.
On a side note, all skylight manufacturers that I investigated when looking for my specific size had one thing in common. They all had caution or warning labels stating to NOT use Dicor self-leveling lap sealant on these skylights. I also saw quite a bit of mention of that on the RV forums that I frequent. The skylight manufacturers recommend using their butyl caulking or a product called SB-140 which is a butyl caulking that goes down pretty nice but definitely does not flow out like a self leveling lap sealant. I am not a chemist but I think it has something to do with the petroleum base of the Dicor and it attacking the lexan of the skylight.
Maybe that is why my original lasted 20 years is because Monaco used a much more dense skylight caulking to adhere the skylight and I only touched up a couple areas over the 15 years that we have owned the coach. When I touched up the areas I did in fact use Dicor, however, I kept it away from coming in contact with the lexan itself and just used the Dicor self-leveling lap sealant to cover cracks in the butyl caulking/putty.
It seems as though the ones I've seen fail online have one thing in common and that was they applied Dicor self-leveling lap sealant directly over the lexan skylight and along those seams is exactly where the skylight cracked and failed. So obviously there must be something to that and I wasn't going to take a gamble and chance it so I followed the warnings and only used the Dicor over the screw heads and outermost seam making sure to keep it far away from the lexan material.
Hope that information is helpful and thanks for looking.
Mike
There was nothing wrong with mine and it was still somewhat flexible/pliable even being 20 years old this year. There seems to have been a lot of people with cracked and/or broken sky lights in their coaches this past year based on threads on an RV forum that I visit so I figured I would be proactive so as to not ruin a vacation due to a broken skylight.
Mine was not leaking and was properly sealed from the factory but still, I figured there was a better way to mount the new skylight. I have never been a fan of putting screws through the plastic/lexan skylights and allowing all of those stresses and forces to be in such a narrow field. I thought if I could build a picture frame to go around the perimeter of the skylight and then sandwich the fiberglass roof material, inner clear bubble, outer smoked skylight and then the aluminum frame with butyl caulking between each layer it would be a much more uniform and even application of tension and should last another 20 years. Yes, I probably over-thought this and could have just replaced it in the same manner as the factory but I guess I tend to go a little overkill on things.
Here is the original before commencing the project. Other than being a bit chalked out, the skylight was still somewhat pliable and I probably could have gone another year or two. Monaco did a very good job of ensuring it wouldn't leak.

New smoked skylight and mocking up the aluminum frame to gather measurements.

Once aluminum was cut, I beveled the edges and left about 1/16" land remaining for full penetration.


After the frame work was completed I clamped it to the new skylight in order to transfer the screw hole locations to the aluminum frame. This way I didn't need to weaken the new lexan skylight any more by drilling additional holes.

Test fitting one last time.

Original skylight removed, all old butyl putty and lap sealant removed. Prior to reassembly I wiped the entire perimeter down with mineral spirits.

I applied a healthy bead of butyl caulking down around the perimeter and then installed the clear inner bubble. This is used for insulating purposes and creates a couple inches of dead air between the inner and outer bubbles.

I then applied a little thinner bead of butyl caulking, installed the smoked outer skylight, then another thin bead of butyl caulking and then the aluminum frame work and used #8 by 1-1/4" stainless steel tech screws which bit down good and solid to the original roof and sub-structure.

Finally I applied a dose of Dicor self-leveling lap sealant around the perimeter and the screw heads avoiding to get any on the lexan material.

That pretty much concludes the skylight installation.
On a side note, all skylight manufacturers that I investigated when looking for my specific size had one thing in common. They all had caution or warning labels stating to NOT use Dicor self-leveling lap sealant on these skylights. I also saw quite a bit of mention of that on the RV forums that I frequent. The skylight manufacturers recommend using their butyl caulking or a product called SB-140 which is a butyl caulking that goes down pretty nice but definitely does not flow out like a self leveling lap sealant. I am not a chemist but I think it has something to do with the petroleum base of the Dicor and it attacking the lexan of the skylight.
Maybe that is why my original lasted 20 years is because Monaco used a much more dense skylight caulking to adhere the skylight and I only touched up a couple areas over the 15 years that we have owned the coach. When I touched up the areas I did in fact use Dicor, however, I kept it away from coming in contact with the lexan itself and just used the Dicor self-leveling lap sealant to cover cracks in the butyl caulking/putty.
It seems as though the ones I've seen fail online have one thing in common and that was they applied Dicor self-leveling lap sealant directly over the lexan skylight and along those seams is exactly where the skylight cracked and failed. So obviously there must be something to that and I wasn't going to take a gamble and chance it so I followed the warnings and only used the Dicor over the screw heads and outermost seam making sure to keep it far away from the lexan material.
Hope that information is helpful and thanks for looking.
Mike
- Location
- The Land Northward (Bountiful), Utah
I replaced the over bathroom skylight on my 5th wheel last year as well. I omitted the screws as well because I believe that's what caused mine to crack from the factory. I chose an un-tinted frosted glass to keep the extra light in the WC. I did butyl caulking and installed it floating. Looks much better than factory. My main concern was to avoid water pooling around the edge since mine sits stationary most of the time as a whiskey tango cabin.
Wait, I’ve gotta see the first pics of the chassis on RME? We’re in a fight!
- Location
- Grantsville, Utah
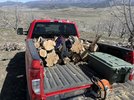
Cut up some trees for the next camping wheeling trip this weekend.
View attachment 148214
I used to save a lot of the wood that I would cut from tree jobs and then split it while we were out camping. And then one day I learned that I could buy a dump trailer full of already dried and split wood for $200. It’s been five years or so since my first purchase, and I am still pulling from the same pile, and life has been excellent!
- Location
- Grantsville, Utah
I'll let ya have a dump trailer load for free, but you gotta limb the logs. I'll load em with the tractor.I used to save a lot of the wood that I would cut from tree jobs and then split it while we were out camping. And then one day I learned that I could buy a dump trailer full of already dried and split wood for $200. It’s been five years or so since my first purchase, and I am still pulling from the same pile, and life has been excellent!

