General Tech What did you work on Today?

zmotorsports

Hardcore Gearhead
Vendor
Location
West Haven, UT
You blend well. It's an art form. I'm "meh" at best at it.


Glad to see you back on the board. Hope you continue to recover!

Thank you. It's definitely also a perishable skill and I haven't done much paint & body for the past 12-15 years so it was like starting over from scratch.

I appreciate the comments.

Mike
 

mbryson

.......a few dollars more
Supporting Member
Thank you. It's definitely also a perishable skill and I haven't done much paint & body for the past 12-15 years so it was like starting over from scratch.

I appreciate the comments.

Mike


I'm in the same boat with the "starting from scratch" thing. Painting this car has been interesting :D


I painted some wheels for my daughter with some single stage a few months back. Summit Racing single stage I bought for my truck tailgate. Glossed out well and look excellent for the quality of paint. Everything cool and I'm thinking it's not a perishable skill.

I am struggling a bit with the Omni 161 clear. :D I'll get it figured out
 

jeeper

I live my life 1 dumpster at a time
Location
So Jo, Ut
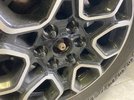
Back in February I stuck these f150 take offs on my wife's expedition. The rear axle pokes out far enough that the center cap can't fit on. It's bothered us, but I hadn't gotten around to it yet.

766B53FB-B4D8-40BC-8A88-28C717640D34.jpeg

Wife went to get her emissions done, and received a courtesy safety check. They told here the rear brakes were worn and should be replaced. I figured now was a good time to do the 'axle mod' as well.


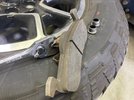
Here is the rear brake pad that needed to be replaced. Glad I got it replaced before we had trouble! Had I not already ordered new pads, I for sure would not have changed them.

DFC87F07-BD3E-4FDA-9096-D96BEE9BBCB1.jpeg


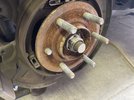
I had to knock out one stud to be able to get the band saw to fit in right, and a few seconds later, 'axle mod' complete.

4E280834-A207-4883-AF67-270D832DB79E.jpeg

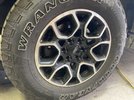
Repeat for side two, and now her wheels look like they should.

E3F37FF0-D9F7-4237-9F38-861C659C156C.jpeg
 

JeeperG

Well-Known Member
Location
Riverdale
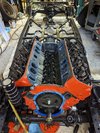
Still out tinkering, learnt something new today, you can't degree a cam with hydraulic lifters in, now on the hunt for someone with maybe a couple solid roller lifters laying around we can toss in and finish so I can get the correct push rods ordered.
PXL_20220704_192957884.jpg
 

J-mobzz

Well-Known Member
I have been watching motor rebuild videos on YouTube all day. I know motorcycle motors inside and out and would really like to build a V8. I am thinking I will rebuild tear into the 396 this winter and see what kind of condition it is in.
A decent cam, some good heads and add fuel injection and I doubt you’ll ever regret the money you put into it would be my bet.
 

1969honda

Well-Known Member
Supporting Member
Location
Cache
If you can't find solid rollers I know in the past I've read you can modify a normal hydraulic roller (at least for the LS family) to stay at its max length to get the same effect as a solid for checking cam degree and push rod length.
 

1969honda

Well-Known Member
Supporting Member
Location
Cache
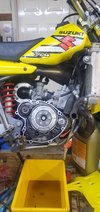
We got the cylinder and head back from Kustom Kraft after replating and boring to RM80 specs due to all the scaring. Put it all together with my 15 year old son only to have the kick start spring/ratchet jam on the third kick and find a no spark issue. 🤦‍♂️ 🤬

Guess I'll troubleshoot that one after the Tae Kwondo Nationals tournament he, my wife and 10 year old daughter have in Las Vegas this week that we leave for tomorrow morning.

16569993130307080556091029958057.jpg

It was really fun to put together with my boy though and have him excited to learn a little about wrenching. He keeps mentioning a v8 super beetle would be an epic high school car... so there is hope for some mechanical/fabrication interest moving forward!
 

zmotorsports

Hardcore Gearhead
Vendor
Location
West Haven, UT
I'm in the same boat with the "starting from scratch" thing. Painting this car has been interesting :D


I painted some wheels for my daughter with some single stage a few months back. Summit Racing single stage I bought for my truck tailgate. Glossed out well and look excellent for the quality of paint. Everything cool and I'm thinking it's not a perishable skill.

I am struggling a bit with the Omni 161 clear. :D I'll get it figured out

Mark, I've always been a PPG fanboy when it comes to paint and clears but 2 years ago when I was sticker shocked with a quart of clear for a touch up job, I remembered reading about SPI products (Southern Polyurethane Inc) and opted to give them a call. I spoke with Barry, the owner and found out he used to work for PPG and really felt comfortable with trying his products. I will say that their Universal Clear is what clear should be like. It reminded me of the of the PPG Concept clear of 30 years ago. It is a high solids clear that lays down beautifully as well as cuts and buffs excellent. The best thing is the high quality actually comes in at a reasonable price, much closer to lesser clears on the market. You might want to give it a try if/when you need more. I think you'll like it.


Hope you are doing better Mike. Missed your posts.

Glad to see you back Mike! Keep healing up!

This! I look forward to all of your posts.

Thanks guys. I'm not at a 100% yet but feeling much better and just happy to be able to get back to work and somewhat of a normal life. I appreciate all of the comments.

Mike
 

mbryson

.......a few dollars more
Supporting Member
Mark, I've always been a PPG fanboy when it comes to paint and clears but 2 years ago when I was sticker shocked with a quart of clear for a touch up job, I remembered reading about SPI products (Southern Polyurethane Inc) and opted to give them a call. I spoke with Barry, the owner and found out he used to work for PPG and really felt comfortable with trying his products. I will say that their Universal Clear is what clear should be like. It reminded me of the of the PPG Concept clear of 30 years ago. It is a high solids clear that lays down beautifully as well as cuts and buffs excellent. The best thing is the high quality actually comes in at a reasonable price, much closer to lesser clears on the market. You might want to give it a try if/when you need more. I think you'll like it.
...


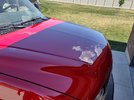
What are your thoughts on using a different clear with the PPG basecoat? I'm not sure I'm comfortable playing chemistry expert with my current level of knowledge. My thoughts are that I'll lay down what I have with the appropriate activator and "flash time" in 3 "normal" coats (for me). I'll likely keep spraying to 5 coats counting on cutting about 1-2 coats off with some 2000 grit then some 3000 grit and a buffer. I was just wanting to "leave" the clear as sprayed on this car but it's not working out that way. I just have to roll with the punches a bit.

If the 161 clear is a disaster, I'll evaluate from there. I'll have plenty of room to rub that clear off with some 400 and try some SPI (you're not the first to mention that brand) over the top. I'll likely want that to "flash" for quite a while (30-60 days) before loading another clear over what's on the car at that point.
 

zmotorsports

Hardcore Gearhead
Vendor
Location
West Haven, UT
What are your thoughts on using a different clear with the PPG basecoat? I'm not sure I'm comfortable playing chemistry expert with my current level of knowledge. My thoughts are that I'll lay down what I have with the appropriate activator and "flash time" in 3 "normal" coats (for me). I'll likely keep spraying to 5 coats counting on cutting about 1-2 coats off with some 2000 grit then some 3000 grit and a buffer. I was just wanting to "leave" the clear as sprayed on this car but it's not working out that way. I just have to roll with the punches a bit.

If the 161 clear is a disaster, I'll evaluate from there. I'll have plenty of room to rub that clear off with some 400 and try some SPI (you're not the first to mention that brand) over the top. I'll likely want that to "flash" for quite a while (30-60 days) before loading another clear over what's on the car at that point.

I used to feel the exact same way about mixing brands Marc. Nowadays, less nervous about it as I've been doing it for small spot jobs over the past 10+ years. My first experience was with House of Kolor bases and candy's then using PPG clear with great success.

Then I experimented on a few small jobs with Sherwin Williams, Martin Senour and Diamont bases and used PPG clears with excellent results. The Sherwin Williams base was on my son's LJ as the cost was much less than the same in PPG. The Diamont bases with PPG Clear was the biggest risk as it was on our 2003 Monaco Dynasty coach which had some clear peeling and I wanted to repaint the failing areas. Diamont was what Monaco used from the factory and was the only thing I could get mixed in the correct colors so I went with it. I initially tested it on the refrigerator cover then ended up using the Diamont base with PPG clear on the complete bedroom slide, eyebrow (area over the windshield) and the large section between the front and bedroom slides on the street (driver's) side. The result was amazing so I have little fear now of mixing brands as long as I stay with a urethane base.

One thing I have found is the most urethanes are now more comparable to PPG's DBC base rather than the older BDU bases. The DBU used an active reducer whereas the DBC and most other urethane bases I have used recently only require a reducer. After speaking with Barry @ SPI last year he recommended that if I wanted to really lock down the base well then mix about an ounce of activator from their clear into a quart of reduced base urethane (ready to spray) and it would basically turn it into a reactive reducer and help to avoid bleeds and mottling of the metallic bases. Hope all of that makes sense.

Over the years I have witnessed PPG using less and less solids in their clears resulting in my having to apply more coats in order to get the depth I was looking for and still have enough to cut & buff afterwards. In order to not run the first coat of the DC2021 clear I would apply a "fog coat" of clear initially over the base after a tack. Once the fog coat flashed for about 10 minutes I would follow by 2 full medium wet coats with 25-30 minutes flash time between coats using the 85-degree reducer. Then I would over-reduce the last coat of clear about another 10% with their 105-degree (very slow) reducer and this would allow the last coat to lay down like glass with nearly zero orange peel and a great depth.

For the past couple of years using SPI's Universal Clear I can say that it is definitely a high solids clear and does not need the previous mentioned steps. In fact with SPI's clear you do NOT want to put a fog coat down as the first coat. You want to put the first coat down as a medium wet coat and have it look like you want the final job to look. Then wait 30-minutes and do another. Two coats is all that is really needed and still provide plenty of mil thickness for a nice cut & buff job. A third coat can be applied if needed but I have not needed to use one yet and the results are amazing.

After curing I sand with 1500-grit then 2000-grit before going to compounding. On rare occasions or spots with a bit more trash or debris in them I may start with 1200-grit before going to 1500 and 2000 grits. On the open blend areas of the clear on my son's Duramax I just lightly hit them with some 2000-grit wet sandpaper before moving on to the three steps of polish and it resulted in a mirror finish without removing too much material or cutting back into the blend.

My procedure of cutting and buffing followed by a 3-step compounding/polishing process that I use has resulted in several best of paint awards, people's choice awards and best in class awards in many shows with cars that I've built.

I will post a few completed pictures of my son's Duramax in the next posts showing the results of not only the areas in which I painted, cleared and blended but also of the overall 20-year old OEM finish that we performed a full paint correction on over the weekend.

I hope that information is helpful.

Mike
 

zmotorsports

Hardcore Gearhead
Vendor
Location
West Haven, UT
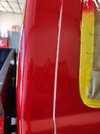
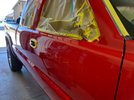
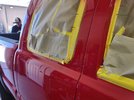
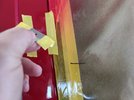
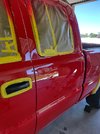
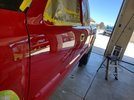
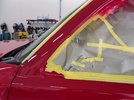
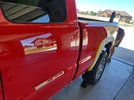
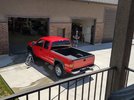
Here are some pictures of the final cutting and buffing and paint correction on my son's 2002 Duramax 2500HD that we've been working on.

After a small amount of sanding with 2000-grit wet sandpaper and then a first coat of compounding with a white wool pad followed by a second pass with milder polishing compound using a yellow pad. Make sure to wipe the panel down between steps to avoid cross contaminating compounds or you'll chase your tail trying to eliminate swirl marks or scratches.
gm1.jpg

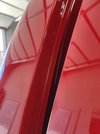
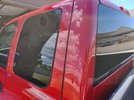
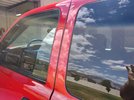
C-pillar after the same process as above lightly wet sanding and two of the three steps of compounding/polishing.
gm2.jpg

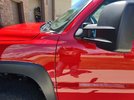
Same two-steps on the OEM finish. Really brings the depth out.
gm3.jpg

gm4.jpg

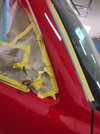
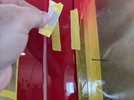
I had a small run or sag in the clear just in front of the driver's side rear quarter glass above the marks for the clear blend. A razor blade with masking tape removed most of the run without getting into the surrounding clear. The masking tape aids in keeping the razor blade from taking too much thus allowing the defect to stand ever so slightly proud and just enough to hit it with some 1200- grit paper, then 1500-grit and finally 2000-grit before moving to the compounding stage.
gm5.jpg

gm6.jpg

gm7.jpg

gm8.jpg

gm9.jpg

Here is the area where the run is and there is no sign of the defect nor the blended color or clear.
gm10.jpg


More pictures to follow.....
 

zmotorsports

Hardcore Gearhead
Vendor
Location
West Haven, UT
Unmasked and doorjambs wiped with a damp cloth to remove any compound splatter. The door gaskets and window gaskets are being reinstalled.

gm11.jpg

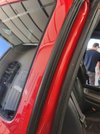
Open blend area on the driver's C-pillar.
gm12.jpg

There are no tape edges visible and the window gaskets are ready to be installed.
gm13.jpg

Window and door gaskets installed.
gm14.jpg

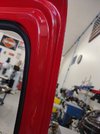
Doorjambs are just one of my pet peeves. Seeing overspray or rough edges in doorjambs drives me up a wall and one of the things I look closely at when I was going to car shows. This separates the men from the boys as far as I'm concerned when it comes to prep work and ensuring high quality workmanship. Absolutely NO evidence in this doorjamb of any paint work done. The soft edge is melted in resulting in an un-dectable paint correction.
gm15.jpg

Back side of the door is the same way, no indication of paint work visible.
gm16.jpg

gm17.jpg

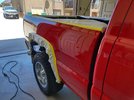
Starting the 3-step paint correction process on the bedside. I had my son mask the plastic fender flares and trim to avoid compound splatter getting in the pores of the plastic which result in more clean up work afterwards.
gm18.jpg

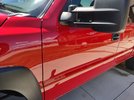
This is after the third and final polishing step using a fine machine glaze and a black foam polishing pad. IF the first two steps are done correctly and fully, this step should be quick and result in no evidence of swirl marks.
gm19.jpg

Unmasked and ready to back outside for a wash job.
gm30.jpg


Few more pictures to follow.....
 

zmotorsports

Hardcore Gearhead
Vendor
Location
West Haven, UT
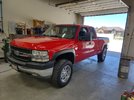
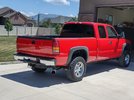
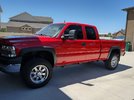
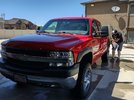
Last of the pictures of my son's LB7 Duramax, I promise.

Rolled outside and after a full wash job to remove any/all compound splatter and ready for the road.

gm31.jpg

gm32.jpg

gm33.jpg

gm34.jpg

gm35.jpg

gm36.jpg

gm37.jpg

gm38.jpg


gm39.jpg

gm40.jpg


Overall, I think it looks pretty good for a 20-year old truck with just shy of 300k miles on it and only needing some minor paint touch-up and polishing.

Thanks for looking.

Mike
 
Top