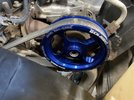
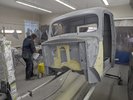
Without any sun or light it will look black, definitely got our work cut out on body work.With all the curves on that body this color is going to be different from every angle. I love it.
You are using an out of date browser. It may not display this or other websites correctly.
You should upgrade or use an alternative browser.
You should upgrade or use an alternative browser.
General Tech What did you work on Today?
- Thread starter Gravy
- Start date
May be more clear on the truck, this was more of a quick spray to check how much base we needIf it were me personally, I think I’d be going like 6 clear and a good finish buff. Either way it’s gonna be beautiful in the end.
Corban_White
Well-Known Member
- Location
- Payson, AZ
I like your welding cart!Buying a HF winch feels dirty, but perfect for the application. 🤔
Everything on a Diesel engine just takes longer, and more effort to repair. I forgot how different gas vs diesel really is.
The terminals on my cummins need to be replaced and I have put it off for a couple months. The cables are way thicker than a gasser, so they took a while to get through
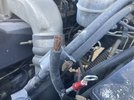
And of all the dumb things in the world, it gave me a blister on my finger to do just the first one. 🤦🏼♂️
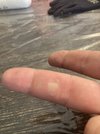
3 more to go, plus 2 new batteries later and maybe she’ll be up and going again.
The terminals on my cummins need to be replaced and I have put it off for a couple months. The cables are way thicker than a gasser, so they took a while to get through

And of all the dumb things in the world, it gave me a blister on my finger to do just the first one. 🤦🏼♂️

3 more to go, plus 2 new batteries later and maybe she’ll be up and going again.
ID Bronco
Registered User
- Location
- Idaho Falls, ID
Everything on a Diesel engine just takes longer, and more effort to repair. I forgot how different gas vs diesel really is.
The terminals on my cummins need to be replaced and I have put it off for a couple months. The cables are way thicker than a gasser, so they took a while to get through
View attachment 152012
And of all the dumb things in the world, it gave me a blister on my finger to do just the first one. 🤦🏼♂️
View attachment 152013
3 more to go, plus 2 new batteries later and maybe she’ll be up and going again.
First world problems, Thank goodness we have them.
ID Bronco
Registered User
- Location
- Idaho Falls, ID
Last night I replaced the cruise control buttons on our little Ranger pickup. It should be an easy job, so I dug into it just before dark. I got it all torn apart and the new part has much shorter wires between the two sides so it won't route the same way the oem one did. Awesome. I buttoned it all back up and connected the battery and the horn is honking continuously. I dig back into it, double check everything, put it back together and same result. After some flashlight maneuvering and some time reviewing everything I realize one of the wires got stripped and making contact to the metal in the steering wheel when I put the last two screws into the airbag. Some electrical tape and rerouting fixed the problem. It works great but this is another example of a quick job talking much longer than anticipated. One more thing off the list.
- Location
- The Land Northward (Bountiful), Utah
Upholster'D
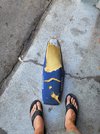
New foam on the parts that look like a dog chewed on it.
A little blend sanding.
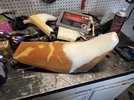
A little pneumatic stapler and blammo all done.
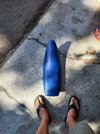
Also today I learned:
If you stuff a plastic bag into the intake snorkel to keep water out while pressure washing a motorcycle...
it won't start no matter how many times you clean the carburetor and disassemble it and reassemble it... Even a new spark plug won't help.... LOL
Cute little thing runs real good now!
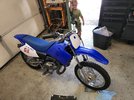

New foam on the parts that look like a dog chewed on it.
A little blend sanding.

A little pneumatic stapler and blammo all done.

Also today I learned:
If you stuff a plastic bag into the intake snorkel to keep water out while pressure washing a motorcycle...
it won't start no matter how many times you clean the carburetor and disassemble it and reassemble it... Even a new spark plug won't help.... LOL
Cute little thing runs real good now!

- Location
- Grantsville, Utah
- Location
- Payson, UT
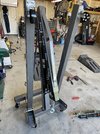
You're such a tease. Spill it.I picked up and assembled an engine hoist for Hobo Fraught. I usually use my little jib crane, but I'm about to embark in an engine pulling marathon.
View attachment 152033
20% off for the Labors of the Days!
- Location
- West Haven, UT
So the last couple of weeks I have been repairing a small rust spot on my son's WJ. This job as well as painting and doing a paint correction on his 2002 Duramax were supposed to have been done this past spring. However, with my health issue that I experienced earlier this year all of these projects, as well as others, got postponed.
Now that I am feeling better I have been busting my ass trying to get caught up.
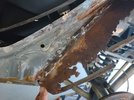
The small rust area that was on this dog leg when he purchased the Jeep 5+ years ago has gotten slightly larger. With the small trim panel removed it was obvious this was going to require a bit more attention than originally planned.
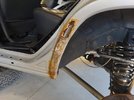
Luckily we were able to purchase a nice quality dog leg for the majority of the repair. This would save a lot of sheet metal fabrication work.
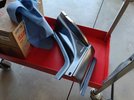
Spot welds drilled out and the the panel cut just short of the new one.
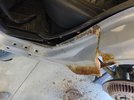
This is where it went to shit. I hadn't planned on the inner structure being so severely deteriorated. This piece can no longer be purchased as it was discontinued. So I drilled out the spot welds holding the panel to the substrate panel.
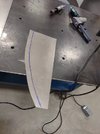
Next I cut a cardboard template roughly the shape I felt like we needed and transferred that to some 18-gauge P&O.
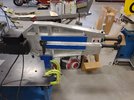
With the tipping dies on the bead roller I began tipping the outer edge.
After tipping to 90-degrees and a little shrinking the shape is coming around.
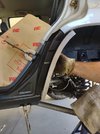
Fabricated an inner flange to weld on which will secure it the same way the OEM did.
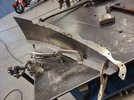
A lot of test fitting required then snuck up on the exact fitment.
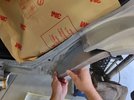
Newly formed panel in comparison to the severely rusted inner panel.
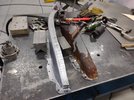
More to follow........
Now that I am feeling better I have been busting my ass trying to get caught up.
The small rust area that was on this dog leg when he purchased the Jeep 5+ years ago has gotten slightly larger. With the small trim panel removed it was obvious this was going to require a bit more attention than originally planned.

Luckily we were able to purchase a nice quality dog leg for the majority of the repair. This would save a lot of sheet metal fabrication work.

Spot welds drilled out and the the panel cut just short of the new one.

This is where it went to shit. I hadn't planned on the inner structure being so severely deteriorated. This piece can no longer be purchased as it was discontinued. So I drilled out the spot welds holding the panel to the substrate panel.

Next I cut a cardboard template roughly the shape I felt like we needed and transferred that to some 18-gauge P&O.

With the tipping dies on the bead roller I began tipping the outer edge.

After tipping to 90-degrees and a little shrinking the shape is coming around.

Fabricated an inner flange to weld on which will secure it the same way the OEM did.

A lot of test fitting required then snuck up on the exact fitment.

Newly formed panel in comparison to the severely rusted inner panel.

More to follow........
- Location
- West Haven, UT
Continuing on the with the rust repair.
In order to prevent this from happening again, I mixed up some SPI Epoxy Primer to coat the inside of the panels with.
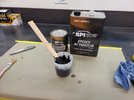
Any bare steel received a good coating of epoxy primer.
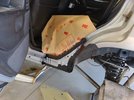
After curing, the new inner panel was clamped in place, the small areas for the spot (plug) welds would be were cleaned out with a flattened drill bit.
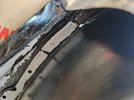
And the plug welds were welded with a blast of compressed air to aid in preventing the epoxy primer on the backside from burning off.
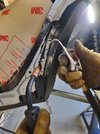
Another coat of SPI Epoxy Primer brushed on after the inner panel is completed.
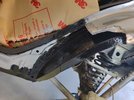
After the epoxy primer has cured some urethane seam sealer was applied to keep any moisture out of the welded pinch seam.
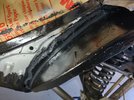
At this point we can actually move on to what we thought the job was only going to require, prepping and welding the outer dog leg onto the Jeep.
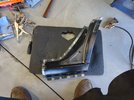
Outer skin of the dog leg welded in the same fashion to prevent the epoxy primer from burning off.
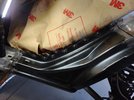
Welds dressed and blended.
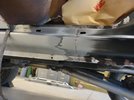
After finishing up the driver's side I figured I would inspect a small rust spot on the passenger's side rocker panel that I noticed the last time it was on the lift for service. Sure enough with a smoke poke from a pick it also requires some attention. Marked back to good steel and a new patch panel fabricated by rolling over a large pipe to create the radius and a trip to the pan brake for the flange.
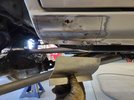
More pictures to follow....
In order to prevent this from happening again, I mixed up some SPI Epoxy Primer to coat the inside of the panels with.

Any bare steel received a good coating of epoxy primer.

After curing, the new inner panel was clamped in place, the small areas for the spot (plug) welds would be were cleaned out with a flattened drill bit.

And the plug welds were welded with a blast of compressed air to aid in preventing the epoxy primer on the backside from burning off.

Another coat of SPI Epoxy Primer brushed on after the inner panel is completed.

After the epoxy primer has cured some urethane seam sealer was applied to keep any moisture out of the welded pinch seam.

At this point we can actually move on to what we thought the job was only going to require, prepping and welding the outer dog leg onto the Jeep.

Outer skin of the dog leg welded in the same fashion to prevent the epoxy primer from burning off.

Welds dressed and blended.

After finishing up the driver's side I figured I would inspect a small rust spot on the passenger's side rocker panel that I noticed the last time it was on the lift for service. Sure enough with a smoke poke from a pick it also requires some attention. Marked back to good steel and a new patch panel fabricated by rolling over a large pipe to create the radius and a trip to the pan brake for the flange.

More pictures to follow....
- Location
- West Haven, UT
Continuing on......
The rocker panel cut and now sneaking up on the fitment of the new patch panel.
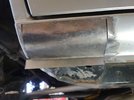
After I was happy with the fitment I coated the back side of the patch panel as well as the inner structure with epoxy primer. Then fit the panel into place after a night or two of curing for the welding process. A nice tight fitment is necessary to avoid blowing holes in the thin sheet metal.
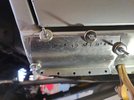
The process I use is to turn the welder up a bit on the hot side to ensure full penetration. This is key as most people I see turn their welders down to avoid burning through however, it results in an improperly welded joint that once the weld is ground down has very little fusion. I hit the areas fast with enough wire speed to fully penetrate leaving a small but deep tack weld. I then use a 1/16" cut off disc on a die grinder turned on its side to know the tack weld down so that it is barely standing proud of the parent material. Do NOT go right to town grinding in a traditional manner or you will thin the sheet metal down on either side of the weld to the point that it may burn through.
Once the tack weld has had the top knocked off, this is now the beginning point for the next tack weld. By having this properly fused tack weld as a base for the next it is easier to progress around the panel without blowing holes in it. By hitting the previous tack weld directly in the middle the current required to melt the wire is actually divided amongst the two panels. IF you try to aim towards one panel or the other the current is enough that it will burn back the edge resulting in a big nasty hole. I like to put a tack weld about every inch or so, then grind the tops of each tack weld down, then go around adding another tack weld to each of the previous one, know them down and continue this process until the entire perimeter of the patch panel is welded in place. Then I will use a 2" or 3" Roloc disc to fully blend the tack welds to the parent material. At that point I will hit the area with some 80-grit sandpaper on a DA and prep for any small amount of body work and primer that will be required. I can attest by using this method and ensuring the fitment is very good will result in very, very little filler (if any) and then it's ready for primer.
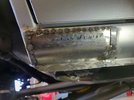
Completely blended after 80-grit and a DA. Now it is ready for a coat of SPI Epoxy Primer and a skim coat of filler.
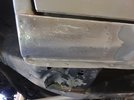
Filler applied and sanded with 80-grit, 120-grit and finally 220-grit before another coat of epoxy primer to cover the bare metal and body work followed by some SPI 2k Primer.
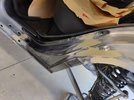
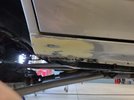
Making sure the door gap is perfect before continuing.
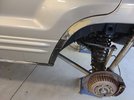
Back masked to create a soft edge for the primer surfacer.
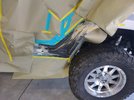
After a coat of epoxy primer and 2k primer.
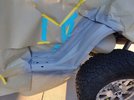
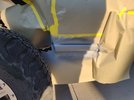
More pictures to follow......
The rocker panel cut and now sneaking up on the fitment of the new patch panel.

After I was happy with the fitment I coated the back side of the patch panel as well as the inner structure with epoxy primer. Then fit the panel into place after a night or two of curing for the welding process. A nice tight fitment is necessary to avoid blowing holes in the thin sheet metal.

The process I use is to turn the welder up a bit on the hot side to ensure full penetration. This is key as most people I see turn their welders down to avoid burning through however, it results in an improperly welded joint that once the weld is ground down has very little fusion. I hit the areas fast with enough wire speed to fully penetrate leaving a small but deep tack weld. I then use a 1/16" cut off disc on a die grinder turned on its side to know the tack weld down so that it is barely standing proud of the parent material. Do NOT go right to town grinding in a traditional manner or you will thin the sheet metal down on either side of the weld to the point that it may burn through.
Once the tack weld has had the top knocked off, this is now the beginning point for the next tack weld. By having this properly fused tack weld as a base for the next it is easier to progress around the panel without blowing holes in it. By hitting the previous tack weld directly in the middle the current required to melt the wire is actually divided amongst the two panels. IF you try to aim towards one panel or the other the current is enough that it will burn back the edge resulting in a big nasty hole. I like to put a tack weld about every inch or so, then grind the tops of each tack weld down, then go around adding another tack weld to each of the previous one, know them down and continue this process until the entire perimeter of the patch panel is welded in place. Then I will use a 2" or 3" Roloc disc to fully blend the tack welds to the parent material. At that point I will hit the area with some 80-grit sandpaper on a DA and prep for any small amount of body work and primer that will be required. I can attest by using this method and ensuring the fitment is very good will result in very, very little filler (if any) and then it's ready for primer.

Completely blended after 80-grit and a DA. Now it is ready for a coat of SPI Epoxy Primer and a skim coat of filler.

Filler applied and sanded with 80-grit, 120-grit and finally 220-grit before another coat of epoxy primer to cover the bare metal and body work followed by some SPI 2k Primer.


Making sure the door gap is perfect before continuing.

Back masked to create a soft edge for the primer surfacer.

After a coat of epoxy primer and 2k primer.


More pictures to follow......
- Location
- West Haven, UT
Continuing on with the repair.
Primer block sanded with 220-grit then 320-grit before adding a couple coats of white epoxy primer in which was sanded using 500-grit wet sandpaper after curing overnight. I had a couple of small areas where I sanded through to metal that required a little touch up of primer before continuing. It was then wet sanded and prepped for sealer and paint.
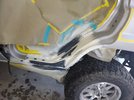
Passenger's side rocker prepped as well.
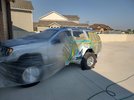
Jeep bagged and pushed outside the shop for paint and clear as I refuse to spray anything in my shop. We had planned on painting and clearing on Saturday but the winds were a bit stronger than I like so we waited until yesterday morning which was perfect weather.
My son was putting the finishing touches on the masking and bagging the tires/wheels while I mixed up the PPG DBC base coat as well as a clear base to use as a wet bed and blend.
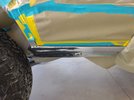
At this point the sealer had been applied, allowed to flash for about an hour, then a clear base was applied to serve as a wet bed for the heavy metallic silver paint. This is after the first three coats of base that covered very well. I did a lot of back masking to create the soft edges necessary for an open clear blend. For the last coat of base I mixed the silver base 50/50 with the clear base to produce a very transparent base for creating a nice blend. The color was blended about an inch from the rounded corner of the door jamb.
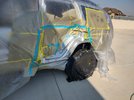
Here is the finished job after the clear coat was applied and the blending solvent applied for the open clear blend. The clear was blended up near the middle of the strike plate holes in the jamb and about an inch from the rolled back masking paper on the wheel arch where the blending solvent was then applied to melt the new clear into the OEM clear. This can be touchy but even this 19-year old clear blended perfectly.
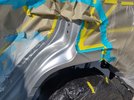
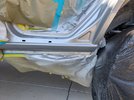
Same process used on the passenger's side rocker panel. The clear was stopped about an inch from the paper and the blending solvent was applied to complete a seamless open clear blend.
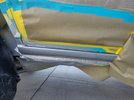
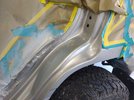
This will require very, very little polishing in the door jamb and on the wheel arch to achieve a seamless blend.
Thanks for looking.
Mike
Primer block sanded with 220-grit then 320-grit before adding a couple coats of white epoxy primer in which was sanded using 500-grit wet sandpaper after curing overnight. I had a couple of small areas where I sanded through to metal that required a little touch up of primer before continuing. It was then wet sanded and prepped for sealer and paint.

Passenger's side rocker prepped as well.

Jeep bagged and pushed outside the shop for paint and clear as I refuse to spray anything in my shop. We had planned on painting and clearing on Saturday but the winds were a bit stronger than I like so we waited until yesterday morning which was perfect weather.
My son was putting the finishing touches on the masking and bagging the tires/wheels while I mixed up the PPG DBC base coat as well as a clear base to use as a wet bed and blend.

At this point the sealer had been applied, allowed to flash for about an hour, then a clear base was applied to serve as a wet bed for the heavy metallic silver paint. This is after the first three coats of base that covered very well. I did a lot of back masking to create the soft edges necessary for an open clear blend. For the last coat of base I mixed the silver base 50/50 with the clear base to produce a very transparent base for creating a nice blend. The color was blended about an inch from the rounded corner of the door jamb.

Here is the finished job after the clear coat was applied and the blending solvent applied for the open clear blend. The clear was blended up near the middle of the strike plate holes in the jamb and about an inch from the rolled back masking paper on the wheel arch where the blending solvent was then applied to melt the new clear into the OEM clear. This can be touchy but even this 19-year old clear blended perfectly.


Same process used on the passenger's side rocker panel. The clear was stopped about an inch from the paper and the blending solvent was applied to complete a seamless open clear blend.


This will require very, very little polishing in the door jamb and on the wheel arch to achieve a seamless blend.
Thanks for looking.
Mike
- Location
- West Haven, UT
Finished up my son's WJ last night by hitting the blend areas with just a couple swipes of 2000-grit wet sandpaper then breathed over the areas with my mini-polisher and a couple of compounds.
I am pretty pleased with the results and the whole job turned out seamless. My DIL stopped by while we were putting the door and trim back on last night and she said "you can't even tell where the rust was or where you painted". I told her I thought that was the highest compliment as that is what we were going for.
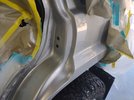
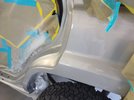
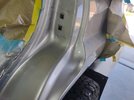
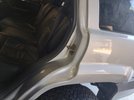
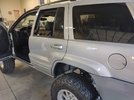
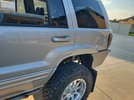
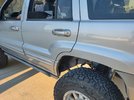
With his Duramax all touched up and paint correction complete from about a month ago and now with his Jeep looking good I hope that is the last of my paint and body work for a while. It is not my favorite thing to do these days.
Thanks for looking.
Mike
I am pretty pleased with the results and the whole job turned out seamless. My DIL stopped by while we were putting the door and trim back on last night and she said "you can't even tell where the rust was or where you painted". I told her I thought that was the highest compliment as that is what we were going for.


With his Duramax all touched up and paint correction complete from about a month ago and now with his Jeep looking good I hope that is the last of my paint and body work for a while. It is not my favorite thing to do these days.
Thanks for looking.
Mike
rholbrook
Well-Known Member
- Location
- Kaysville, Ut
Mike, is there anything you don't excel at? Seriously love your threads
- Location
- West Haven, UT
Mike, is there anything you don't excel at? Seriously love your threads
Thanks Russ.
YES! There are plenty of things I suck at, trust me. However, I'm not going to post them.
Basically, I am a mechanic, plain and simple and that's the only thing I am good at so I capitalize on that and have used it to my advantage to make a living.
I appreciate the comment and happy you find my threads or posts informative. I hope others learn from my posts as much as I continue to learn from other members here.
Mike
glockman
I hate Jeep trucks
- Location
- Pleasant Grove
I have used your "back masking" technique a couple times painting stuff since you posted it on your lawn mower repair. Thanks for sharing stuff like this.Thanks Russ.
YES! There are plenty of things I suck at, trust me. However, I'm not going to post them.
Basically, I am a mechanic, plain and simple and that's the only thing I am good at so I capitalize on that and have used it to my advantage to make a living.
I appreciate the comment and happy you find my threads or posts informative. I hope others learn from my posts as much as I continue to learn from other members here.
Mike
- Location
- Bountiful, land of rocks
Hell of a blend on the silver... those can be tough. Looks to match the door pretty well?

