General Tech What did you work on Today?

rholbrook

Well-Known Member
Location
Kaysville, Ut
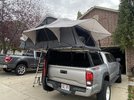
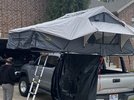
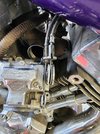
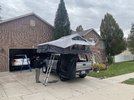
Early Christmas for the boys. Harrison is headed to Moab Thursday and figured Christmas would be earlier than planned. I’ve had it for a bit but have been waiting for Christmas, what the hell. A little early won’t hurt. Expedition One rack and 3-4 person SmittyBilt Gen 2 tent. It’s a little big for his shortbed Tacoma but I like that it’s big bed. Wish I didn’t toss the lift system I had for my Jeep hardtop. Anyone have one they are looking to get rid of?
2A14D9B4-A586-4DEB-9464-5C7361CD4263.jpegAA5FBC49-71D1-49B2-8922-0A003D2759BE.jpegC30347C0-8562-49EA-89DE-970F53FD6764.jpeg
 

zmotorsports

Hardcore Gearhead
Vendor
Location
West Haven, UT
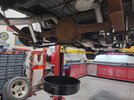
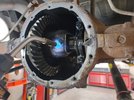
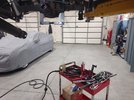
Saturday I was able to get some shop time in to break down the rear end of an '85 C10 for James, fellow forum member.

Pretty cool old truck and well built. I'm sure it's a blast to drive.

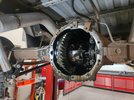
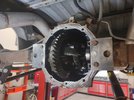
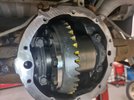
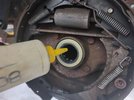
Ready to pop the diff cover off and drain the fluid.
gm1.jpg

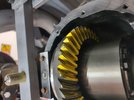
WOW! I think that gear oil was the original fill as it was nasty smelling.
gm2.jpg

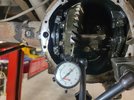
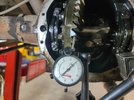
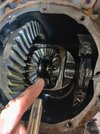
Some basic checks just to see how well it's held together as I'm sure it hasn't had an easy life.
gm3.jpg

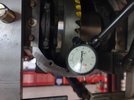
Backlash was a bit fat @ .0105".
gm4.jpg

The center pin bolt required a little persuasion in order to come out.
gm5.jpg

With the center pin removed, the axle shafts can be pushed inward, the C-clips removed and the axle shafts removed.
gm6.jpg

At this point I checked the combined preload (CPL) with the carrier still in place but axle shafts removed and got 10 in/lbs.
gm7.jpg

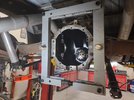
Case spreader installed and axle housing opened approx. .020" to remove the carrier. Pinion preload (PPL) was then checked and found it was around 4 in/lbs. A bit low but that is not unexpected for a 38 year axle that I am sure hasn't had an easy life. It also tells me that carrier is shimmed appropriately in order to have the proper amount of carrier preload being around 6 in/lbs. I generally like to see around 5-7 in/lbs. additional from the PPL, so this tells me the correct overall shim package is in place and should provide a very close starting point when going back together.
gm8.jpg

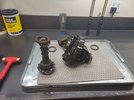
OG parts removed and sitting on the bench.
gm9.jpg


Thanks for looking.

Mike
 

zmotorsports

Hardcore Gearhead
Vendor
Location
West Haven, UT
A little more work on the C10 last night. Got home later than planned so not much accomplished.

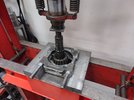
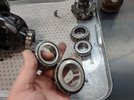
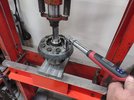
Started by pressing off the inner pinion bearing to determine the OG shim thickness.
diff1.jpg

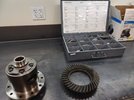
Grabbed the shim assortment and put the drawer on my workbench within easy reach. Funny how many shims I've collected just over the past few years of building axles. Back when I was racing in the late 80's into late 90's I built more axles than I do now but I had shims in boxes and not nearly as many as I do now. When I built my new shop just over 5 years ago now and was emptying boxes from my old shop I wanted to organize these to make them more readily available but now I'm almost out of space in the drawer. Guess I need to expand to another drawer.:thinking:
diff2.jpg

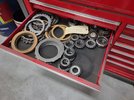
Similar situation with the setup bearings. I had them in a cardboard box for decades but as I was putting them away after the last axle the box started coming apart, despite the half roll of duct tape trying to hold it together. :D I opted to have the setup bearings share the drawer with left over transmission clutches/steels but I continue to add to my selection of setup bearings as well. It is nice to locate the correct setup bearings quickly and efficiently though.
diff3.jpg

Setup bearings matched and at the ready.
diff4.jpg

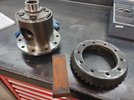
Before mating the new ring gear with the carrier I stone the mating surfaces to ensure there are no burrs or foreign material obstructing their proper fitment.
diff5.jpg

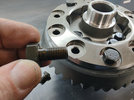
It's been a while since I built a GM 10-bolt and I had forgotten these use left handed ring gear bolts.
diff6.jpg

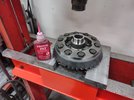
Ring gear installed and bolts treated with red Loctite before threading into place.
diff7.jpg

Carrier locked in place in the press and torqueing to spec @ 65 ft/lbs.
diff8.jpg


Thanks for looking.

Mike
 

zmotorsports

Hardcore Gearhead
Vendor
Location
West Haven, UT
Worked on James' C10 last night. This week hasn't exactly gone as planned so shop time has been less than expected but made good progress last night.

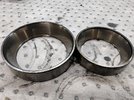
After driving the pinion races out you can see they were in need or being replaced. Not trashed by any means but they are at the end of their life as they are beginning to show signs of pitting, which is the beginning of the end.
gm1.jpg

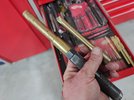
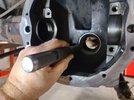
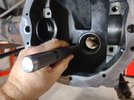
To drive the new races in I don't like to use steel drivers. I prefer to use bronze and this seems to be my "go-to" driver for the inner race where you have to reach into the case further and do so without catching your hand between the housing and the hammer. This one is an old MAC driver that came with a couple of attachments. The attachments are tapered and you can see the flat on the base of the handle then a nut. The nut presses the tapered attachment off when turned which makes swapping these attachments around easy when needed. I bought this one about 30 years ago and it has been a great drift, especially for driving in new bearing races.
gm2.jpg

The long reach is very nice to keep hands outside of the actual housing while striking with the hammer. Very easy to hold and align without having to reach clear inside as you would with a shorter drift.
gm3.jpg

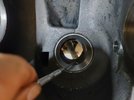
To ensure the races are fully seated I like to use a pick to "feel" around the backside to make sure there is no gap between the race and the bore.
gm4.jpg

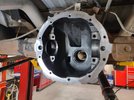
Pinion races installed,cover surface is cleaned and the entire housing is cleaned with brake wash and ready to move on with outer axle bearings and seals then setup.
gm5.jpg

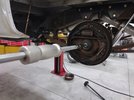
After the seals are removed a slide hammer is used to remove the outer axle bearings.
gm6.jpg

New bearing being driven in. Make sure to drive on the outer diameter of the bearing to avoid damaging your new bearing.
gm7.jpg

After bearing is fully seated the seal can be installed.
gm8.jpg

Axle bearings and seals installed.
gm9.jpg

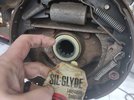
At this point the axle housing is completed and ready to start mocking up to get the correct pinion depth and backlash. Once all final shim stacks are determined and as it is going back together before I install the axle shafts I like to apply some gear oil to the bearing and turn it by hand to ensure there is adequate lubrication for the initial drive. Nothing worse than burning up a new bearing on the road test. I also will apply a light film of Sil-Glyde to the seal just as the axle is being installed.

I didn't get any pictures of the pinion setup, because I forgot. But this particular ring & pinion has the pinion depth engraved in the end so it made pinion setup a no brainer and easy. Only took me a couple of times to have the pinion depth spot on based on the axle centerline and a few measurements & calculations.

Next I can move on to setting up the carrier placement.

Thanks for looking.

Mike
 

zmotorsports

Hardcore Gearhead
Vendor
Location
West Haven, UT
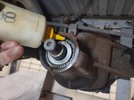
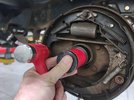
Also, worth noting, notice in this picture that the end of the drift is chamfered, no mushrooms here.
gm3.jpg


Please do yourselves a favor and try to keep those mushrooms in the yard where they belong, NOT on your punches or drifts. This is one of my pet peeves (yeah, I know, I have a lot of those) but this one will save you some pain and suffering. At the very beginning of my career I failed to do so because I never knew it was important. Growing up on the farm all of my dad's tools were beat to hell because they were beat on and abused so a mushroom head on a punch was no big deal.

Each morning I see the scar on the end of my nose where a piece of a punch smacked me in the in the beak. After pulling the sliver out of my nose I bled like a stuck pig and since then I don't own a single object that has any burrs or mushrooms on them. I went on a grinding rampage and addressed ALL of my punches, drifts and chisels to remove any and all burrs and I keep them that way. When one begins to form I walk to the disc sander and knock it off before it ever has a chance to grow. Please keep all your hammers, punches, chisels, drifts and anything that you strike with force free from those nasty projectiles.

You'll thank me one day......
 

zmotorsports

Hardcore Gearhead
Vendor
Location
West Haven, UT
These next few posts will be rather picture heavy, I hope you're ok with that.....


More work on the C10 on Saturday and it's nearly complete.

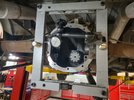
Case spreader installed on the housing and spreading.
gm1.jpg

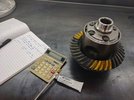
I apply some GM Gear Marking compound to 2-3 locations around the ring gear. Taking a gear reading in more than one place ensures there are no runout issues. As for gear marking compound, I have tried several over the years and I much prefer the GM version. I feel it applies more smoothly and evenly and is easier to get a nice imprint on when rotating the assembly which greatly aids in getting a good visual of the pattern impression.
gm2.jpg

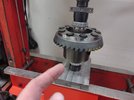
Pressing the carrier side gears in place. It is absolutely imperative that you select drivers that fit solidly on the Inside Diameter of the bearings and allow the cage and rollers to spin freely while pressing. Anything that comes in contact with the outer cage or rollers will damage the bearing in short order. This goes for the bearing on the opposite side as well, not just the one that you are pressing on. As I am pressing bearings I will use my finger to spin both bearings repeatedly while pressing to ensure there are no issues. A slightly damaged bearing here will definitely end up in a shortened life once it is put in service so don't chance it.
gm3.jpg

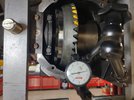
On the first attempt it was a bit tight at only about .004" backlash. I moved the carrier a few thousands to the left and landed on .008" with the case spreader tension released.
gm4.jpg

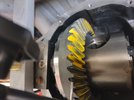
Excellent looking gear mesh pattern. When doing setups focus initially on pinion depth, pinion depth and then pinion depth before ever finalizing the backlash and it will live a long happy life. Did I mention focus on pinion depth????
gm5.jpg

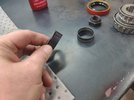
I was impressed with this particular kit as it came with BOTH a crush sleeve as well as a solid collar/shims (crush sleeve eliminator kit). Most kits will come with a new crush sleeve and you have to purchase the crush sleeve eliminator separately, and that is IF a crush sleeve eliminator is even available as they are not offered for all axles. I much prefer a solid spacer (crush sleeve eliminator) setup.
gm6.jpg

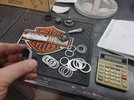
They require a bit more effort to get set up correctly as it usually involves multiple times in/out to get the proper preload but well worth it. I couldn't land exactly where I wanted with the shims supplied so I had to dig into my assortment of shims.
gm7.jpg

With the mockup complete it was time to move on to final assembly of the pinion. The inner bearing installed on the pinion and oiled, next was heat up the outer pinion bearing for an easy installation without having to beat it into place with a hammer.
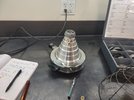
gm8.jpg

While the outer bearing is heating up I oiled the inner pinion bearing to ensure it won't start dry. Also preload reading should be taken with lubed bearings. Here you can also see the solid spacer and shims installed on the pinion and ready for installation.
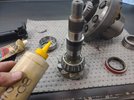
gm9.jpg

I prepped the pinion seal with a bit of GM ES (Engine Sealant) applied to the OD and some Sil-Glyde to the inner seal and
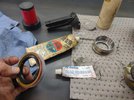
gm10.jpg


More pics to follow in next post......
 

zmotorsports

Hardcore Gearhead
Vendor
Location
West Haven, UT
Continuing on with the final assembly of the C10 rear end.

At this point you have to work quickly upon final assembly of the pinion. Have all tools within easy reach, have the seal prepped and ready as well as some oil.
gm11.jpg

With the outer pinion bearing at the correct temperature (~250*) to ensure just enough expansion for easy install, install the pinion assembly from the back side with the inner bearing pressed on and the shim stack for the preload in place. If you are using a crush sleeve this is also the time to ensure it is in place. Then place the heated out bearing into place and push onto the pinion as far as you can with a pair of pliers. Once in place it will generally start to shrink as the pinion acts as a heat sink and sucks the heat from the bearing and thus it starts to cool and shrink. I also apply some gear oil to the bearing to assist in shrinking into place and to ensure it doesn't have a dry start. This one is most critical as it is above the oil level when completed and generally takes a few revolutions of the axle assembly to start slinging oil up to the outer pinion bearing.
gm12.jpg

Then the seal is installed, the yoke installed and torqued in place. I generally start around 125-130 ft/lbs. on a new pinion nut and then take a pinion preload reading. For new bearings I shoot for around 15-20 in/lbs. of rotating torque to measure for PPL (Pinion Pre-Load). Make sure you are measuring actual rotating torque and not break-away torque.

NOW, contrary to what people will say on the internet, you can alter the PPL slightly by increasing the torque to the pinion nut. This is why I do so many mockups to get the shim stack correct before final assembly. On this particular setup dry rotating torque was around 22 in/lbs but I knew it would be slightly less on final assembly with the bearings lubed. At 130 ft/lbs I ended up with about 12 in/lbs. of rotating torque, which was not quite enough. I increased to 140 ft/lbs. and then finally to 150 ft/lbs. where I landed exactly @ 15 in/lbs. of rotating torque, perfect.
gm13.jpg

Beautiful looking pattern.
gm14.jpg

With the case spreader tension backed off I landed right @ .008" backlash (B/L). The specs called for .006"-.011". I was shooting for the lower side around .006"-.008".
gm15.jpg

All final measurement noted in my notes as well as engraved on the ring gear.
gm16.jpg

Next I applied some Sil-Glyde to the outer axle seals.
gm17.jpg

And some gear oil to the outer axle bearings before sliding the axle shafts into place.
gm18.jpg

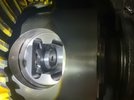
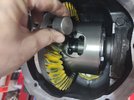
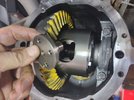
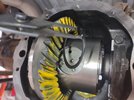
With the axle shafts slid all the way in, the C-clips can be installed and then pushed back outward slightly until they fully engage in the grooves in the side gears of the carrier. This particular carrier is an Eaton Truetrac, which is a LSD (Limited Slip Differential).
gm19.jpg

A solid plug is installed to keep the axle shafts spaced outward. This takes the place of the center pin of an open carrier.
gm20.jpg


More pictures to come......
 

zmotorsports

Hardcore Gearhead
Vendor
Location
West Haven, UT
Last post of pictures today.
With the center slug installed to keep the axle shafts spaced outward and keep the C-clips in place.
gm21.jpg

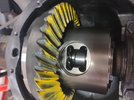
The next spacer was installed in the outer section of the carrier.
gm22.jpg

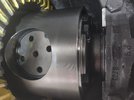
The snap-ring being installed to keep the parts in place.
gm23.jpg

Be certain to inspect the snap-ring and ensure it is fully engaged in the groove all the way around the bore.
gm24.jpg

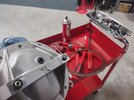
Next was time to install the differential cover. The owner opted to have me install a girdle style of cover which applies a small amount of force to the bearing caps to help them from distorting under high torque applications. With these bearings being of the smaller variety as far as axles go, this was a good call. Also came with a Lubelocker gasket.
gm25.jpg

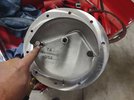
The back side of the diff. cover shows the feet that make contact with the bearing caps.
gm26.jpg

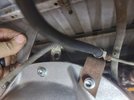
With the much thicker flange of the TA differential cover, the emergency brake cable bracket would not fit properly so had to take a small detour to fabricate a bracket to mount the bracket.
gm27.jpg

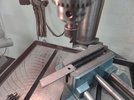
A side trip to the drill press.
gm28.jpg

Emergency bracket fabricated, bead blasted, painted and installed. Lastly the girdle supports were torqued to 5 ft/lbs. (60 in/lbs.) and the jam nuts torqued to 20 ft/lbs.
gm29.jpg

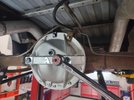
Rear end completed other than reconnecting the driveshaft and filling with gear oil.
gm30.jpg


Also, for those interested I have a few short video clips that I posted to my Instagram account on Saturday that may help to explain things a bit better than the pictures alone. They can be found @z_motorsports on Instagram.

Thanks for looking and allowing me to ramble about gears, again. You guys are probably getting tired of seeing my gear setup pictures but it seems to be a common job that is coming through my door lately. I'm ready for a bit of a change actually as these are getting boring. :thinking:

Mike
 
Top