General Tech What did you work on Today?

JeeperG

Well-Known Member
Location
Riverdale
No matter what people tell you, there's no such thing as a perfect paint job.
I've never heard anyone say this and certainly not apologizing, just acknowledging it's got a few flaws, we are aware of them all, I personally could care less, I'm beyond grateful and happy with how it is all turning out, it is much more than just a truck, I've spent more time with my brother and others than I would have otherwise, you can't buy those things and we haven't even started having fun and sharing this thing yet. I'm sure I'll have better words and something to say upon completion.

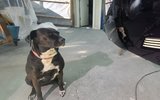
Inspector Olivia approves?
1000004210.jpg
 

Gravy

Ant Anstead of Dirtbikes
Supporting Member
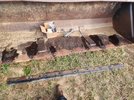
I made myself a new scraper blade for my tractor bucket out of some AR 500 plate that I got for free from my buddy who's work replaced the blade on their 10-ft snow plow.

This AR 500 stuff is so hard it took two cutoff wheels just to cut it in half down to 7 ft.
And after wasting three expensive cobalt drill bits.... out came the gas axe. I'm really pretty terrible at beveling with a torch... But this stuff IS like 5/8" thick.
20231104_135355.jpg
 

Hickey

Burn-barrel enthusiast
Supporting Member
I made myself a new scraper blade for my tractor bucket out of some AR 500 plate that I got for free from my buddy who's work replaced the blade on their 10-ft snow plow.

This AR 500 stuff is so hard it took two cutoff wheels just to cut it in half down to 7 ft.
And after wasting three expensive cobalt drill bits.... out came the gas axe. I'm really pretty terrible at beveling with a torch... But this stuff IS like 5/8" thick.
View attachment 166119
If you preheat the spots where you want to drill holes, it drills fine. The hardness doesn’t take a ton of heat to remove. A MAPP gas torch is probably enough.
 

Gravy

Ant Anstead of Dirtbikes
Supporting Member
If you preheat the spots where you want to drill holes, it drills fine. The hardness doesn’t take a ton of heat to remove. A MAPP gas torch is probably enough.

True, and I did anneal them first, and was able to drill pilot holes. However, it's very difficult to anneal the full thickness of 5/8" plate. AR500 is tricky as well because just a few too many rpms or too much pressure and it will work harden and you end up like me with a few ruined $25 1/2 cobalt bits. It took 5 minutes with a torch to do the work of 30 minutes with a drill.

But beveling 7' of plate takes some patience regardless. And I'll be honest, it just going to get beat on so I'm not that worried, in fact my friend (the heavy equipment operator) laughed and told me I shouldn't have wasted my time beveling it, but I think it'll cut bushes better with a jagged sharp edge.
 
Last edited:

zmotorsports

Hardcore Gearhead
Vendor
Location
West Haven, UT
I started running the overhead on the Cummins ISL in our coach on Saturday. Cummins recommends running an overhead @ 150k miles and with our coach now over 140k miles, I figured it was close enough and I would just run the overhead now along with oil and filter and chassis grease so it's ready to put to bed for a few months and rip roaring ready to go come spring.


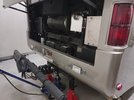
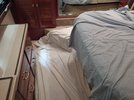
Protective measures taken to protect the interior as this task must be accessed through the bedroom closet floor.
coach1.jpg

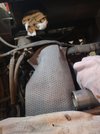
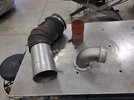
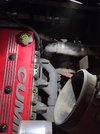
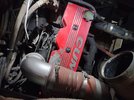
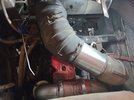
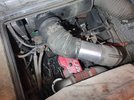
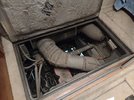
Intake ducts and tubing that must be removed to gain access to the rocker cover.
coach2.jpg

Coach up on jackstands to gain access for starter motor removal in which to gain access to the port to bar the engine over.
coach3.jpg

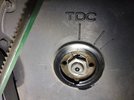
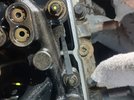
Removed the oil fill cap in the timing cover to expose the timing marks on the camshaft sprocket. I was off by about 35-40 degrees of camshaft revolution.
coach6.jpg

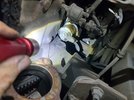
This is problem #1 of the day. In Cummins' infinite wisdom, they put the lift pump right over the access plug/port for barring the engine over. I couldn't even remove the plug, let alone insert the barring tool. I've replaced the OEM lift pump twice on this engine in the past 17-years of ownership and it is NOT a fun task. If this were in an OTR truck it would be a simple solution to just unbolt the lift pump and move it out of the way to gain access to the port, but that would be accomplished by standing next to the engine and framerail of the truck, not tucked up in between the engine block and framerail of a coach where it is less than favorable to do. Rather than mess with moving the lift pump I opted to bar the engine over the old-fashioned way, a couple teeth at a time.
coach9.jpg

With the timing marks now aligned for cylinder #1 @ TDC I can move back inside the coach.
coach11.jpg

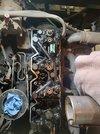
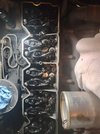
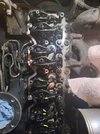
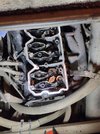
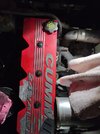
After the intake tubing is removed the rocker cover can be removed. I was pleased to find the inside of the engine looking so good. It pays huge dividends to perform proper and consistent service intervals.
coach13.jpg

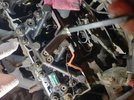
Before closing up the shop for the day I thought I'd check the Jacobs C-Brake (compression brake) on cylinder #1 and see if it was out of spec.
coach14.jpg

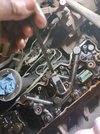
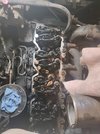
The gap on the ISL Jacobs compression brake is huge @ .090". It was very slightly loose but within specification. Either way, the Jake Brake needs to come off to gain access to the valvetrain so it will be completely adjusted upon reassembly. I just wanted to see what it was at for my own peace of mind.
coach16.jpg

Engine covered up until I can get back on it.
coach17.jpg


Thanks for looking.
 

STAG

Well-Known Member
Arts and crafts project for me tonight.

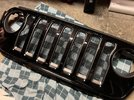
I wanted to change some stuff on my grille, and that includes relocating the front “trail cam”. And by relocating the trail cam, I thought the empty camera hole in the factory grille looked terrible.

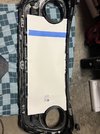
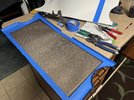
I hopped on Amazon but didn’t see any aftermarket grille inserts I really liked, so I ordered some universal hex mesh aluminum that came already coated black, and made a template out of some poster board, and then cut the hex mesh into a grille insert. I’m happy with it considering I’m only about $40 into it.

ADB9A412-5D72-40F8-8297-8FCEA3C9E81D.jpeg
AC1CB11B-84C6-4049-A86C-8AF73A0C9177.jpeg
A45A1E4D-BCA5-479C-9194-78B267EA60F7.jpeg
 

zmotorsports

Hardcore Gearhead
Vendor
Location
West Haven, UT
Made a little more progress on the Cummins ISL last night.

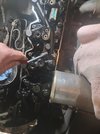
I started by removing the wiring for the Jacobs C-Brake and then removing the six bolts for each section of compression brake. Before removing I backed off the center stud space take up shim so it is ready to be reinstalled and adjusted once the valves are adjusted.
coach18.jpg

Front C-Brake removed.
coach19.jpg

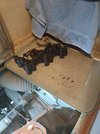
and set aside.
coach20.jpg

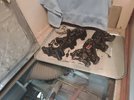
Then the second (rear on engine) removed and set aside.
coach21.jpg

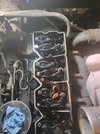
Next comes removal of the rocker box. This is secured down to the head using 5 center mounted bolts with female threaded heads where the rocker cover secures. The rocker box was really stuck down to the head and required some finessing to get it to let loose as there really wasn't anywhere to pry against.
coach22.jpg

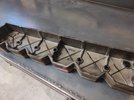
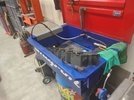
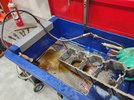
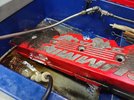
Rocker box finally removed and in the solvent tank for cleaning.
coach23.jpg

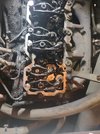
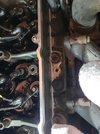
Then the hour and a half process of cleaning the head from the rocker box's sealant. This was probably the most time consuming part thus far as there isn't much room and I was standing on my head leaning down into the engine bay working with one hand as the other was supporting me so I didn't fall in.
coach24.jpg

coach25.jpg

With the sealant cleaned off and a wipe down with brake cleaner it was time to close up the shop.

Thanks for looking.
 

zmotorsports

Hardcore Gearhead
Vendor
Location
West Haven, UT
I was able to get some time on the coach last night and got the valves adjusted.


I prefer to use my stepped feeler gauges as a go/no-go gauge. I adjust them down to where there is slight drag but the stepped portion won't slide under. Then I torque the jam nut to specification, mark the rocker with a paint pen and move on to the next.
coach26.jpg

coach27.jpg

Half of the valves are adjusted, torqued to spec and marked as completed.
coach28.jpg

I then crawled under the coach and seeing as how I was working by myself and to prevent from getting up and down multiple times from under the coach, I marked the flywheel then turned it one full revolution (360-degrees).
coach29.jpg

Which brought the engine to TDC on cylinder #6.
coach30.jpg

I then adjusted the other half of the valves until all were completed, torqued and marked.
coach31.jpg


Thanks for looking.
 

zmotorsports

Hardcore Gearhead
Vendor
Location
West Haven, UT
Need to do this on my CAT. I can watch your YouTube, but out of curiousity, how much were the valve clearances out of spec?
They were all tight by several thousandths. Near the lower end of the range but still within specification. I wouldn't have wanted to let it go much longer so I feel Cummins' recommendation of 150k miles is pretty spot-on.
 

Gawynz

Active Member
Location
Ogden, UT
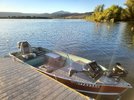
Completed the simple task of servicing and winterizing the boat and got it put away for the winter. I finished this project this spring and used the heck out of it this summer getting out on the lake 18 times! I'm very happy with how it turned out, everything worked flawlessly all Summer.

20230909_073344.jpg

This winter I plan to clean up the trailer and ditch the mailbox stickers for some actual decals.
 

zmotorsports

Hardcore Gearhead
Vendor
Location
West Haven, UT
Over the weekend I completed the overhead on our Cummins ISL in our 2003 Monaco Dynasty.

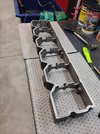
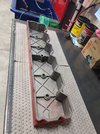
Cleaning the rocker box.
coach32.jpg

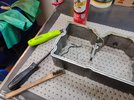
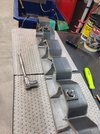
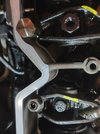
Cleaning the original sealant from the sealing surface. I used my carbide scraper to clean the flat areas then a cotter pin hook tool to clean the groove out followed by a general purpose stainless steel brush and lastly some brake cleaner. I don't like using powered wire wheels or abrasive pads on die grinders to clean aluminum components such as these as I feel they erode or deteriorate the sealing surface.
coach33.jpg

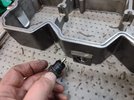
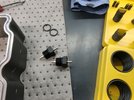
Also, during disassembly I noted that there was some oil residue or buildup around these electrical connectors that go through the rocker box for the solenoids on the C-Brake housings. I removed them and noticed that the O-rings were flattened slightly.
coach34.jpg

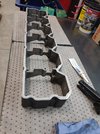
Rocker box sprayed with brake cleaner and thoroughly inspected for any cracks or issues, especially in the middle girdles.
coach35.jpg

O-rings removed.
coach36.jpg

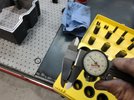
and I sorted through my O-ring assortments to find replacements.
coach37.jpg

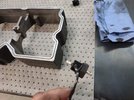
New O-rings installed on the connectors.
coach38.jpg

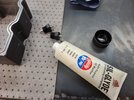
Grabbed the new tube of Sil-Glyde and applied a small amount around the O-rings.
coach39.jpg

Connectors installed and the rocker box is ready for sealant.
coach40.jpg


More pictures to come.
 

zmotorsports

Hardcore Gearhead
Vendor
Location
West Haven, UT
Continuing on.


With some time left before closing up the shop for the night I thought I'd go ahead and install the rocker box and torque it in place. Whenever I use sealant on a component I prefer to let them sit overnight whenever possible, so this was perfect timing as I still had some time before going in for the evening. I applied some sealant, just about a 1/8"-3/16" bead is all that is required. Not too much or you'll end up with a mess both outside or worse, inside the engine.
coach41.jpg


The rocker box was torqued to 212 in/lbs. and just a small (1/16"-1/8") of sealant squeezed out.
coach42.jpg


This is about all you should see squeezed out from the sealing surface. Much more than that and you used too much.
coach43.jpg


Same on the inside.
coach44.jpg


With time still remaining before closing up the shop for the evening I commenced cleaning of the rocker cover.
coach45.jpg


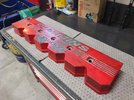
Rocker cover came pretty clean but had some powder coating peeling off.
coach46.jpg


Inside is clean enough to eat off of.
coach47.jpg


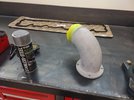
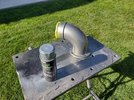
I also made a trip to the glass bead cabinet and blasted the intake elbow. I don't care for raw aluminum in such a dirty environment as the pores get dirty and it is a PITA to clean afterwards. So rather than reinstall as is, I chose to spray some Semour Stainless Steel paint onto the intake elbow. Way overkill I know, but it should be easier to wipe off when I'm in there doing maintenance.
coach48.jpg


That turned out better than leaving the surface blasted and exposed.
coach49.jpg


I also used some Power House to clean the hoses and intake duct as well as some Scotchbrite to clean the aluminum tube for the air intake.
coach50.jpg


Stay tuned for more pictures.
 

zmotorsports

Hardcore Gearhead
Vendor
Location
West Haven, UT
Continuing on.

Saturday morning I went out to the shop to finish up by installing the Jacobs C-Brake and adjusting it to the specified clearance of .090".
coach51.jpg


With the engine already @ cylinder #6 TDC from the last of the valves being adjusted, I adjusted the compression brake on cylinders 2, 4 and 6. Then marked with yellow dot showing that cylinder was complete. After adjusting the first three cylinders, I barred the engine over one full revolution to put the engine @ cylinder #1 TDC where it all began and adjusted the C-Brake on cylinders 1, 3 and 5.
coach52.jpg


After double checking the jam nuts on the C-Brake housings I installed the rocker cover and torqued the new center bolts with grommets to 106 in/lbs.
coach53.jpg


Then reinstalled the oil fill cap on the timing cover.
coach54.jpg


I did a little follow up cleaning around the perimeter before adding the last of the components.
coach55.jpg


Then installed the freshly painted intake elbow and silicone hose from the charge air cooler (CAC).
coach56.jpg


Then the air intake ductwork was installed and boost hose connected.
coach57.jpg


And a final shot before closing the hatch.
coach58.jpg


Thanks for looking.
 
Top