General Tech What did you work on Today?

zmotorsports

Hardcore Gearhead
Vendor
Location
West Haven, UT
The 3.90's really woke this thing up, especially with the loose 3200 stall converter I put in.
With the overdrive and lockup the cruise is still great. I want to say i saw it was still just under 2500 rpm at 85mph. It has a pretty large tire though. The 275/50/20 is like 30.5" tall.

It pulls so much harder now it's really a different truck and matting the throttle at anytime instantly brings the rpm up over 3000 rpm where the cam is happy and it's making boost.

The only complaint currently is that I have to extend the blow off valve discharge out front or underneath somewhere, when on the freeway at light throttle a ton of air is bypassing as the charger is spinning fast enough to make boost but with the throttle not open it all gets bypassed and it's pretty damn loud in the cab.

I didnt even have to try and power brake it to get them spinning. I just stopped, let off the brakes, and floored it.. I'm guessing if I power braked it I could leave an expensive but endless pair of stripes.

Glad to hear those are working out well JJ.
 

SoopaHick

Certified Weld Judger
Moderator
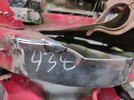
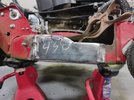
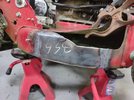
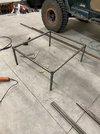
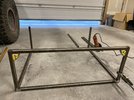
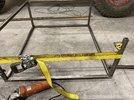
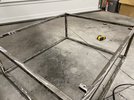
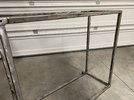
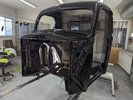
Finishing up that base for the coffee table...

With a grinder and time, anything can be created!

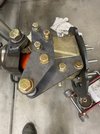
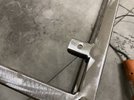
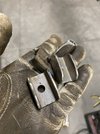
I needed some way to attach the top and base together and realized too late that I forgot to grab extra plate to do that. But I did have plenty of extra tubing... So after a lot of cutting and grinding I created these little channel brackets with the requested hole size drilled through the center.

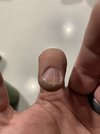
Surprisingly only had one mishap with the grinder...

Even though the powder coater is going to sandblast it, I Threw a quick rough polish on there because I can't send it out the door dirty.
 

Attachments

  • 9E884581-0C96-4FEF-A7AF-692C757CD80F.jpeg
    9E884581-0C96-4FEF-A7AF-692C757CD80F.jpeg
    294.1 KB · Views: 31
  • 000F0147-2C7E-4476-839D-33E22B91B73E.jpeg
    000F0147-2C7E-4476-839D-33E22B91B73E.jpeg
    453.3 KB · Views: 34
  • 15E86AC8-DBD7-4798-8FAB-533C1C4E336F.jpeg
    15E86AC8-DBD7-4798-8FAB-533C1C4E336F.jpeg
    156.5 KB · Views: 33
  • 589C5A06-BA15-45A6-8B8C-5C8D4A6E5F83.jpeg
    589C5A06-BA15-45A6-8B8C-5C8D4A6E5F83.jpeg
    360.9 KB · Views: 33
  • 0C0FB463-9352-4781-9AA2-287BB35611B1.jpeg
    0C0FB463-9352-4781-9AA2-287BB35611B1.jpeg
    412.7 KB · Views: 32

NYCEGUY01

Well-Known Member
Location
Willard, UT
16699223699598832907570217383637.jpg

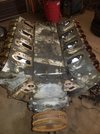
Got this LQ9 down to the longblock. Waiting for gaskets and parts to start showing up.. getting a quick and dirty re-ring, bearings, cam, etc...

I think I'm gonna throw on a carb and put it in the brown stepside.
Not completely sure yet but that seems like it will be super quick and easy. Lol
 

zmotorsports

Hardcore Gearhead
Vendor
Location
West Haven, UT
Finally got back in the shop after the past week and tackled my end of season maintenance on our OPE (Outdoor Power Equipment).

While performing the seasonal maintenance and cleaning the deck I noticed there was a wear through area on the right side of the mower deck, similar to the left side that I repaired a few years ago. This lawnmower is my original lawnmower that I purchased over 31 years ago back when my wife and I purchased our first home. I opted to buy a quality mower using the old adage buy once/cry once. The old Snapper 21" walk-behind has been an awesome mower.

I realize that I may be crazy keeping this ole' girl cutting but I'm not the kind of person to dispose of things until they are absolutely used up and I would like to see this mower outlive me. Most of the maintenance items I have had to address on this mower over the first 28~ish or so years have been normal maintenance, things like oil changes, air filters, valve guide seal replacement, drive cable, drive pulley and wheels and all parts have been readily available for the most part. A few years ago I had a wear through area on the left side where the deck rubs against the concrete and I waffled on a new mower at that time but opted to repair and keep this one. Now I have to do the same repair in the right side.

Prior to cutting the old section out of the deck, I fabricated this patch panel from a piece of .125" thick hot rolled plate. I scribed and cut to size on the deck then chamfered the edges to allow a full penetration weld and allow metal finishing afterwards.
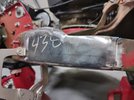
mow10.jpg

Close attention to fitment aids in tidy edges and flush welds.
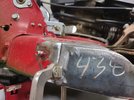
mow11.jpg

Patch panel tacked in place.
mow12.jpg

mow13.jpg

Fully welded.
mow14.jpg

Welds dressed and entire panel metal finished. Blended with 80-grit Roloc then moved to 180-grit on a DA to prep for paint.
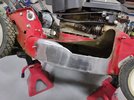
mow15.jpg

I had nice definitive edges to mask to on this side so no blending like I had to do on the left side. Masked, scuffed and then wiped down with wax & grease remover.
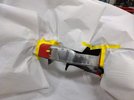
mow16.jpg

A couple light coats of metal etching primer.
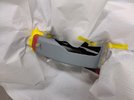
mow17.jpg

Then a couple coats of Duplicolor red paint which has been the closest match I've been able to locate from an aerosol can.
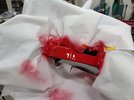
mow18.jpg

Unmasked and sitting back down off the jack stands.
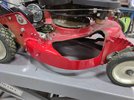
mow19.jpg


All that is remaining is to reinstall the side discharge block-off chute after I complete the remainder of the end of season maintenance work. Then it should be ready for spring mowing.

Thanks for looking.

Mike
 

DaveB

Long Jeep Fan
Location
Holladay, Utah
It is snow blower time for me. I have six of them laying around so I pulled some out and started fixing them. I got our main Honda blower fired up without any work on my part then started on another Honda. This Honda had a blown motor so it was mostly a spare parts blower for mine. Some neighbor kids took the family blower apart and tried to use the motor on a go cart. They didn't pay much attention to gearing and it came down the street once but couldn't go back up the street. I saw the motor sitting in the driveway and asked their dad about it and he gave me the motor. So I thought I could just swap the motor into the blown engine Honda but it was not so easy. I did manage to get it in but had to modify a bunch of things. I got it running well but it looks pretty ugly. We have named it the franken blower as the top cover is half HS520 and half HS621. I'll have to see what I can do to make it look better.
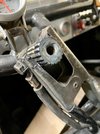
Now on to the four Toros. Two of the four Toros are now running.
 
Last edited:

Hickey

Burn-barrel enthusiast
Supporting Member
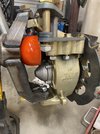
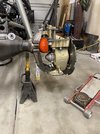
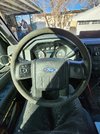
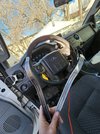
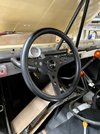
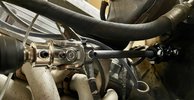
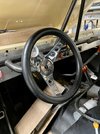
My orbital valve died at Sand Hollow and I decided to upgrade the steering shaft and wheel at the same time. The new orbital was bought for Britney, so that was nice to have on hand.
The old steering wheel was a tad small and the quick disconnect was aluminum and it’s splines were pretty worn out.


962927FF-E551-42AC-81C0-72D8FCB863FA.jpeg7CA7DE49-4B92-4A54-951B-85690D94E6CA.jpeg7C01E9B6-1D1E-44CC-AC2A-AF9764818774.jpeg

The old steering shaft had no joints in it. That caused some issues with the orbital box.

6A7C7865-6829-495A-BB33-9D0989E69118.jpeg
 
Top