Jeep Speed Goat TJ, the anti-build thread

Greg

I run a tight ship... wreck
Admin
With the new wheels having a little more backspacing, I was concerned about the rear shocks clearing the tire at full compression. I decided to try a make-shift RTI ramp using my flatbed and trailer ramps. I got 3/4 of the way there, but not to the point of flexing everything out. The shock is within 3/4" of the tire at stuff and the opposite tire still has 2" of down travel to go. If they don't hit, it's going to be damn close. I'd much rather figure this out now, than destroy an ORI shock. There's a chance I'll have to move the lower shock mounts in a hair.

After I did all this, I realized I can just fully charge the shocks on opposite corners, and run the shocks all the way down, reaching full stuff and full extension in the shop. I may try that tomorrow.

i-7rsmpMS-X2.jpg

i-m2ZFxhD-X2.jpg

i-H9KmJ6M-X2.jpg

i-VHVhMj2-X2.jpg
 

Greg

I run a tight ship... wreck
Admin
The next thing I need to work on before hitting the trail is the engine oil pan and transmission pan skid plate. I'm trying to make it tight, keep it light but with just enough reinforcement to protect the vulnerable parts.

I started out with a piece of 1/8" sheetmetal, 14" x 36". I bent the edges at a 45*, then spent a bunch of time drilling holes with a 1.5" annular cutter, then adding dimple dies to add even more reinforcement. I'll be adding some rubber pucks between the oil pan and skid plate, just in case it takes a hard hit and will dissipate the hit. I'm also adding a piece of HDPE down the center that should add even more rigidity, help reinforce the skid plate and give something to slide on.

i-r53MzM3-X2.jpg

i-6prfT2b-X2.jpg

i-83btJRX-X2.jpg


What's crazy is that at this ride height, the bottom of the front axle tube is just a hair lower than the engine skidplate will be.

i-cd3qWRP-X2.jpg
 

Greg

I run a tight ship... wreck
Admin
Wrapped up the skid plate build, took two full days and plenty of effort. I built a 3/16" x 2" skid mount off the engine mounts supporting the front, then added the rubber pucks at the back of the oil pan in the unsupported section, then it bolts to the t-case skid.

I added a 3/16" steel plate extension behind the t-case skid to tie into the rear lower link mount, otherwise it would have left a perfect gap to get hung up on. Ended up drilling and tapping everything, counter sinking 1/2" bolts and threading the holes. It was all a giant pain in the ass!

i-XZ3vJGw-X2.jpg

i-Xd2Zj2d-X2.jpg


There are four more things that left that I need to take care of before hitting the trail.

  • My front locker isn't working, I think the copper air line isn't secured to the bulkhead fitting inside the diff.
  • Need to swap around my hydraulic hoses at the cyl, I don't like the way I routed them.
  • Need to cut the shifter gates.
  • Lastly, need to verify shock clearance out back at full droop.

I have plans to wheel the TJ next weekend on 21 Road with the Grand Mesa Jeep Clubs event... but I don't like taking an untested Jeep out on a big trail run. I also need a working front locker... we will see what happens.

i-bmCr4ws-X2.jpg
 

Greg

I run a tight ship... wreck
Admin
ORI Struts are officially RAD!

I still needed to verify shock clearance at the rear tires, so I pressurized the upper chamber on the passenger side shock (pushing out/extended) and then pressurized the lower chamber (pulling the shock in/collapsed) on the drivers side. At 450 psi of Nitrogen, I was able to get full travel and see that the shock still clears the tire, by 1/2"! 😲

Got lucky there! 🤣

i-Gv987S2-X2.jpg

i-8MwFhC9-X2.jpg

i-kbsqTGT-X2.jpg

i-2dDJ9GP-X2.jpg


I raised the height a bit, for more clearance for the upcoming 21 Road trip. Again, ORI's are RAD.... just a little more nitrogen and it has more belly clearance!

i-qqHJpSk-X2.jpg


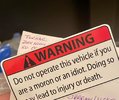
Also added a safety warning sticker.... @I Lean , @Vonski , @XJEEPER

i-hPBmNGW-X2.jpg
 

Greg

I run a tight ship... wreck
Admin
Alright, I've knocked off all the items on my 'trail ready' list! Really looking forward to getting the TJ back out on the trail with all the changes.

I swapped out the full hydro hoses, rerouted them and they look much better. I zip tied the hoses to the track bar, need to add a hose protector at the frame to prevent wear. I pulled the front dff cover off and was able to repair my front air locker issue, so I have a locker again. Also cut the shifter gates so I can find Reverse during an "Oh Shit!" moment and then started working on the mount for the Milwaukee PackOut boxes. These will hold recovery gear & tools and should be a handy addition. The sheetmetal mount doubled as a deflector for the transmission cooler fan, it used to blow toward the back of the cabin and is quite loud, so hopefully this makes a difference.

i-prGH8G8-X2.jpg

i-mF32sv3-X2.jpg

i-QfJKJbP-X2.jpg

i-c8zhS5w-X2.jpg

i-HBSWB5F-X2.jpg
 

bryson

RME Resident Ninja
Supporting Member
Location
West Jordan
From the pics it looks like the front of your engine skid mounts to the engine (at the plate bolted to the block) itself? And the rear of the skid mounts to the t-case skid which I'm assuming is frame mounted? Do you anticipate issues with things flexing with the front being drivetrain mounted, and the rear being frame mounted? Maybe the skid will be flexible enough being 1/8" that it won't be an issue?
 

Greg

I run a tight ship... wreck
Admin
From the pics it looks like the front of your engine skid mounts to the engine (at the plate bolted to the block) itself? And the rear of the skid mounts to the t-case skid which I'm assuming is frame mounted? Do you anticipate issues with things flexing with the front being drivetrain mounted, and the rear being frame mounted? Maybe the skid will be flexible enough being 1/8" that it won't be an issue?

That's what I'm hoping, had I gone with a thicker material for the skidplate, I'd be more worried about wear and tear... time will tell!

*edit* Actually, it's mounted the same way it was before with thicker plate and there were no issues.
 
Last edited:

Greg

I run a tight ship... wreck
Admin
Had a wiring issue with the yellow LED's, they'd blow a 25 amp fuse as soon as they were turned on. It took the test light to figure out that the wire plugs I bought on Amazon were backwards.... Black is power and Red is ground. :eek:

Rewired them, fired up the LED lights and headlights after adjusting them.... that's plenty of light! I want to add some small rock lights down the road, but this is good enough for now.

i-ktNmBGb-X2.jpg


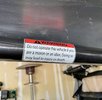
I had to relocate my 'Warning' sticker.... now it's right in front of the driver, not on the roof.

i-ws4SXPX-X2.jpg
 

Hickey

Burn-barrel enthusiast
Supporting Member
Had a wiring issue with the yellow LED's, they'd blow a 25 amp fuse as soon as they were turned on. It took the test light to figure out that the wire plugs I bought on Amazon were backwards.... Black is power and Red is ground. :eek: Rewired them, fired up the LED lights and headlights after adjusting them.... that's plenty of light! I want to add some small rock lights down the road, but this is good enough for now.

i-ktNmBGb-X2.jpg


I had to relocate my 'Warning' sticker.... now it's right in front of the driver, not on the roof.

i-ws4SXPX-X2.jpg
IMG_5531.jpeg
 

Coco

Well-Known Member
Location
Lehi, UT
I need some of those sticker too.... I remember with Rocklogic had them way back when, then LROR did a run of them, and now they gone again.

I would donate some money to some! :cool:
 

Greg

I run a tight ship... wreck
Admin
Good looking setup 🤘 curious how the wheels hold up over time, they look like some solid units

I'm pretty sure I'm going to destroy the plastic hub caps right away, but that's OK. Hell, the wheels will probably get beat up pretty good on 21 Road tomorrow! 🤣
 
Top