
Time for an update
Sold the Allied beadlocks and picked up a set of the Trail-Gear Creeper Locks. I have always liked the look of these wheels, and with the Allieds selling, it was time to pull the trigger, and get a set. I also picked up my 2.0" 14" Fox airshocks which will be going on the buggy shortly. Just waiting for final paint/assembly, then they will be going in

I also picked up an ECT lightweight aluminum steering wheel from Stratton (thanks again) anyone want/need a GT steering wheel with a quick disconnect? Always wanted one of these steering wheels, and finally got one. After originally setting up the steering in the buggy, I think with the new wheel, I am going to re-configure the steering column. With the way it is currently mounted, I think it could easily bend, so I am going to do the good 'ol heim joint method, and build a hoop to support it closer to the wheel.
This past weekend, I mounted up the tires on the new wheels, and got the front axle finished up. I got the left side bumpstop pad re-welded onto the housing, and built the suck down mount. Once everything was finished welded, I cleaned out the housing the best I could, installed Trail-Gear's Diff Stud Eliminator, and installed the High Pinion 3rd. I worked on it Sunday, and finished building the axle. Got the RCV shafts, and the Trail-Gear Creeper Flanges on the axle, along with the ARP studs. I have heard rumor that TG is going to do a true studless hub (a drive slug) for the FJ80 axle (like what they just released for the mini truck axles) so until then, I will use the creeper flanges.


Last night, I got the skidplate built. After doing some research on Pirate, and seeing what other F-Toy guys have done, I decided the best/easiest way to do it would be to modify an existing TG crossmember, and fit it into the frame.
This is from azyota's build on Pirate:
The T-case skid is done! I cheated and re-used my old Marlin T-case mount. First the sides had to be cut down to fit between the frame rails. Yes, I got the idea from Matt :flipoff2:
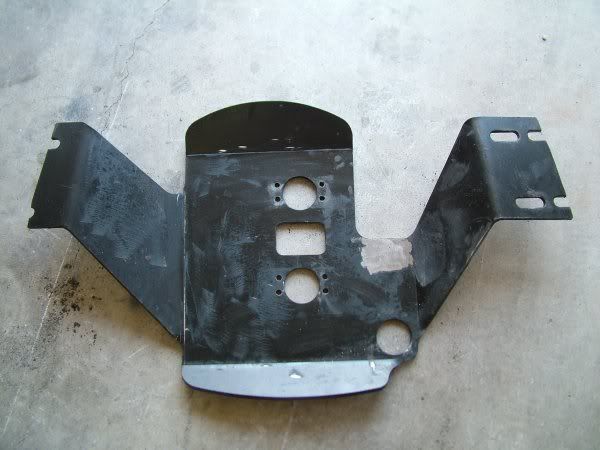
Next the inside of the frame rails were plated with 1/8" cold rolled, and some brackets were fabbed. Here is a before pick of how far down the Marlin skid set.

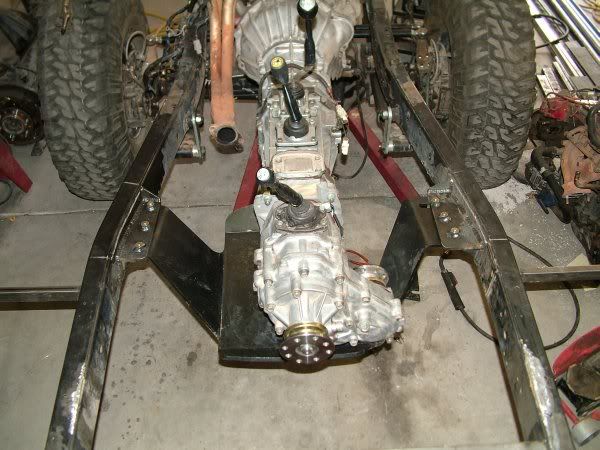
Here is the after, I didn't go completly flat belly. With the skid setting 3/4" below the frame rails, the tranny and T-cases set parallel with the frame rails.

A couple more from above and below.
One of my buddies had a Trail-Gear skid that I got from him, and basically mimicked his and others idea. Turned out really well!

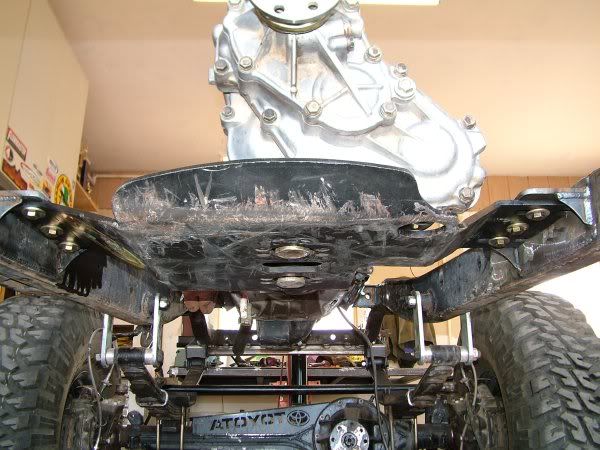
I decided I wanted to play it safe. azyota used a thicker piece of metal, and added 2 braces than what I used. One of my colleagues suggested I use some thicker 2" angle iron, and said that is what he used (figured he has been using his buggy for a season with no issues, figured I could too. The only thing I did differently, compared to him that azyota also did, was I added braces for extra strength. azyota has two braces on either end, and where his mount is on top of the skid, mine is below. I added 4 gussets to both mounts for extra strength/assurance.

All bolted in:

Hard to tell, but here is the side angle. Measured it looks like it sticks down 1" rather than the 3/4" azyota's is. So not a true flat belly, but it will help with the rear driveline angle as well.

Sold the Allied beadlocks and picked up a set of the Trail-Gear Creeper Locks. I have always liked the look of these wheels, and with the Allieds selling, it was time to pull the trigger, and get a set. I also picked up my 2.0" 14" Fox airshocks which will be going on the buggy shortly. Just waiting for final paint/assembly, then they will be going in

I also picked up an ECT lightweight aluminum steering wheel from Stratton (thanks again) anyone want/need a GT steering wheel with a quick disconnect? Always wanted one of these steering wheels, and finally got one. After originally setting up the steering in the buggy, I think with the new wheel, I am going to re-configure the steering column. With the way it is currently mounted, I think it could easily bend, so I am going to do the good 'ol heim joint method, and build a hoop to support it closer to the wheel.
This past weekend, I mounted up the tires on the new wheels, and got the front axle finished up. I got the left side bumpstop pad re-welded onto the housing, and built the suck down mount. Once everything was finished welded, I cleaned out the housing the best I could, installed Trail-Gear's Diff Stud Eliminator, and installed the High Pinion 3rd. I worked on it Sunday, and finished building the axle. Got the RCV shafts, and the Trail-Gear Creeper Flanges on the axle, along with the ARP studs. I have heard rumor that TG is going to do a true studless hub (a drive slug) for the FJ80 axle (like what they just released for the mini truck axles) so until then, I will use the creeper flanges.


Last night, I got the skidplate built. After doing some research on Pirate, and seeing what other F-Toy guys have done, I decided the best/easiest way to do it would be to modify an existing TG crossmember, and fit it into the frame.
This is from azyota's build on Pirate:
The T-case skid is done! I cheated and re-used my old Marlin T-case mount. First the sides had to be cut down to fit between the frame rails. Yes, I got the idea from Matt :flipoff2:
Next the inside of the frame rails were plated with 1/8" cold rolled, and some brackets were fabbed. Here is a before pick of how far down the Marlin skid set.
Here is the after, I didn't go completly flat belly. With the skid setting 3/4" below the frame rails, the tranny and T-cases set parallel with the frame rails.
A couple more from above and below.
One of my buddies had a Trail-Gear skid that I got from him, and basically mimicked his and others idea. Turned out really well!

I decided I wanted to play it safe. azyota used a thicker piece of metal, and added 2 braces than what I used. One of my colleagues suggested I use some thicker 2" angle iron, and said that is what he used (figured he has been using his buggy for a season with no issues, figured I could too. The only thing I did differently, compared to him that azyota also did, was I added braces for extra strength. azyota has two braces on either end, and where his mount is on top of the skid, mine is below. I added 4 gussets to both mounts for extra strength/assurance.

All bolted in:

Hard to tell, but here is the side angle. Measured it looks like it sticks down 1" rather than the 3/4" azyota's is. So not a true flat belly, but it will help with the rear driveline angle as well.


