TIG Talk

I haven't picked up a TIG torch for about a year now and out of the blue I got the itch again. In all, I have probably less than 10 sticks of filler through a TIG welder, so I'm still very much a rookie. I know we don't all TIG weld, but I think there is enough interest in it to make a thread for tips and tricks. Well, I have no tips or tricks to offer, but I'm willing throw some projects out there for the experienced guys to pick over so we can all learn together.


In this project I needed to make some trailer stakes with some strap pockets welded to them. The material I used was 3x1.5x1/8" rectangular tube as well as 2.5" square 1/8" tube.


Getting my parts lined up.
003.jpg

These are settings I went with. The 151 seems very high to me, but maybe not. I did have my foot to the floor almost the entire time. I did play around a bit. As I backed off the pedal I could really see a difference. My filler would not just drop into place. A lot of times it would end up sticking to the tube and I would have to bring the torch over to it and melt it to free it up then go back to my last bead and kind of start over. Maybe I wasn't sticking the filler into the arc far enough or fast enough? I was using 1/16" filler rod.
007.jpg

This is how I prepped the electrode. I use a dedicated grinder to sharpen them, holding them parallel to the wheel. It's kind of hard to see, but it's ground down to a pretty sharp point.
008.jpg

This is the position I was welding in. I would start at the top and pull the torch towards me. I would bring the filler in from the bottom of the picture and most of the time it was leaning up against the square tube to help keep it from bouncing around.
012.jpg

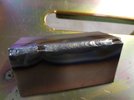
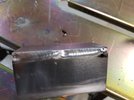
This is how most of the welds turned out. I made a total of 20 of these passes. It's got to be way too hot. Maybe it's just that I had to go slow because of the large gap between the flat surface of the rec tube and the round corner of the square tube. It was a pretty large gap to fill. The top of the weld is undercutting and the HAZ is pretty large.
004.jpg

This picture shows how I was close to burning through, although I never did. The stakes ended up warping quite a bit (not a big deal on this project) right at this strap pocket. From here to the end of the stake is 24 inches. The end of the stakes would be about 1/2" in the air.
006.jpg

This picture shows what my electrode looked like after 7 passes, or about 21 inches of welding. I assume this is normal wear? I could really start to see how my arc went from a very narrow line and ended up as a wide arc, like an umbrella. After sharpening it again it went back to a narrow line again and I could be very precise with where I created a bead.
011.jpg

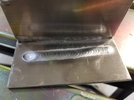
I found welding these lines to be the easiest ones as the filler just kind of dropped into the gap and filled nicely.

One thing to note is how much filler I used. In a total of 60 inches I used 3 1/2 rods. Does that sound about right?
009.jpg

I needed to build 10 stakes and switched over to MIG after the first 5 were done with TIG. You can see how uniform the welds are. Overall I was pleased with the outcome. I just need figure out if the welding could have been done colder with less/no warping.
016.jpg

The bottom 5 are the ones I did with the MIG welder. I really flew through them. Much smaller HAZ and no warping.
020.jpg

Overall I really enjoyed this project. My end game is to get proficient at TIG welding aluminum. I have done it a couple times and accomplished what needed to be done, but I know it could have been done better. I'm going to try to TIG steel more often so that I can develop all the hand/foot/eye coordination more. One thing I really tried to do this time was moving the filler rod through my hand instead of just moving my hand closer to the work as I used it up. It's hard to do!
 

zmotorsports

Hardcore Gearhead
Vendor
Location
West Haven, UT
So last night I had a few minutes and thought I’d run a few test beads on some aluminum scrap I dug out of my drop box.

a6ac8d16689d6d5373a11fd29980ddd9.jpg


I keep dedicated wire brushes on hand for aluminum, steel and stainless steel.
7895908b5ef019dcdb3c80f35251429c.jpg


Wire brushed the seam and a quick wipe with acetone. You can see on the cloth how much was removed with just one swipe.
751b88d669767e4eed2552ff4f48626d.jpg


Two pieces of 3/16” tacked together. Here’s another tip, don’t put your tacks directly on the end of the pieces to be welded but keep them inboard of the ends by at least a half inch or so. Reason being is that as soon as you light up on the tack and it goes molten you’ve lost your tack and the material can move negating any benefit of your tack. This way by the time you reach the tack with the arc and it goes molten you already have at least a half inch or so if weld holding things in place.
4a77617406dcea2e4a73cb1d490480a4.jpg


Let’s talk tungsten sharpening. Always sharpen your tungsten longitudinally to keep the grinding striations pointing down and to the tip of the tungsten. This is the tip I usually use for steel and stainless steel, a 15-degree grind.
1f3583ac57787a9a4070ba5fd06f9c13.jpg


This is what I generally grind my tungsten at for non-ferrous materials, a 30-degree point.
3c0ea26358a16309408fbe937f0235a5.jpg


Machine settings.

140-amps.
65d1738c653962093bc560e6a8420cef.jpg


Balance set to 68% electrode negative.
e43f068dc3b229412929dd4cdfb25721.jpg


Frequency set to 60 Hz. I generally weld fairly good aluminum at anywhere between 90-120 Hz but wanted to demonstrate at 60 Hz to replicate a transformer machine as not everyone has an inverted style welder that can alter the frequency.
845e5cc4fe46b28e7d88588eff8d904b.jpg


First inch or so of weld. This is the filler rod after running that inch of weld. By dipping it into the puddle quickly and pulling it back completely out of the arc path the filler doesn’t melt prematurely. Don’t pull it out too far however, because you don’t want the atmosphere to attack it and contaminate it because then you’ll introduce that directly into the molten puddle upon the next dip.
75bb517ea32bd93060e167b00f4ef32f.jpg


I pulled away very abruptly to try and show the small keyhole or leading edge of the puddle where I was feeding the filler into but it resulted in a small crack at the weld crater. Generally at the end of a weld I taper off of the amperage and add one last smaller dip to the crater to avoid this cracking.
3938512d90049550b75e67d0861e67c7.jpg


Here is a better shot using a screwdriver tip for size comparison. You can see the depression of the crater much better. As the puddle is molten this crater is being directed forward with each movement if the torch. The arc pressure and molten aluminum cause this crater to sink down while drawing parent material in from each side. This is the fusion taking place and the exact point at which you want to direct the filler rod into. You want the molten puddle to melt the filler rod, not the heat from the arc. As you push the rid into the molten puddle you will see the bead profile raise slightly and stand proud of the parent material. This is where I will slightly raise my torch to allow the bead to grow, then as I retract the filler rod I move the torch down and forward pushing the molten puddle where I want it to go and then raise slightly and dip and repeat.

Also remember you control the puddle with the arc. You are driving and determining where the molten puddle is going, don’t let the puddle dictate to you where it’s going. Torch angle is important here as well as where the arc is focused.
19230821991f3e6e385c73f207d95087.jpg


On this bead I used two different balance settings to demonstrate the cleaning effect with even a minor tweak. Look at the area that is chalky white immediately at the toes. The lower balance setting has more cleaning and therefore has a slightly wider cleaning zone at the toes as does the higher balance rate with a slightly more narrow cleaning effected zone. I apologize, I don’t know why I wrote 66%, it was actually 68% electrode negative.
e081ba44669e4570266027b6a9f0cfc6.jpg


83cf8690699d0e0cc3c8cfd3e76d021d.jpg


7e434a55b855edddb03fe1a6406c73b1.jpg


Just for shits & grins I ran some more beads on another piece of 6061 scrap using various frequencies. I also didn’t scrub this piece very well with a wire brush, I basically just gave it a quick wipe down with acetone.
5439edcfa7fa3056c9f2de52a2bf1677.jpg


I played with a few different frequencies as well as a couple different balance rates fir demonstration purposes.
ce1a4ffd09970eb228dc60082d9ad94d.jpg


You can see in the second row where I touched my tungsten with the filler rod and puddle as I didn’t raise the torch to allow for the dead growth. Also you can see a few small protrusions out if the weld puddle in a few locations. This was due to my carelessness as I was hurrying and as I was retracting my filler rod I would flick it slightly sideways as I was feeding it through my fingers. I left these defects to show just how any slight movement can and will have an effect on the finished bead profile. Think of this like signing your name, any movement will be reflected directly in the outcome.
05d32cd79999019eaab17335457fca52.jpg


Fillet style weld around a tube.
6d2996d3efd5021750569589f93e35f9.jpg


c75b7fe676d0c5c2dc355e2fbb4a98f3.jpg


76ecdfb81cacff865f60bb1461f151e7.jpg


This is what my tungsten looked like after all of that welding. Barely a noticeable radius at the very tip of the tungsten, not a large diameter ball by any means. I use 2% Lanthanated tungsten (purple) for all of my welding. I’ve also experimented with the 2% Ceriated (Orange) with good results as well. The Ceriated is a bit easier to come by than the Lanthanated as most welding supply houses carry the 2% Ceriated.
ecc04e2c6f59cef88e9cca174bbf9ca9.jpg


I hope this was helpful.

Mike
 

UNSTUCK

But stuck more often.
Nice welding Mike.

Can you do a rundown of what tungsten diameter and filler rod diameter you would use in different situations? Is it all based on material thickness or perhaps different types of welds, positions, amps?

I'm aware of 4043 and 5356 filler rod. I have both but don't recall why I have both. What would make me want to use on vs the other? Are there others that I should have?

Seems the two main types of AL are 5052 and 6061. Either soft or hard. In my last project I was actually welding these two types together. Should I care about what material I'm welding? What would/should changed based on these two types?
 

frieed

Jeepless in Draper
Supporting Member
Location
Draper, UT
@UNSTUCK .. after looking at your melted filler and weld puddle I'm wondering if you are keeping too long of an arc and/or too far off of 90* with the torch angle. Low angle will send the heat in the direction you are pointing (typically toward your filler) and long arc tends to heat up a larger area and slow down the puddle formation. Typical recommendation for arc length is the tungsten diameter. Typical recommendation for torch angle is 10* off 90 or so. Short arc and nearly perpendicular torch angle will really concentrate the heat into a smaller area.
 

zmotorsports

Hardcore Gearhead
Vendor
Location
West Haven, UT
Nice welding Mike.

Can you do a rundown of what tungsten diameter and filler rod diameter you would use in different situations? Is it all based on material thickness or perhaps different types of welds, positions, amps?

I'm aware of 4043 and 5356 filler rod. I have both but don't recall why I have both. What would make me want to use on vs the other? Are there others that I should have?

Seems the two main types of AL are 5052 and 6061. Either soft or hard. In my last project I was actually welding these two types together. Should I care about what material I'm welding? What would/should changed based on these two types?

No problem.

From my experience I have found that using smaller filler rod than logic calls for on things like chassis work seems to produce a better result. Personally I have found that the old adage of filler rod size being similar to material thickness hasn't always been true. So for .065" wall thickness following that logic you would use 1/16" filler rod.

When I was building ATV sand drag chassis and sandrail chassis using .058" through .083" 4130 chromoly, logic would dictate that 1/16" filler rod be used. However, I seemed to have better results by stepping down to .045" filler rod and pushing it a bit. By pushing it, I mean forcing it into the puddle based on what the puddle can and will take. I found that having to have the current up high enough to create enough heat to melt off the 1/16" filler rod in the puddle usually resulted in an overheated weld or sometimes even a burn through situation in the parent material. By using the .045" filler rod and running slightly less amperage the rod melts off easier and therefore I can push in the rod and melt off whatever the puddle can take to get the bead profile to raise or bulge slightly. So for 1/16" filler rod to melt efficiently on a .065" tubing node you would need somewhere around 75-80 amps or so which could create an overheated weld and maybe a blow-hole in the tubing. By stepping down to say 60-65 amps and using .045" filler material it would keep a nice consistent bead by pushing some filler into the molten puddle and maintain a nice shiny weld bead without overheating.

The weld joint will also play a role. The example above was when welding a tube node or tube joint/union. Now if I was welding a tube to a plate I may bump the amperage a bit and possible even just back up to that 1/16" filler rod to create a decent fillet weld because it will require a bit more amperage to get the flat plate molten.

Aluminum on the other hand I generally bump up the amperage because it dissipates the heat so quickly. Sometimes 10% more amperage is all that is required but again, it depends on the mass of the part and the joint itself. For the pieces above I was able to pretty consistently stay in that 140-amp range because the drops were relatively small plus the fabrication table helped retain some heat in the material. Had the pieces been larger or an air gap between the table and the part I would have more than likely been in the 160-180 amp range. I could have jumped to 1/8" tungsten in the above examples but I already had 3/32" in my torch so I just ran with it and it did a fair job.

When welding a bung to a tank or fitting and there is some material around the end I would possibly step down to 1/16" filler but much of my aluminum work is using 3/32" filler rod. In the example above I used 3/32" 4043 rod but 5356 could have also been used on 6061 aluminum.

The 5356 rod has a bit more strength and is a better match for say 5052 material but it doesn't handle heat cycling well so for things like a radiator which is more than likely built from 5052 sheet the 4043 would be a better choice. Also if the part is going to be anodized 4043 being softer doesn't react well to the anodizing process so 5356 would provide a better match and result. If the part is going to be bent or formed at all after the welding process then 4043 would be a better choice and less likely to develop stress cracks.

When we get to aluminum castings, many people will argue that 5356 will be a better match because it has more magnesium but I have found that it doesn't weld as well plus if the part is say an engine or engine part it won't like the heat and handle it as well as the 4043 so for an aluminum casting 4043 seems to be more prevalently used. That being said, I have found a fairly new filler rod that seems to be a bit stronger and weld almost nicer on aluminum castings called 4943. I have a little bit of experience with it and so far I really like it but before I completely switch over I want to get some more experience with it before I give it my full endorsement.

I hope that information is helpful and again, these are just my opinions based on my experiences. Others may have different opinions on products they like for various materials than I do. I am by all means not a professional welder.

Mike
 

glockman

I hate Jeep trucks
Location
Pleasant Grove
Lots of good information here. I have been looking at TIG machines lately and I'm interested in some opinions.

Here are the machines I am looking at.


The Everlast is a multiprocess, (same one Unstuck was using) It has Tig/stick/Plasma. Seems to have pre, post flow, wide pulse frequency range and comes with everything needed to get started aside from a gas bottle. Also has a 3 year warranty, but is the most espensive at $1500.

The Alpha gets great reviews and is the cheapest at $700. Also has a 3 year warranty. It has all the same settings I can identify but pre flow adjustment. I've heard you can easily bypass this by tapping the pedal prior to toughing off an arch.


The Vulcan also had good reviews and had all the settings of the everlast but with an all digital menu. You can buy a 3 year warranty but that puts it a little over a grand.

I know the multiprocess machines used to be questionable but seems like they have fixed some of that.

If I go with the Alpha, I'd likely get one of their dedicated Plasma cutters that run in the same $700 range and have both for the same price as the Everlast multiprocess. Space really isn't an issue so I don't see a down side to two seperate units.

Any input is appreciated.
 

I Lean

Mbryson's hairdresser
Vendor
Location
Utah
I can't help too terribly much, but I do have that Vulcan ProTIG 205 and I like it. If you want to come play with it, feel free. My vast TIG experience is using @mesha's Lincoln square wave 200, and mine. The Lincoln has less adjustments in it's digital menu, and seems to start the arc a little more smoothly than mine. Once welding, they seem the same to my inexperienced hands.

Also, I can't help but dislike all the many knobs on both those other two. I'm sure they do all the same things as the digital menu on mine, but they're scarier because there's too many. :D
 

Mouse

Trying to wheel
Supporting Member
Location
West Haven, UT
I've recently dusted off my TIG machine and used it for some small projects. I'm getting low on gas, but I am really rusty. Need to practice a bit before doing anything important. I've done a lot of aluminum, but now trying out steel. My machine is a Miller Diversion 180. Not many adjustments as the machine does most of the dialing in for you. If you have any interest in testing it out drop me a PM.
 

glockman

I hate Jeep trucks
Location
Pleasant Grove
Also, I can't help but dislike all the many knobs on both those other two. I'm sure they do all the same things as the digital menu on mine, but they're scarier because there's too many. :D
I actually like manual knobs lol. The pushing 2 buttons to scroll through all the menus on the Vulcan is my main hang up.
 

SnwMnkys

Registered User
Location
Orem, Utah
Ive got the AHP Tig. I have no complaints other than the included foot pedal sucks, which Ive already replaced with a conventional one. And I think the AC Balance is backwards from Miller, Lincoln, etc. Say you run 70% on a Miller. You would run 30% AC balance on the AHP.

If I bought another Id probably buy the Everlast. I like their interface better than the AHP knobs. Just doesnt look as cheap. But other than that I have no reason to upgrade.
 
Top