You are using an out of date browser. It may not display this or other websites correctly.
You should upgrade or use an alternative browser.
You should upgrade or use an alternative browser.
General Tech What did you work on Today?
- Thread starter Gravy
- Start date
Thursty
Well-Known Member
- Location
- Green River
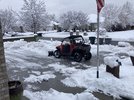
Dang! Hope you heal up fast.I put chains on my 4x4 John Deere tractor on Wednesday and then promptly broke my leg slipping on ice, so when snowmeggen hits here, my wife can clear the road to the highway.
Thursty
Well-Known Member
- Location
- Green River
Tonkaman
Well-Known Member
- Location
- West Jordan
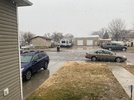
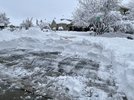
We had a 3’ tall ice wall blocking my driveway. I had to go back and forth over it to crush it down. They still haven’t cleared more than 1 blade width in our area.
- Location
- The Village of Kay
- Location
- West Haven, UT
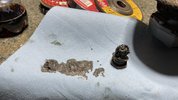
Last weekend while leaving the Swell my cruiser was making unhappy noises.
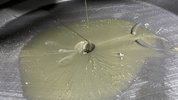
Today I drained the rear diff to see if there was anything obvious to tell me it was bad.
This isn't normal...
View attachment 155607
Glitter...
View attachment 155606
Looks like I'll be regearing to 4.88's after all.
Nope, that's not normal nor good. Yuck.
- Location
- West Haven, UT
Finished up my son's LB7 on Friday night. Wanted to get it done before the end of the year and barely made it. 
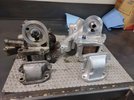
OEM LB7 oil cooler on the left with I believe 11 plate cooler. The new 2020+ L5P 19-plate oil cooler on the right.
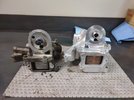
Oil coolers with coolant elbows. Significant size differences.
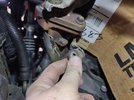
The driver's exhaust manifold heat shield needed to be trimmed.
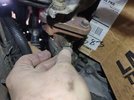
As well as the boss needed to be removed to allow fitment of the larger oil cooler.
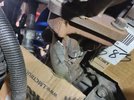
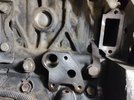
Ports on the block for the oil passage and the coolant passage cleaned and ready to accept the new cooler assembly.
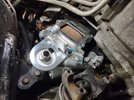
It was like playing Tetris trying to negotiate the oil cooler into the space. Twisting and turning all while turning the pinion yoke to find the right combination of patterns to allow it to fit. Glad we lowered the front axle otherwise I don't know that it would have been possible.
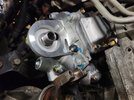
Oil cooler fasteners started then the coolant elbow was wiggled into position before everything was torqued to spec.
Once the oil cooler fasteners were all torqued to 18 ft/lbs., we moved forward to assemble the coolant tube to the back side of the water pump. The stud was removed, gasket inserted and then the tube pulled forward to allow installation of the nuts onto the studs. Then the nuts were torqued to 80 in/lbs. The lower nut was nearly impossible to reach so a torque adapter was used to properly torque.
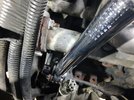
By keeping the torque adapter to 90-degrees no torque calculation modifications are needed.
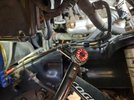
More pictures of the job to come....
OEM LB7 oil cooler on the left with I believe 11 plate cooler. The new 2020+ L5P 19-plate oil cooler on the right.

Oil coolers with coolant elbows. Significant size differences.

The driver's exhaust manifold heat shield needed to be trimmed.

As well as the boss needed to be removed to allow fitment of the larger oil cooler.


Ports on the block for the oil passage and the coolant passage cleaned and ready to accept the new cooler assembly.

It was like playing Tetris trying to negotiate the oil cooler into the space. Twisting and turning all while turning the pinion yoke to find the right combination of patterns to allow it to fit. Glad we lowered the front axle otherwise I don't know that it would have been possible.

Oil cooler fasteners started then the coolant elbow was wiggled into position before everything was torqued to spec.

Once the oil cooler fasteners were all torqued to 18 ft/lbs., we moved forward to assemble the coolant tube to the back side of the water pump. The stud was removed, gasket inserted and then the tube pulled forward to allow installation of the nuts onto the studs. Then the nuts were torqued to 80 in/lbs. The lower nut was nearly impossible to reach so a torque adapter was used to properly torque.

By keeping the torque adapter to 90-degrees no torque calculation modifications are needed.

More pictures of the job to come....
- Location
- West Haven, UT
Before completely buttoning up the bottom of the truck I wanted to pull a vacuum on the cooling system to ensure there were no leaks. After pulling it into a vacuum we could walk away for a few minutes to address the hot pipe.
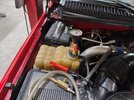
Oil cooler installed so we could fill with oil as well.
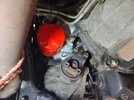
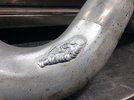
On these LB7's in particular they are known to rub on either the power steering rigid line OR the exhaust manifold fasteners at the front of the driver's side manifold. This was rubbing when he purchased the truck but not leaking. While it was out we decided to build up the area a bit to ensure it wouldn't leak later. Prepped by wire brushing and wiping with acetone.
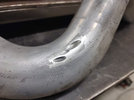
After a couple of small passes with the TIG. This pipe had a bit of contamination to contend with but overall it welded up fair with no pin holes. Afterwards a few passes with a wire brush and a Roloc disk to blend and it could be reinstalled.
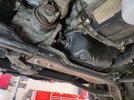
Front axle raised back up into position and bolts reinstalled. Then the lower crossmember could be installed.
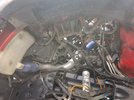
Hot pipe reinstalled and made sure nothing was rubbing on either the manifold nor the power steering lines. A good few shakes ensures there are no interference issues.
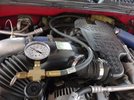
I also like to do a final test by pressurizing the intercooler, intercooler piping and back up to the engine to ensure there are no leaks. There were no complaints about excessive smoking or reduced power, but I still like to check.
Good thing we did because we discovered a small tear in the lower boot between the hot pipe and the intercooler. The clamp must have been covering it before which is why we didn't discover it until we were finishing up. That or it is possible that we tore it upon disassembly, but as easy as the hot pipe came out I find this hard to believe.
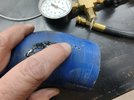
Luckily the GM dealer had one in stock and after a quick trip we were able to finish it up Friday night after all. Re-tested and everything was tight and sealed up.
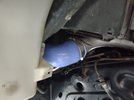
Back from the test drive and checking fluids before he headed home.
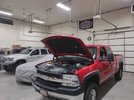
We went into the weekend with a clean shop and the 2002 Duramax crossed off the list.
Thanks for looking.
Mike

Oil cooler installed so we could fill with oil as well.

On these LB7's in particular they are known to rub on either the power steering rigid line OR the exhaust manifold fasteners at the front of the driver's side manifold. This was rubbing when he purchased the truck but not leaking. While it was out we decided to build up the area a bit to ensure it wouldn't leak later. Prepped by wire brushing and wiping with acetone.

After a couple of small passes with the TIG. This pipe had a bit of contamination to contend with but overall it welded up fair with no pin holes. Afterwards a few passes with a wire brush and a Roloc disk to blend and it could be reinstalled.

Front axle raised back up into position and bolts reinstalled. Then the lower crossmember could be installed.

Hot pipe reinstalled and made sure nothing was rubbing on either the manifold nor the power steering lines. A good few shakes ensures there are no interference issues.

I also like to do a final test by pressurizing the intercooler, intercooler piping and back up to the engine to ensure there are no leaks. There were no complaints about excessive smoking or reduced power, but I still like to check.

Good thing we did because we discovered a small tear in the lower boot between the hot pipe and the intercooler. The clamp must have been covering it before which is why we didn't discover it until we were finishing up. That or it is possible that we tore it upon disassembly, but as easy as the hot pipe came out I find this hard to believe.

Luckily the GM dealer had one in stock and after a quick trip we were able to finish it up Friday night after all. Re-tested and everything was tight and sealed up.

Back from the test drive and checking fluids before he headed home.

We went into the weekend with a clean shop and the 2002 Duramax crossed off the list.
Thanks for looking.
Mike
- Location
- West Haven, UT
If anyone is interested in more detail here is a video that I uploaded to my YouTube channel showing the oil cooler upgrade.
Thank you.
Mike
Thank you.
Mike
- Location
- West Haven, UT
Then moving on to yesterday we addressed a full service on my DIL's 2018 Subaru Crosstrek. It was due or coming due for several Preventive Maintenance items so we knocked them all out yesterday to enter into the new year with his vehicles fully maintained.
We had quite the list of items to address:
* Replace coolant
* Replace rear diff. fluid
* Replace front diff. fluid
* Replace CVT fluid
* Replace spark plugs
* Flush brake fluid
Car racked and coolant draining.
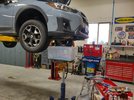
The coolant block plug was tightly nestled in behind the exhaust downpipe so I had to cut one of my longer 17MM hex bits.
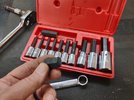
I could then insert the 17MM allen bit and even with an extra long wrench I didn't have enough leverage and had to grab the wrench extender to break the plug loose.
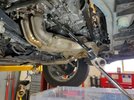
Coolant remaining to drain while I moved to the rear of the car.
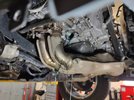
While coolant continued to drain I drained the read differential. Oil didn't look terrible but needed to be replaced.
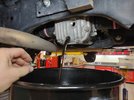
Very small amount of debris on the drain plug, about normal for 80k miles.
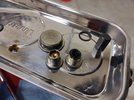
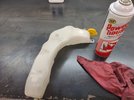
Coolant surge tank removed to clean the old coolant out of and prep to accept the new.
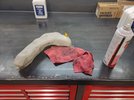
Cleaned and ready to reinstall.
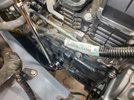
Moved on to to the replacement of the spark plugs. Access on this car is far from ideal. Had to use my small headed Snap-on ratchet that I machined a few weeks back. Here is the removal of the coil packs.
While replacing the spark plugs on the passenger's side I pulled a vacuum on the cooling system to ensure there are no leaks.
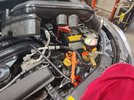
More pictures to come.....
We had quite the list of items to address:
* Replace coolant
* Replace rear diff. fluid
* Replace front diff. fluid
* Replace CVT fluid
* Replace spark plugs
* Flush brake fluid
Car racked and coolant draining.

The coolant block plug was tightly nestled in behind the exhaust downpipe so I had to cut one of my longer 17MM hex bits.

I could then insert the 17MM allen bit and even with an extra long wrench I didn't have enough leverage and had to grab the wrench extender to break the plug loose.

Coolant remaining to drain while I moved to the rear of the car.

While coolant continued to drain I drained the read differential. Oil didn't look terrible but needed to be replaced.

Very small amount of debris on the drain plug, about normal for 80k miles.

Coolant surge tank removed to clean the old coolant out of and prep to accept the new.

Cleaned and ready to reinstall.

Moved on to to the replacement of the spark plugs. Access on this car is far from ideal. Had to use my small headed Snap-on ratchet that I machined a few weeks back. Here is the removal of the coil packs.

While replacing the spark plugs on the passenger's side I pulled a vacuum on the cooling system to ensure there are no leaks.

More pictures to come.....
- Location
- West Haven, UT
Continuing on with the Crosstrek preventive maintenance.
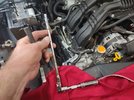
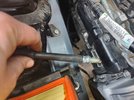
Here is the setup required to remove the spark plugs on this FB20D opposing 4 engine. A 14MM deep socket, a 3" 3/8" extension and a thin headed 3/8" drive ratchet.
This also comes in handy to remove the spark plug once it is broken free and can be turned out by hand. Although I've had this MAC rubber spark plug tool for several decades, a piece of fuel line can also be used as it doesn't need to be a purchased tool.
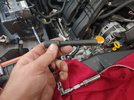
Rubber tool pushed on to the spark plug and turned outward.
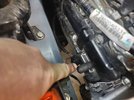
Spark plug removed.
Reinstalling the new spark plug. After snugging it slightly, it was torqued to 13 ft/lbs.
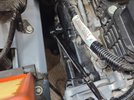
Moving on to the driver's side to replace the 2 spark plugs on that side. The battery needed to be removed as does this wire loom bracket to gain access to the rear cylinder.
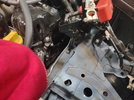
While the cooling system was in vacuum we had the front differential fluid draining as well as the CVT fluid. The differential fluid only required a fill until it came out the level port but the CVT required it be filled to a certain point, then the transmission needed to be brought to 95-113 degrees for proper fluid level. Once at the proper transmission temperature we could add until it just came out the level port and then torque all the plugs to spec.
Once the powertrain fluids were replaced we moved on to the last item on the list which was a full flush of the brake fluid. Pulling a vacuum and pulling fresh fluid through the entire system is quite easy but necessary to ensure a properly maintained brake system.
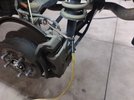
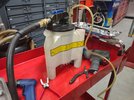
Vacuum collector pulling old brake fluid out and new fluid through the system.
And that pretty much wrapped up the preventive maintenance other than a few items to check and inspect on the list. While we were at it we also installed a new serpentine belt and tossed the old one in the back for an emergency.
Thanks for looking.
Mike
Here is the setup required to remove the spark plugs on this FB20D opposing 4 engine. A 14MM deep socket, a 3" 3/8" extension and a thin headed 3/8" drive ratchet.

This also comes in handy to remove the spark plug once it is broken free and can be turned out by hand. Although I've had this MAC rubber spark plug tool for several decades, a piece of fuel line can also be used as it doesn't need to be a purchased tool.

Rubber tool pushed on to the spark plug and turned outward.

Spark plug removed.

Reinstalling the new spark plug. After snugging it slightly, it was torqued to 13 ft/lbs.

Moving on to the driver's side to replace the 2 spark plugs on that side. The battery needed to be removed as does this wire loom bracket to gain access to the rear cylinder.

While the cooling system was in vacuum we had the front differential fluid draining as well as the CVT fluid. The differential fluid only required a fill until it came out the level port but the CVT required it be filled to a certain point, then the transmission needed to be brought to 95-113 degrees for proper fluid level. Once at the proper transmission temperature we could add until it just came out the level port and then torque all the plugs to spec.
Once the powertrain fluids were replaced we moved on to the last item on the list which was a full flush of the brake fluid. Pulling a vacuum and pulling fresh fluid through the entire system is quite easy but necessary to ensure a properly maintained brake system.

Vacuum collector pulling old brake fluid out and new fluid through the system.

And that pretty much wrapped up the preventive maintenance other than a few items to check and inspect on the list. While we were at it we also installed a new serpentine belt and tossed the old one in the back for an emergency.

Thanks for looking.
Mike
UNSTUCK
But stuck more often.
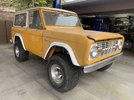
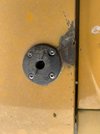
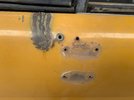
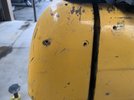
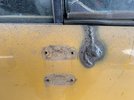
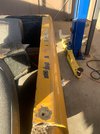
So my boss’s friend told my boss he was taking his race car trailer to Rocky Point to this really good and super cheap body/paint shop. My boss had him check to see if they would do his Bronco at the same time. He ended up with a “show quality” quote for $1200 plus paint. He jumped on it. He then came to me and said I had a day and a half to fill in every hole on the bronco. I guess he wanted to make sure they didn’t just body fill them. I lost count at 210ish. There was probably around 230 holes I filled in.
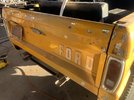
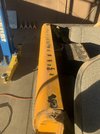
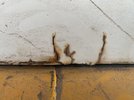


UNSTUCK
But stuck more often.
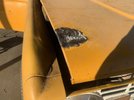
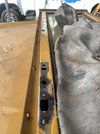
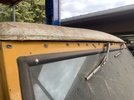
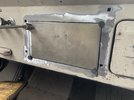
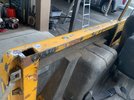
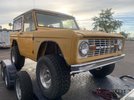
I didn’t take a lot of pictures, but every hole in the body, dash, hood, windshield frame, and top got filled in.
THEN, my bosses buddy didn’t want to drive the five miles out of his way to pick it up this morning so I had to load it on my bosses trailer so we could meet him close to the freeway and move it into his enclosed. The bronco is very hard to get running right now. The battery is junk and it requires a shot of either to get it started.
We decided to meet in a dirt field by the freeway to swap. When we got there the lot was chained off so we couldn’t get in. There was a strip mall around the corner so we headed there. We butted the two trailers together so we could roll it right into the enclosed. As we are unstrapping a security guard comes out and tells us to leave. We tell him we’ll be five minutes. We start pushing the bronco over with me in the driver seat. Then “crunch”. The bronco was too tall. I get out and look. Then jump down to start letting air out of the tires. Now it would clear but we couldnt roll it. We had to start it and drive it in. No one around will help us jump start it. I grab a jack and prop up the rear end of the trailer and unhook my bosses truck. We try to jump start it but we get nothing. Turns out the starter relay died. I had nothing to jump it with. The security guard was back and threatening to call the cops. Bosses buddy almost got in a fight with the renta cop. I hook the trailer winch to the bronco and pull it forward, strap it down and we head back to my shop. We get there and John runs for a battery and a relay. We get them installed and get the bronco running. Air it back up enough to drive it over to the enclosed. Then let the air back out to load it. As I’m driving it in the front of the trailer tilts up pretty high which I thought was strange. Anyways I get it in and strapped down. Then I walk to the front of the trailer and notice the guy has a 2” ball on his 2 5/16” coupler. That’s why it tilted up so much. I told him and he flipped the ball over to the right one.
I have never been so happy not to have a passport. After all that they really wanted me to go with them. Hard pass! I haven’t heard anything. Hopefully they made it there by now.
DaveB
Long Jeep Fan
- Location
- Holladay, Utah
I just wrapped up a motor rebuild for my old Polaris snowmobile. I took the damaged pistons and cylinders off the 500 motor and transplanted some 440 heads. Turns out they share almost every part except the pistons and cylinder heads. I put in a piston and ring kit and resealed everything. I fired it up for a little bit and it runs well so far. Now I hope I did everything right.
I’m boring, changed the oil in the wife rig and the slc airport truck 😂 lost motivation changing the gear oil in the rear axle of the truck when I realized I had to remove the cover. Ohh also got all the tires up to proper psi. That’s a hard day at the TRD shop

