General Tech What did you work on Today?

moab_cj5

Well-Known Member
Supporting Member
I wondered if you were considering hand or foot or ribs insignificant. Really I was trying to gauge how much of a man you are... We'll call it undetermined at this point. Glad you aren't more laid up though.
Im man enough to have my wife drive me an hour to the hospital in a lifted land cruiser, and walk into the NowCare only to be told to go directly to the ER for a trauma evaluation, rather than call an ambulance and make the trek strapped to a backboard...😉

In all seriousness though, it hurt like hell when it happened but is much better now.
 

jeeper

I live my life 1 dumpster at a time
Location
So Jo, Ut
If there is one thing I have learned from my recent shin injury, its that if you ignore it long enough and don't worry about treating it right, it will eventually heal itself.

@Gravy and I received a similar injury on the same day. He went to the doc, rested, and did what he was told. It took him 6-8 weeks to get better.

I didn't go to a doc, didn't rest, and ignored what I was told.. it's only been 13.5 weeks.. and like I said.. eventually It is going to heal itself.
 

moab_cj5

Well-Known Member
Supporting Member
Spiny process is the term for those wings I think.
And I've cracked a couple. Definitely not something to be triffled with, you borked your back. Treat it as such.
They called it a "____ process", not spiney, but I don't recall the term. If you were to break your back, this is where to do it. I was medically cleared for all activity today. They removed the restriction of "if it hurts, don't do it" and replaced that with "if it hurts, you can work through the pain if you want."

I will be back on the roof this weekend working to get things buttoned up.
 

anderson750

I'm working on it Rose
Location
Price, Utah
They called it a "____ process", not spiney, but I don't recall the term. If you were to break your back, this is where to do it. I was medically cleared for all activity today. They removed the restriction of "if it hurts, don't do it" and replaced that with "if it hurts, you can work through the pain if you want."

I will be back on the roof this weekend working to get things buttoned up.
Transverse
 

glockman

I hate Jeep trucks
Location
Pleasant Grove
No pictures but I put another coat of mud and sanded the other half of my garage ceiling Monday. I found out you can "sand" drywall mud with a wet sponge. I also found out you can "sand" too much mud pretty easily and then have to add more back in and repeat. At least I was just dripping wet with muddy water and not covered in sheet rock dust. I'm not sure which is worse.
 

anderson750

I'm working on it Rose
Location
Price, Utah
No pictures but I put another coat of mud and sanded the other half of my garage ceiling Monday. I found out you can "sand" drywall mud with a wet sponge. I also found out you can "sand" too much mud pretty easily and then have to add more back in and repeat. At least I was just dripping wet with muddy water and not covered in sheet rock dust. I'm not sure which is worse.
I hate sheetrock dust
 

mbryson

.......a few dollars more
Supporting Member
Late on the reply, but needed to ask if this is the hot rod? Congrats Marc, that's awesome.


That's the Buick jambs. Not loving the clear coat and trying to decide how to proceed. I need to do a couple of test panels with the clear. Not sure I want to do those on my car or not.

This morning's thoughts are to paint the quarters and roof (may need a little more material to work with there anyway?) and see if I can get the clear to lay down decently. The jambs are a little "dry" even after glossing well as I sprayed the last coat of clear. Not a big deal for door jambs but if my car turns out that way I'll be pretty disappointed. Best case, I could just "blend" the rest of the panels into the quarters and no one would even know (other than what I've shared on the interweb). Worst case, I sand what I put on there off and swap to a different clear coat (wasting about $400 in the process)
 
Last edited:

zmotorsports

Hardcore Gearhead
Vendor
Location
West Haven, UT
So I've been MIA for the past two months due to a freakin' health issue which that has been less than pleasant. Between an ER visit, bedrest and forced to sit on the couch for days and weeks on end I am bursting to get back to my normal life. We had to cancel one of our RV trips to Monument Valley last month because my wife didn't want to be in the middle of nowhere and I need medical attention. Granted she was probably right, but I wasn't happy about having to cancel a trip.

I was able to hobble out into the shop on a few rare days and get the Jeep back on the road and luckily I had my awesome son who came by regularly to check on me and help with things in the shop but to say I am way behind on work is a HUGE understatement. You don't realize how a normal workflow just seems to plug along and working each afternoon/evening and a few weekends allows a person to keep caught up personal projects, normal daily and weekly tasks and just overall maintenance of ones home and vehicles, LET ALONE side jobs that are on the list.

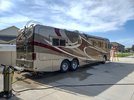
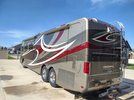
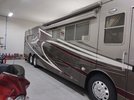
On one particular day where my son could help I pulled the coach out and gave her a bath as I hadn't been able to since we returned from the Swell. That is not like me to park the coach in the shop dirty. I'm slipping in my old age.

coach1.jpg

coach2.jpg

coach3.jpg

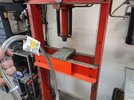
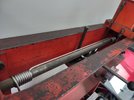
Then a few nights later I decided to fix my hydraulic press. Several years ago I had the cable break that raises and lowers the table/shelf. I didn't have a replacement so I trimmed it and resecured it but it prevented the table from going all the way to the bottom of the press. This is generally not an issue but I had a couple of axle bearings to press on a while back and it required me manually raising and lowering the table in which I was afraid it was going to slip and fall so I thought I'd replace the cable. I ordered a new length of rubber coated wire rope from McMaster Carr and went about replacing it.
press1.jpg

The table reached the end of the old cable about 17" above the floor. Not ideal.
press2.jpg

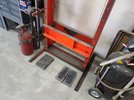
Old cable removed.
press3.jpg

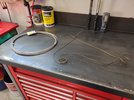
New cable installed and tails taped up to prevent fraying.
press4.jpg

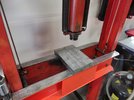
I used a very flexible wire rope with small strands to keep the bend radius tight and it worked out wel on the 1.25" diameter shaft.
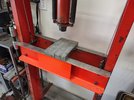
press5.jpg

Press completed and ready for another 40+ years of service.
press6.jpg


Thanks for looking.
 

zmotorsports

Hardcore Gearhead
Vendor
Location
West Haven, UT
Now this brings me current to last week.

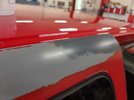
My son and I tackled the paint on his 2002 Duramax 2500HD. The clear coat started peeling a few years ago and although he had done a great job keeping the truck looking good, the fact was that we needed to repaint the roof. Well we were going to try and get it done last fall but time got away from me with side jobs so I thought I would tackle it immediately after my wife and I returned from our Swell trip in April. Well, that went to shit when I got sick so I finally feel about 93.7% better so we started on it last week.


I used to do quite a bit of paint & body work from street rods, muscle cars, snowmobiles, ATV's and even some insurance and spot jobs when I ran my speed shop. I am 100% self taught and although I feel I do a decent job, I am to the point in my life where I HATE doing paint work. It is messy and a pain in the ass. I have refused to paint in my home shops so when I had my last shop at our previous home I would get all of the fabrication and prep work completed, then load the vehicle on my flatbed car hauler and bring it to my "dirty shop" that was on my parent's farm. This was where I did all of the body work, finish work and painting. I had a smallish 25'x30' two bay section of my dad's shop set up as a paint booth that allowed me to turn out some pretty nice paint jobs. A couple of my cars have been featured in magazines and our 1940 Chev coupe even won best paint at a couple of shows as well as people's choice in the Boise Roadster show many, many years ago.

These days however, I still refuse to paint in my home shop due to what it does to the overall feel and cleanliness of having that dust and overspray inside. This results in my getting things setup and then juggling the task on nice days when the weather cooperates so I can spray it outdoors.

Here is my paint prep area with protective paper thrown down to protect my workbenches from nasty drips and spills.
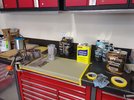
gm1.jpg

My son prepping the edges while I run a DA over the roof removing the failed clear and even the damaged base color. The OEM primer was in fact in excellent condition so a good sanding to give the new epoxy primer/sealer a good tooth to bite into.
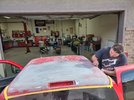
gm2.jpg

Roof sanded and ready to start masking.
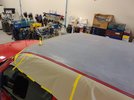
gm3.jpg

Masked and bagged in preparation for a full treatment of SPI's epoxy primer in which I slightly reduced it to allow it to flow out nicely as a sealer. I could have used a general sealer but the epoxy does such a better job of providing a finish that will last for many, many years and seeing as how my son has no plans of getting rid of his truck we opted for the epoxy vs. the standard sealer.
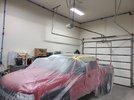
gm4.jpg

Roof sealed with epoxy primer. It actually laid down quite nice.
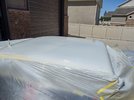
gm5.jpg

As I pulled the mixing cups out of my boxes of supplies my son joked that our primer mixing cup has seen a few years of use. This mixing cup for primer is only about 30 years old and has seen it's fare share of projects. The smaller plastic cup is my cleaning cup where I use clean-up lacquer thinner to clean measuring sticks and paint guns when I tear them apart for cleaning.
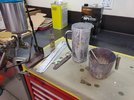
gm6.jpg

My paint and clear mixing cups from half gallon to gallon sizes that have also seen a few year's use.
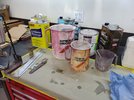
gm7.jpg

The GM Victory Red laid down excellent.
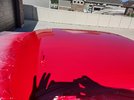
gm8.jpg

Being painted outside on even the nicest of days still netted me a few bugs and a little trash that needs to be addressed. A little cutting and buffing is all that is needed.
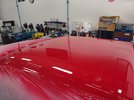
gm9.jpg

gm10.jpg


More pictures to follow.....
 

zmotorsports

Hardcore Gearhead
Vendor
Location
West Haven, UT
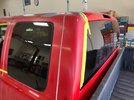
After repainting the roof we moved on to the tops of the doors.


I generally try to avoid doing open blend clears but with no breaks in the body panels and not wanting to repaint the entire truck we have no other options that to blend the color around the top edge of the windows, then clear mid way down and use some blending solvent around the lower third of the windows to create a smooth transition from new paint up top to OEM finish around the bottom of the window.

The clear was peeling in a few places around the tops of the doors as well so it was removed and prepped.
gm11.jpg

gm12.jpg

I had a couple of very small areas where I hit bare metal so I touched them up with some etching primer to prevent any corrosion issues. I would have liked to not have gone through OR used some epoxy primer but that would just keep moving my blend area to a larger and larger blend which I was trying to avoid.
gm13.jpg

Primer wet sanded and prepped for masking.
gm14.jpg

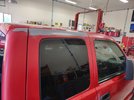
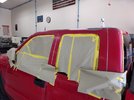
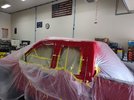
Masking commenced and backmasking the door jambs to avoid overspray while providing a soft edge. The prep consisted of 400-grit across the top edge then transitioned to 600-grit where the color will be blended and the bulk of the clear coat will be laid down and finally into 800-grit range at the lower section for the clear open blend with blending solvent which will ultimately require a small amount of polishing to make the repair undectable.
gm15.jpg

Masking well on its way.
gm16.jpg

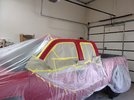
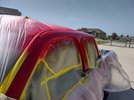
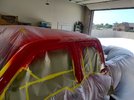
Truck bagged and ready for paint and clear.
gm17.jpg

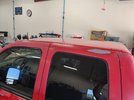
A couple of light coats of GM Victory Red applied and blended into the A, B and C pillars. Then a couple coats of clear. The sun was in my eyes and it was hard to see so rather than have a mis-spray, I marked with a Sharpie where the first coat of clear would end, then another a couple of inches away where the second coat would end and I would hit it with blending solvent.

Here is the first coat of clear applied as per the marks.
gm18.jpg

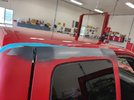
Second coat of clear and blended into the OEM finish then the truck pushed back into the shop.
gm19.jpg

gm20.jpg

Thanks for looking.
 
Top